Build Your Own 3D Puzzle Magnetic Mecha in 3 Simple Steps-Enginediy
If you are a fan of "Gundam" or any other series about giant robots, then you'll love this all-metal model mech. The build is very straightforward and is a great way to while away the hours when you have some spare time in your busy schedule.
Follow this guide to find out more.

Source: Magnetic Games/YouTube
As you can imagine, like any project of this nature, you'll need some tools and materials before you get started.
Materials and gear needed
- Magnetic Mecha Model Kit
Once you have all the stuff and tools you need, it is time to get on with this awesome build.
Step 1: Unbox the model and assemble the torso
The first step is to obviously unpack and unbox the model parts. The kit should come complete with all the parts, instructions, and some basic tools to get you started. The parts are also organized into labeled bags for ease of reference during construction.
As you unbox the model, ensure you put the pieces somewhere safe so that you don't misplace them. This is easier to do than you might think, so assume that you will lose smaller pieces (like nuts and bolts) if you don't take care. 
Source: Magnetic Games/YouTube
This is especially true if you have small children around the house. In this case, obviously, try to assemble the model when they are at school or asleep. Some parts are quite small, so you want to avoid them accidentally swallowing them, or just generally putting them somewhere you'll never find.
Bearing that in mind, let's get on with the build. First, take the parts for the body, and assemble as instructed. Ensure you use the correct parts needed. 
Source: Magnetic Games/YouTube
This will include a variety of pieces including washers, bolts, brackets, nuts, gears, and other parts. As previously mentioned, some of these parts are very small and fiddly so you may want to use pliers or tweezers to help you manipulate, position, and secure them into place.
The kit also comes with a special nut tightening tool to speed up this process. Keep it close to hand at all times. 
Source: Magnetic Games/YouTube
Keep adding the parts as needed, including gears, etc, to build up the main torso of the mech, as instructed. The video is pretty fast-paced and not a step-by-step instruction, so you'll need to refer to the instructions at all times.
With that main portion of the torso built, build the tank-track-like cage for the "cockpit" of the body and secure it into place too. 
Source: Magnetic Games/YouTube
With that done, build the "shoulder cannon" part of the mech, and secure that into place on the main torso, as needed.
Build as instructed.
Source: Magnetic Games/YouTube
With that complete, take some of the batteries, and then build the waist LED lights assemblies as needed. Secure the lights to their mounting arms, and mount these to the main "shoulder" gun assembly.
With that complete, assemble all the parts for the waist and "back" of the mech, and mount them to the main torso assemble. 
Source: Magnetic Games/YouTube
Add in the flexible springs to connect the torso and the "back" of the mech as needed.
Step 2: Build the shoulders and arms
With the main body more or less complete, we can now move on to the shoulders and arms of the mech. Take the parts needed for the spiked shoulders, and assemble as instructed.
Add the gears and other parts for the arm-mounts too. 
Source: Magnetic Games/YouTube
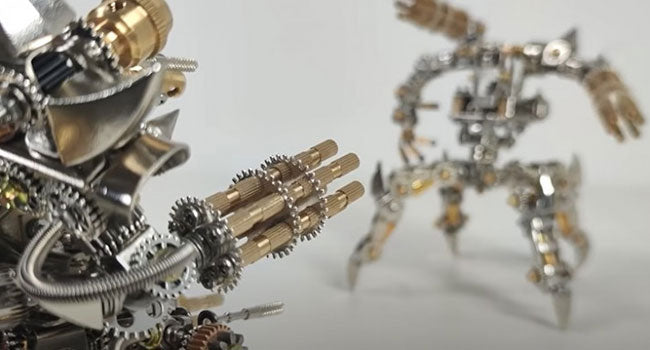
Next, take the parts for the "Gatling gun" right arm, and build it as needed. Tighten any parts by hand and then using pliers, if needed. Take all the parts for the "arm" and "elbow" of the mech, build as instructed, and then mount the "Gatling gun", and "arm" to its corresponding shoulder assembly. 
Source: Magnetic Games/YouTube
The "arm" should be fully poseable, so give the joints a test run. If a little stiff, loosen some of the nuts and bolts as needed. With that done, add any flexible springs to the assembly as required.
With that done, if not already completed, build the left shoulder as needed. Then take all the parts needed to make the left "arm" armament. This will include larger springs to simulate coils of some kind.
With that done, build the left "arm" parts and "elbow", and connect all the pieces together as needed. Then mount the arm into place on its shoulder. 
Source: Magnetic Games/YouTube
Once again, connect any flexible springs to the piece as required. As with the right arm, this should also be poseable, so test it, and make adjustments as needed.
Step 3: Build the legs and feet
With that done, take all the parts for the feet of the mech. Assemble as needed. Next, gather together all the parts for the "knee" and main legs of the mech.
You'll need to partially bend the plates for the knee sections, so be careful not to overdo it. With that done, assemble the mock-pistons and complete the main leg assemblies.

Source: Magnetic Games/YouTube
Your main need to tease the parts a little to make them fit together, so gently tap them using the side of pliers. Once done, mount the feet to their corresponding legs, as needed.
Mount any front plate to the "thigh" of the mech, and then add the pelvic mounting parts to the top of each leg as instructed.

Source: Magnetic Games/YouTube
With that done, connect the legs together using their special bracket assembly. Next, assemble and mount the "groin" gun of the mech between the legs.
With that done, mount the torso to the legs as instructed.

Source: Magnetic Games/YouTube
With the torso now secure, take the arms and mount them into place on the torso using their magnetic mounts. They should simply snap into place when close enough to the mech's main torso.
One of the best parts about this model is that the magnetized arms can be swapped in and out as needed. This means you could design and mount your own new arms, and armaments, to your heart's content.

Source: Magnetic Games/YouTube
With that done, turn on the LED lights, and pose the mech as desired. Your 3D mech model is now fully assembled.
Sit back, grab a hard-earned cup of tea (or something a little stronger), and admire your handiwork!
If you enjoyed this project, you may enjoy this other model kit of a classic car? This build will be a little more challenging, but the final product is simply amazing.
Buy here:https://bit.ly/2YWstPz
Leave a comment