Filling a boiler can be challenging. On both the EngineDIY two-burner (https://www.enginediy.com/products/steam-boiler-for-steam-engine-model?_pos=1&_sid=4a8980b73&_ss=r) and four-burner (https://www.enginediy.com/products/steam-engine-kit-full-metal-steam-generator-heating-boiler-engine?_pos=19&_sid=4a8980b73&_ss=r) boilers, I've found you have to open two fittings, as they are very difficult to fill without venting. The fittings can be tricky; I have stripped a couple of connectors by overtightening.
This pump works well. I have not had any steam or water leaks. Operation is smooth and reliable. Kinda cool to pump your boiler prior to running.
I found the best way to connect to the EngineDIY boilers was with copper tubing. This one (https://smile.amazon.com/gp/product/B07WGYH784/ref=ppx_yo_dt_b_search_asin_title?ie=UTF8&psc=1) worked well, although the inner diameter (4mm), which should have fit the pump nipples, was smaller than advertised. This required coring out with a hand drill and a titanium bit - no problem doing this freehand.
The tubing is easy to shape by hand and, most importantly, it will not crease when bent, as this can impede the flow in the tube.
The EngineDIY boilers take an M5 thread. With a 6mm outer diameter, the tube works well with this push-to-connect fitting(https://smile.amazon.com/gp/product/B07KGMBDXX/ref=ppx_yo_dt_b_search_asin_title?ie=UTF8&psc=1). Get the tube in the right shape and it slips in with minimal effort. Be sure to get the angles on the tube right; you want the tube to come straight out of the fitting to avoid steam or water leaks.
Once the tubing is cored, you can slip the copper tube over the pump nipples. Be sure you have the water supply and output to boiler oriented correctly. On mine, it was intake on the bottom, output on top. I note, however, that the fitting can rotate so double-check that you've got it the right way around.
Dab a bit of rosin on the nipple and slip on the tube. I used this hand torch (https://smile.amazon.com/gp/product/B07M9ZKK9T/ref=ppx_yo_dt_b_search_asin_title?ie=UTF8&psc=1) to heat the tube and fitting, flowing on a small amount of solder.
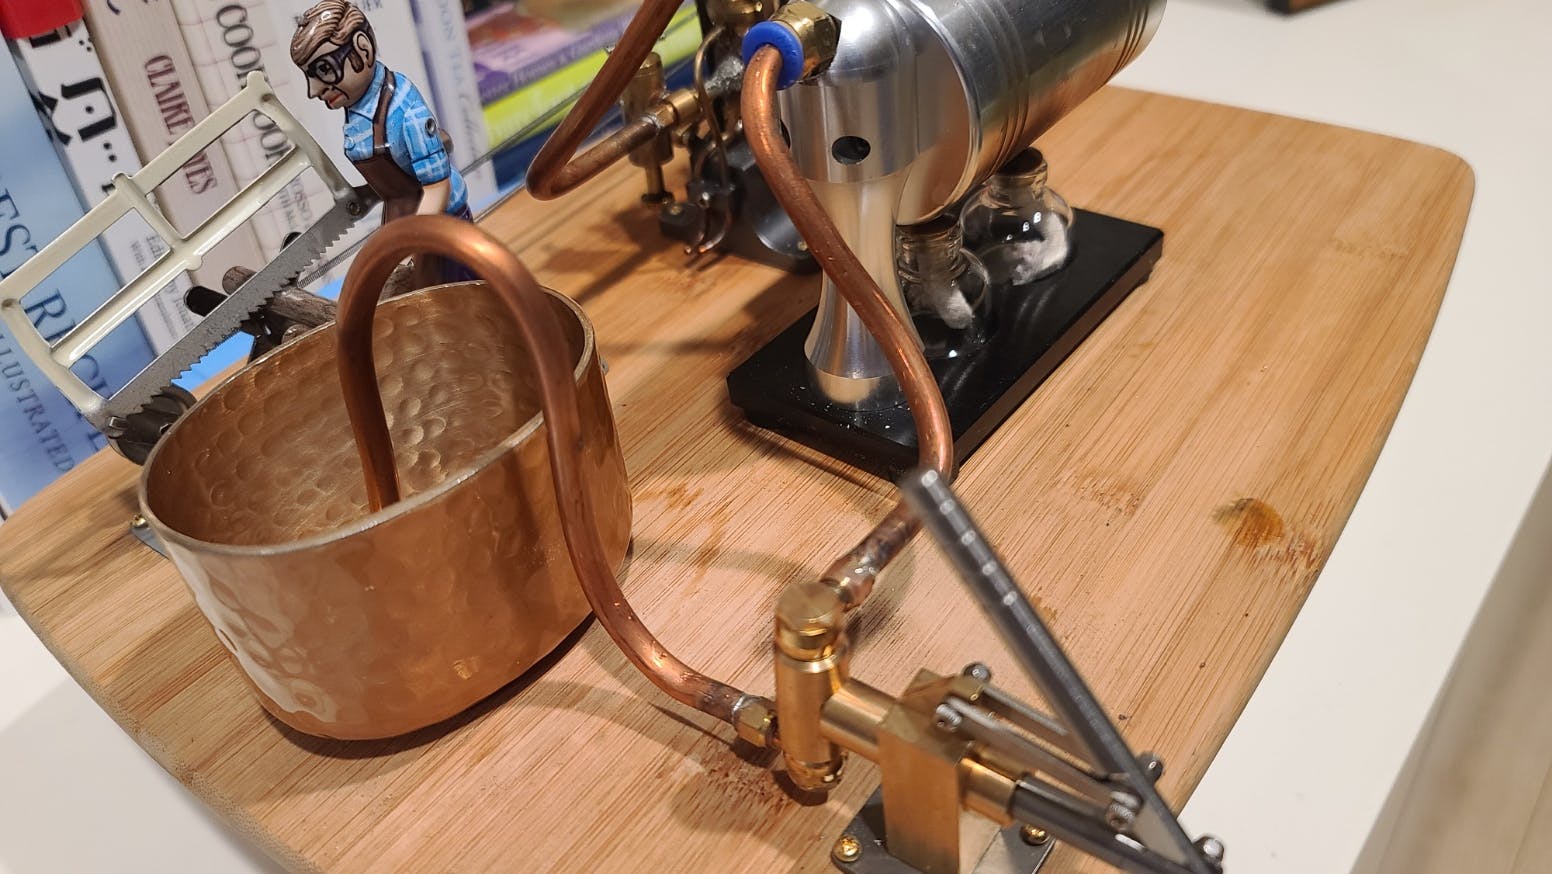
Finally, you'll need a reservoir. I used this brass cup for my four-burner boiler (https://smile.amazon.com/gp/product/B07VBXXX32/ref=ppx_yo_dt_b_search_asin_title?ie=UTF8&psc=1) and this copper one for my two-burner boiler (https://smile.amazon.com/gp/product/B07NXXKLWN/ref=ppx_yo_dt_b_search_asin_title?ie=UTF8&psc=1), shown in the photo. Best to leave the reservoirs in place and fill from a water container.