When assembled according to the directions the shaft would not rotate...0.020" shims between the combustion chamber assembly and the low pressure turbine assembly solved the problem. The atomizer and illuminated tailpipe assembly gave GREAT visual effect. Not as trouble free as my other 3 EngineDIY kits but well worth the extra effort!


This is very well done, excellent quality, and was fun assembling.

I have read the reviews and noticed that they could not get their H76 running. Mine started very easily after I played around a little with the carburetor. Once you get it set right, it starts every time. I like this engine a lot and it has been a great addition to my collection.

Years ago I saw an original three wheeled autocarriage and fell in love with the engine. Now, several years later, I found this working model of that engine and it is a gorgeous piece of engineering and workmanship. Although I have yet to run this engine, I am admiring its fit and finish, both are first rate and the tolerances are very good with little to no slop in the bearings and shafts. I may replace the Red high tension lead with a more vintage looking cloth covered lead and eliminate the sparkplug boot in favor of a brass clip arrangement. I am going to eliminate one of the batteries in the pack so as to lessen the load on the ignition pack. I really am enamored with this model and am really looking forward to put fuel and oil to use. I am even considering the purchase of a second one in the brass finish so that I can add my own color to the assemblies.


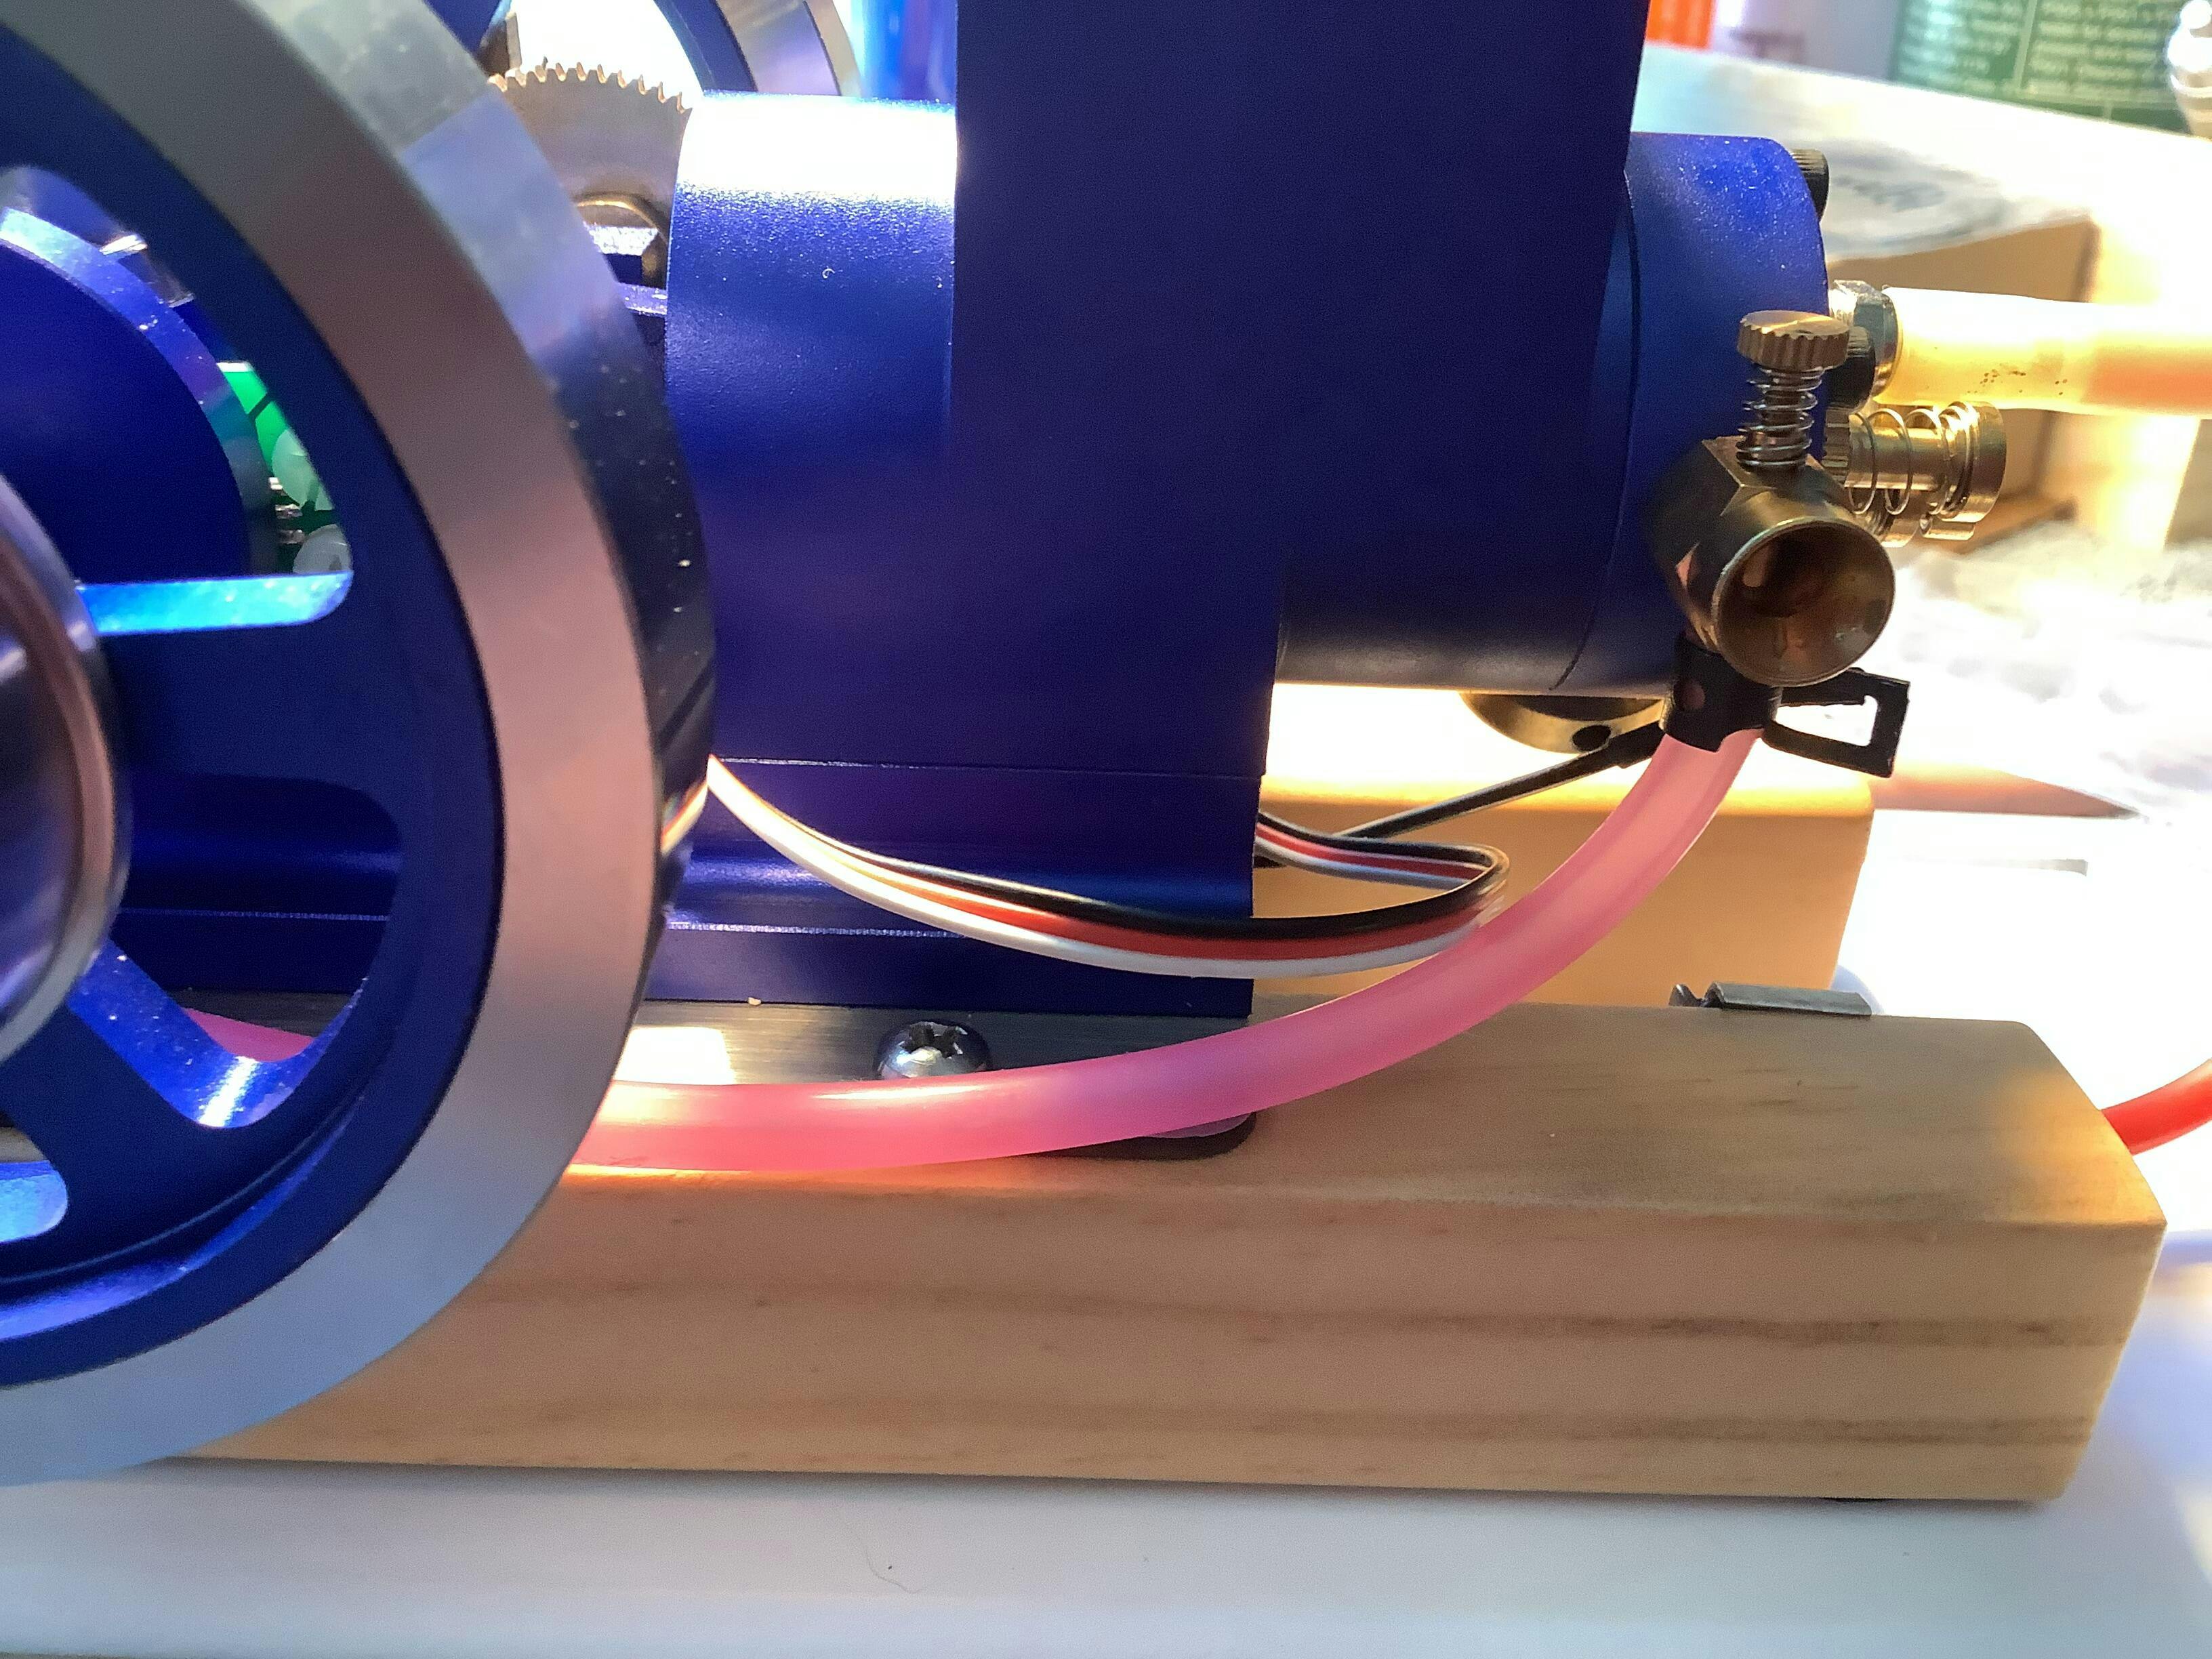
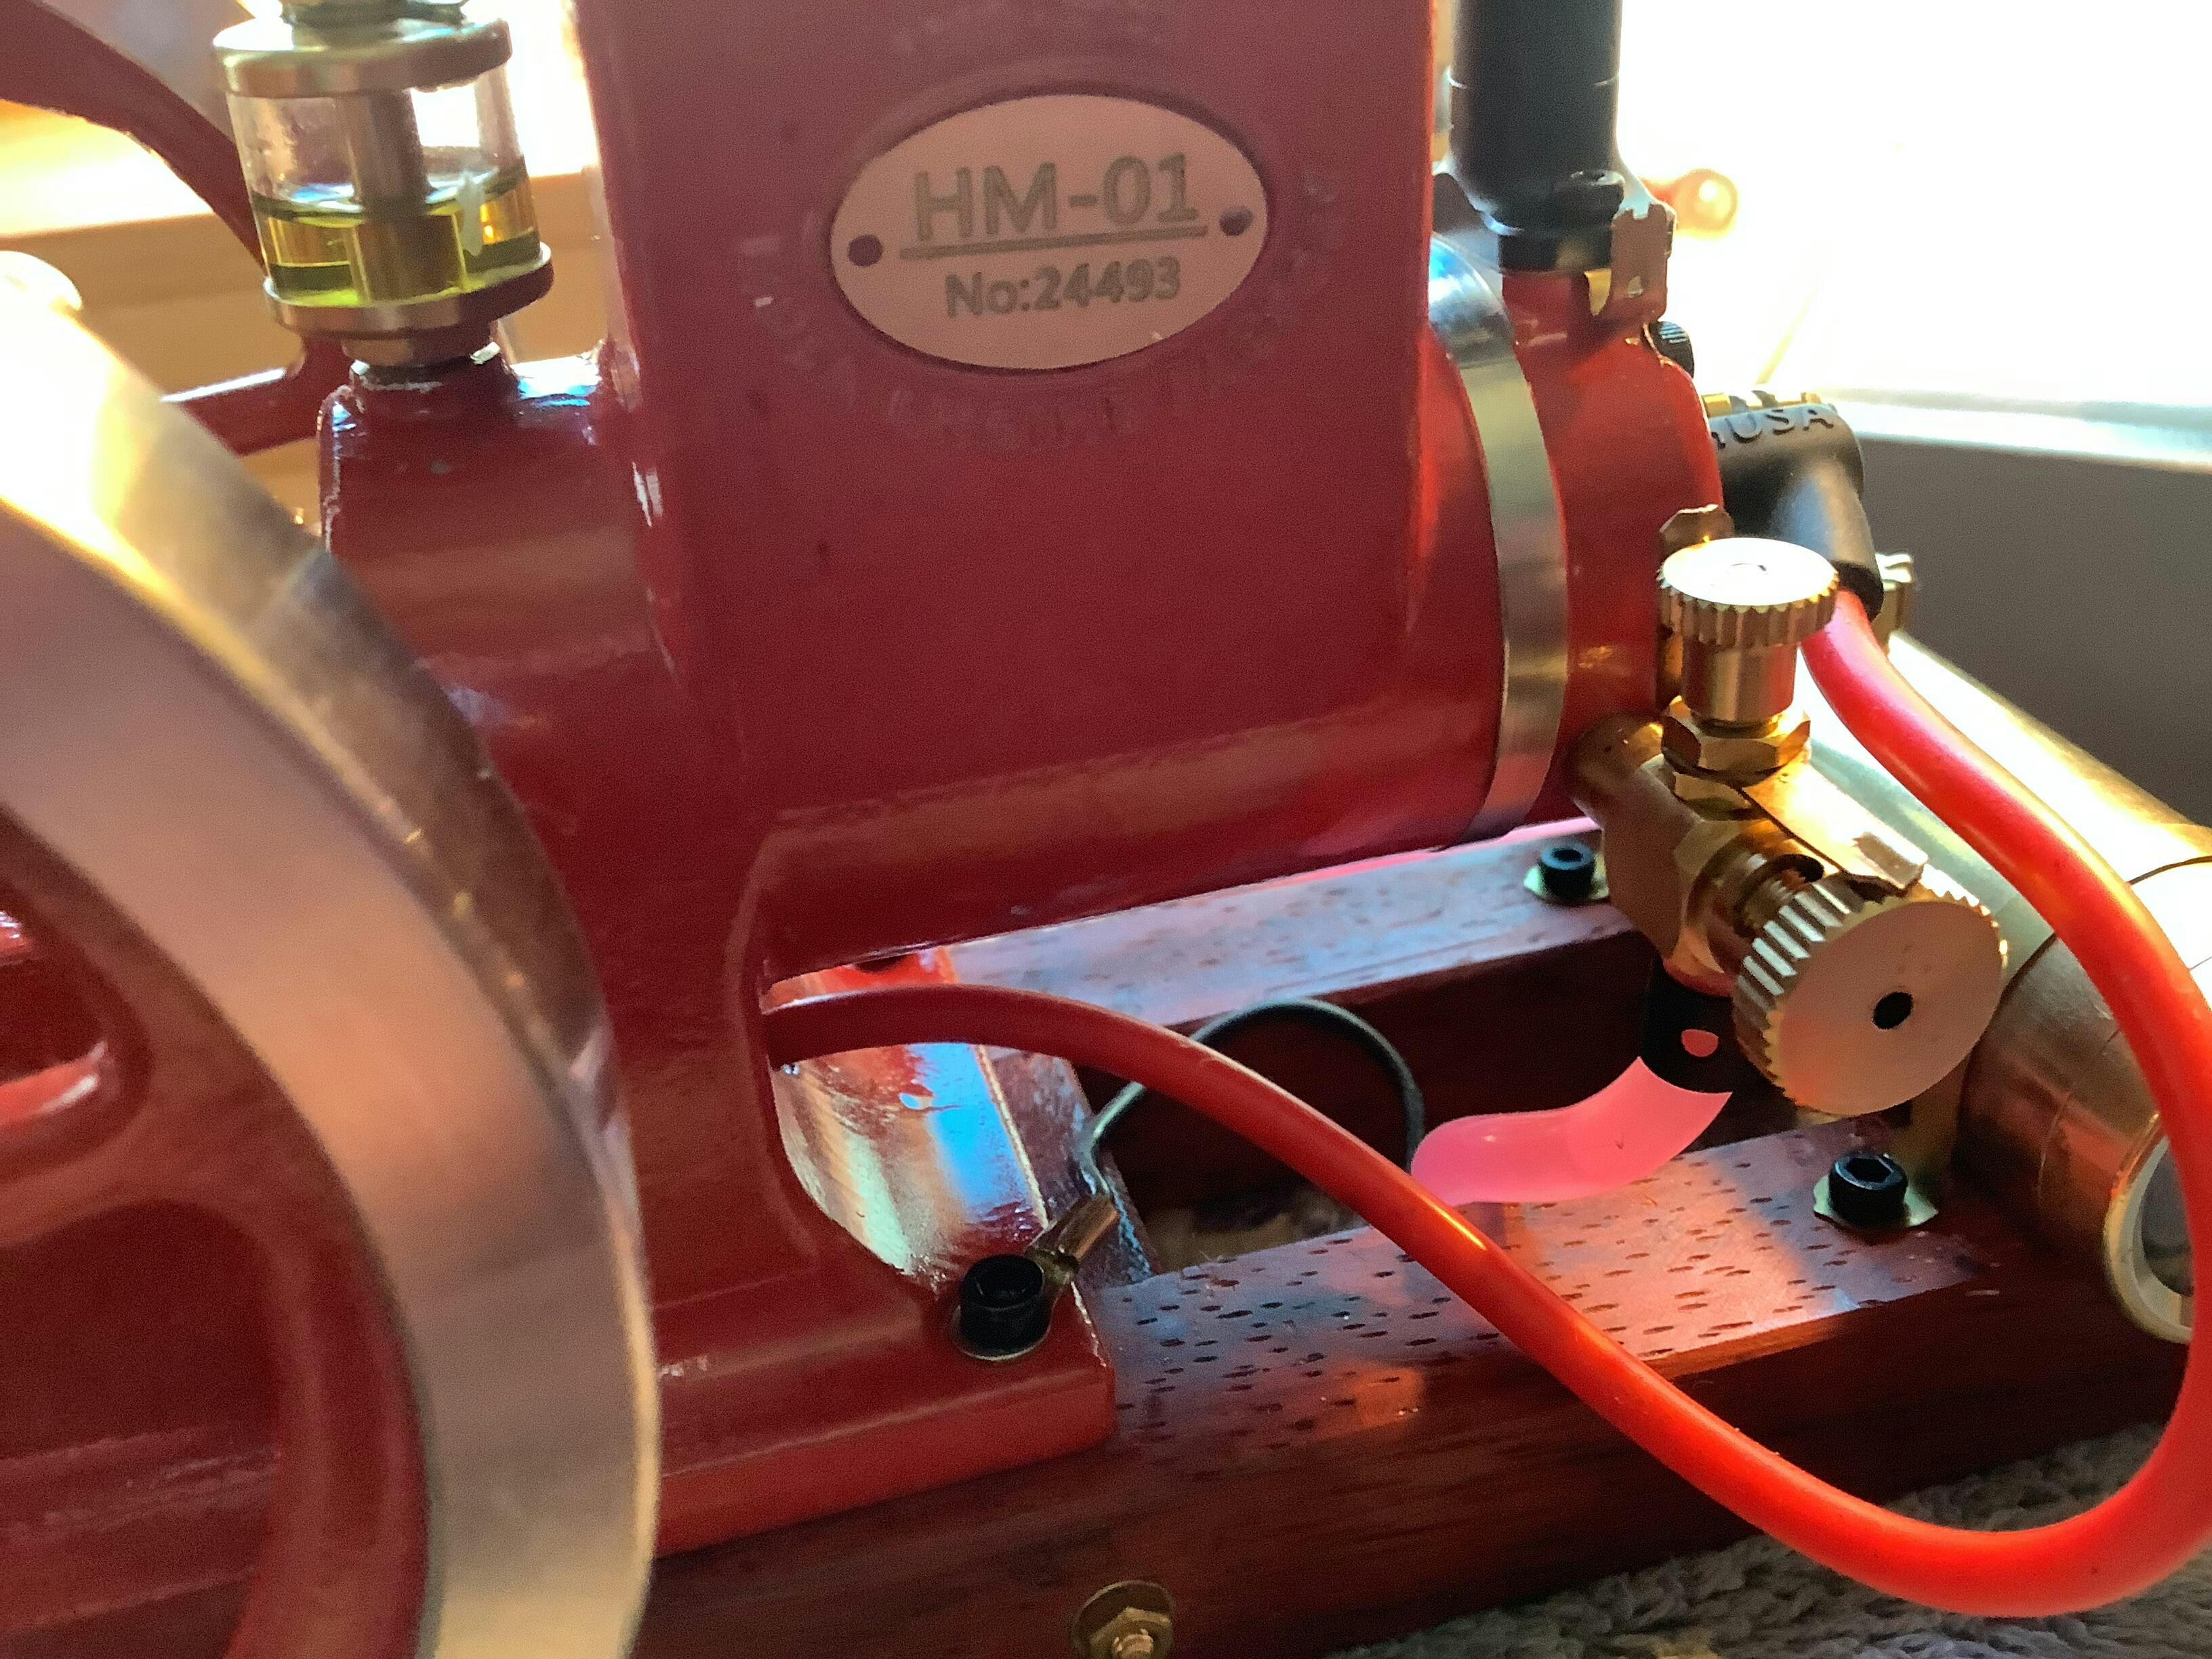
Great replacement hose for my Hit and Miss engines. Good color too.

I have done buisness with Enginediy.com many times, it has always been a pleasure, and there cs has always done right by me. This engine is looking very nice and promesing, I can't wait to put it togheter.

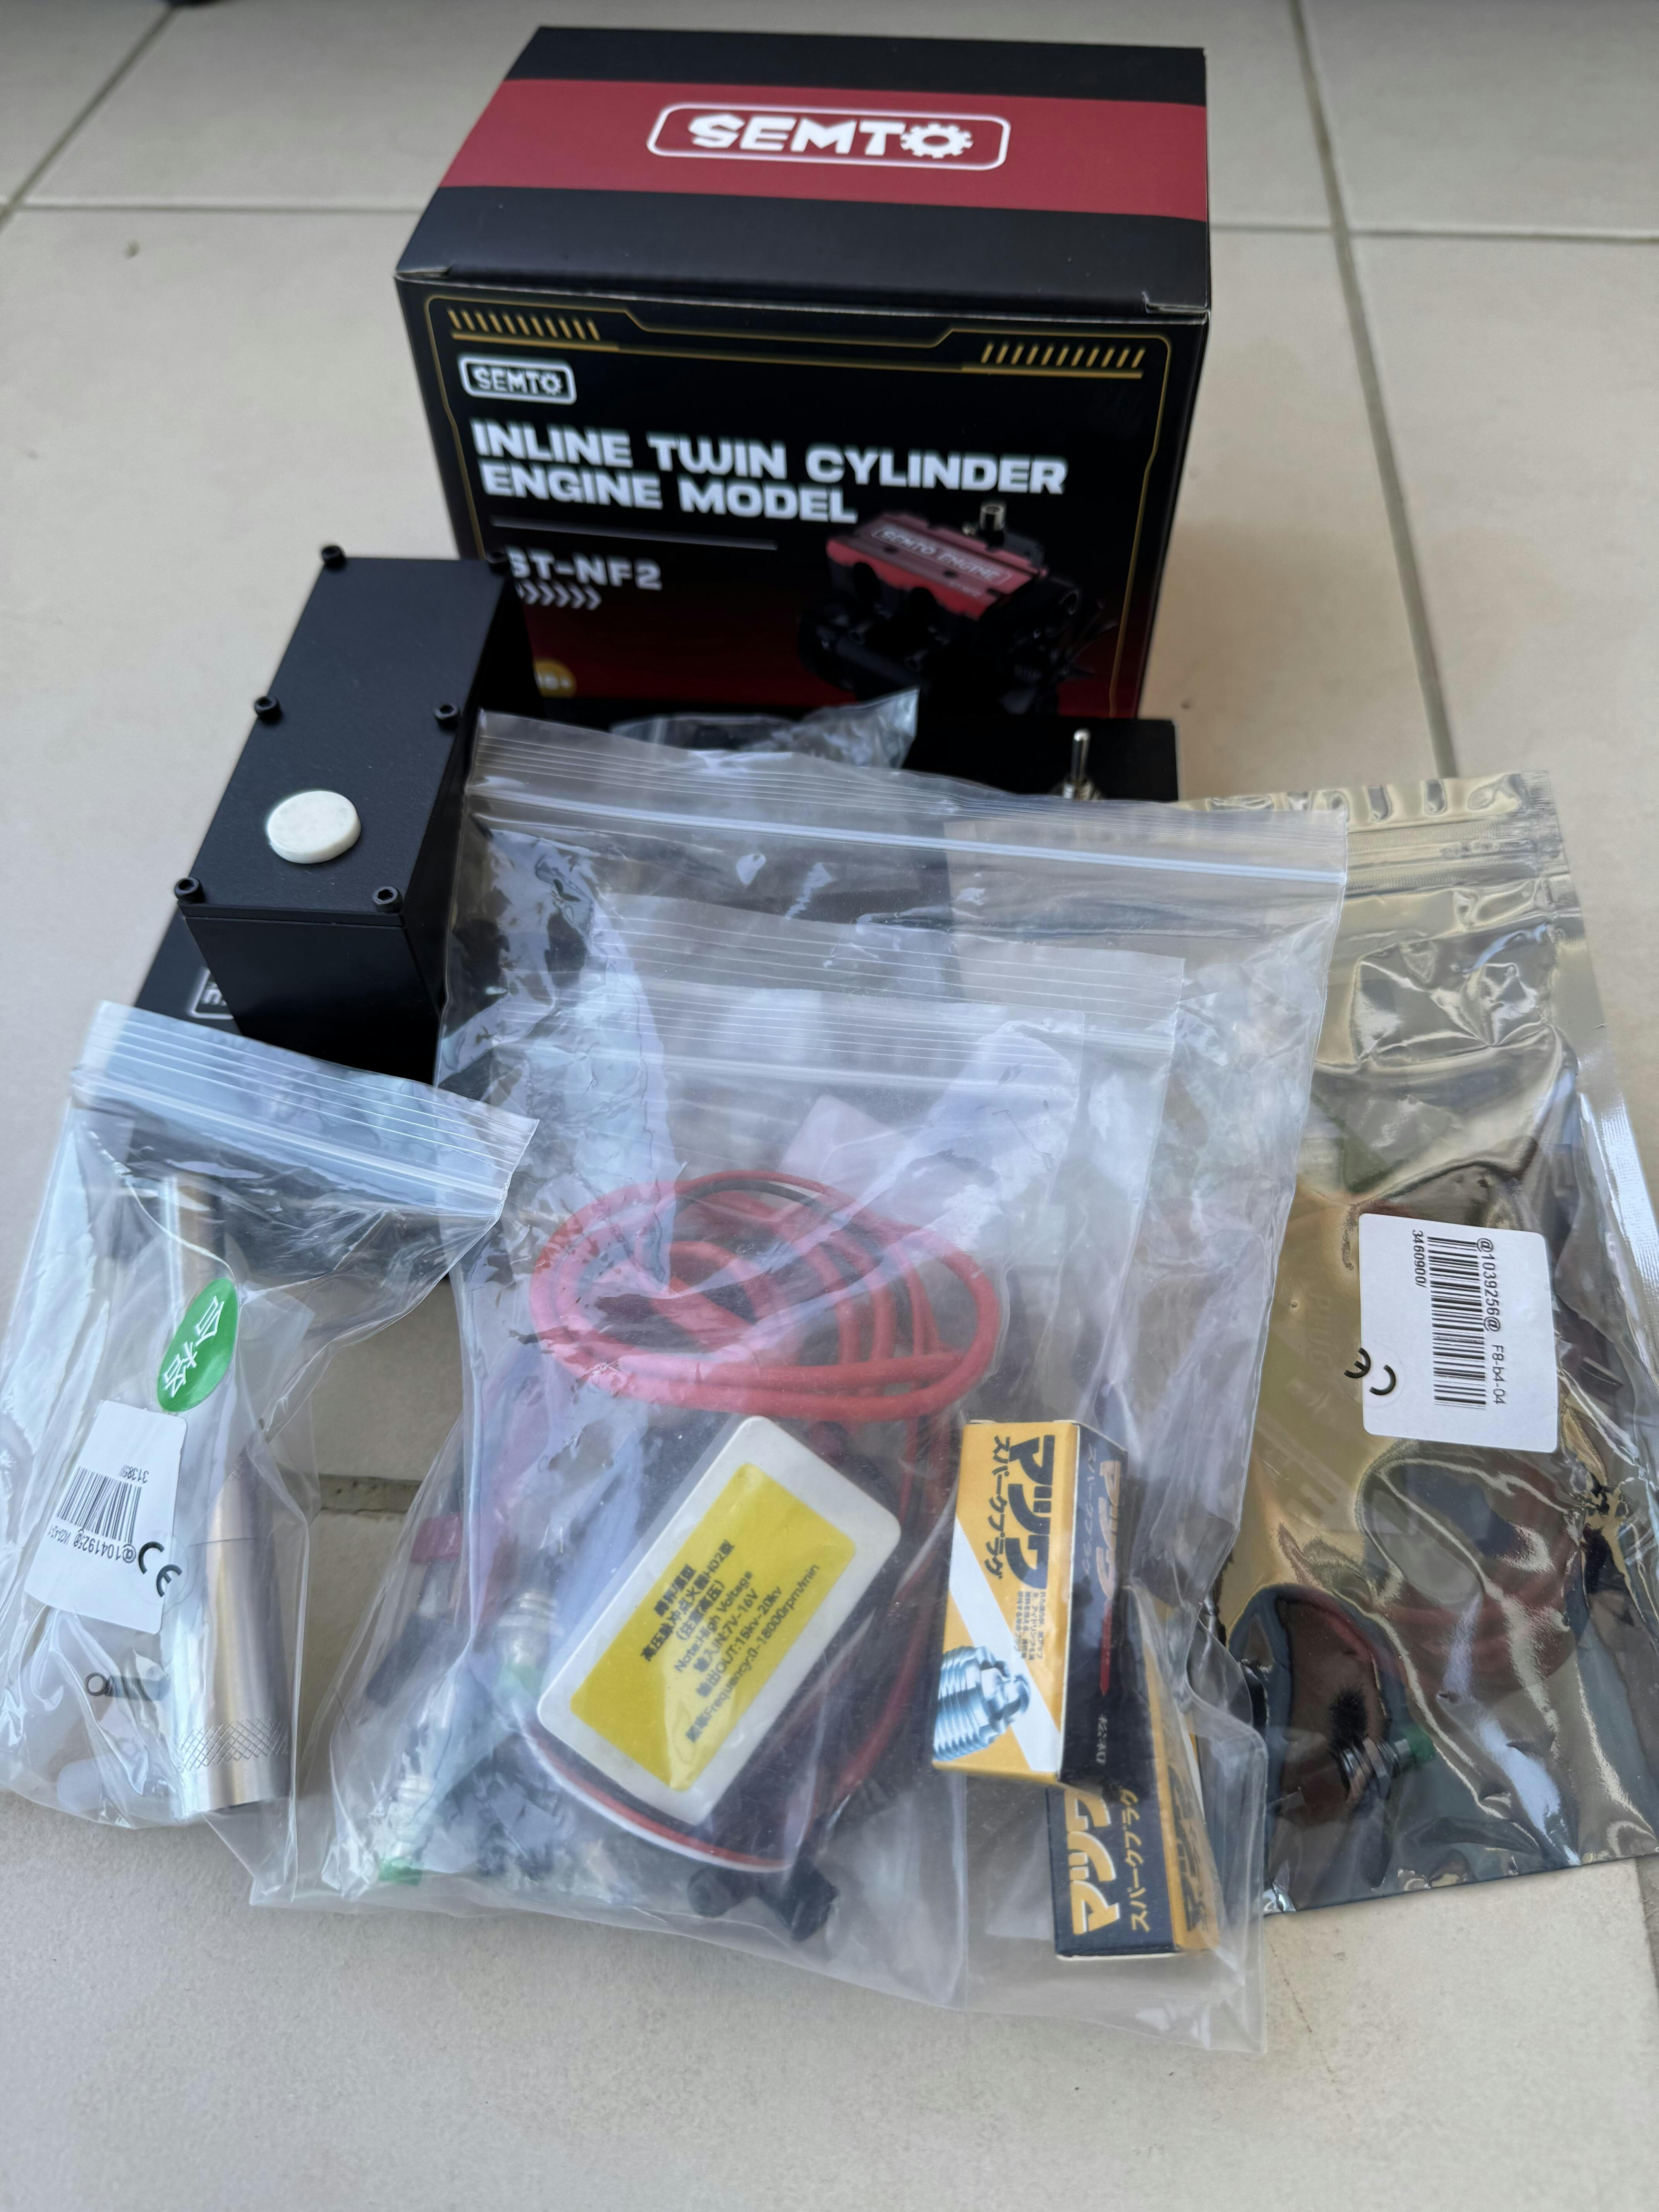
I recently bought a Semto ST-NF2. It's a sensational product, the level of simulation, the fact that it's a real engine, the price not very high. Along with the engine, I bought Semto's official base and ignition kit, which worked perfectly. Everything arrived right, great construction, there was a time that I had to get in touch with Engine Diy support and it was very helpful. To those who are undecided whether or not to buy this engine, I definitely recommend it.

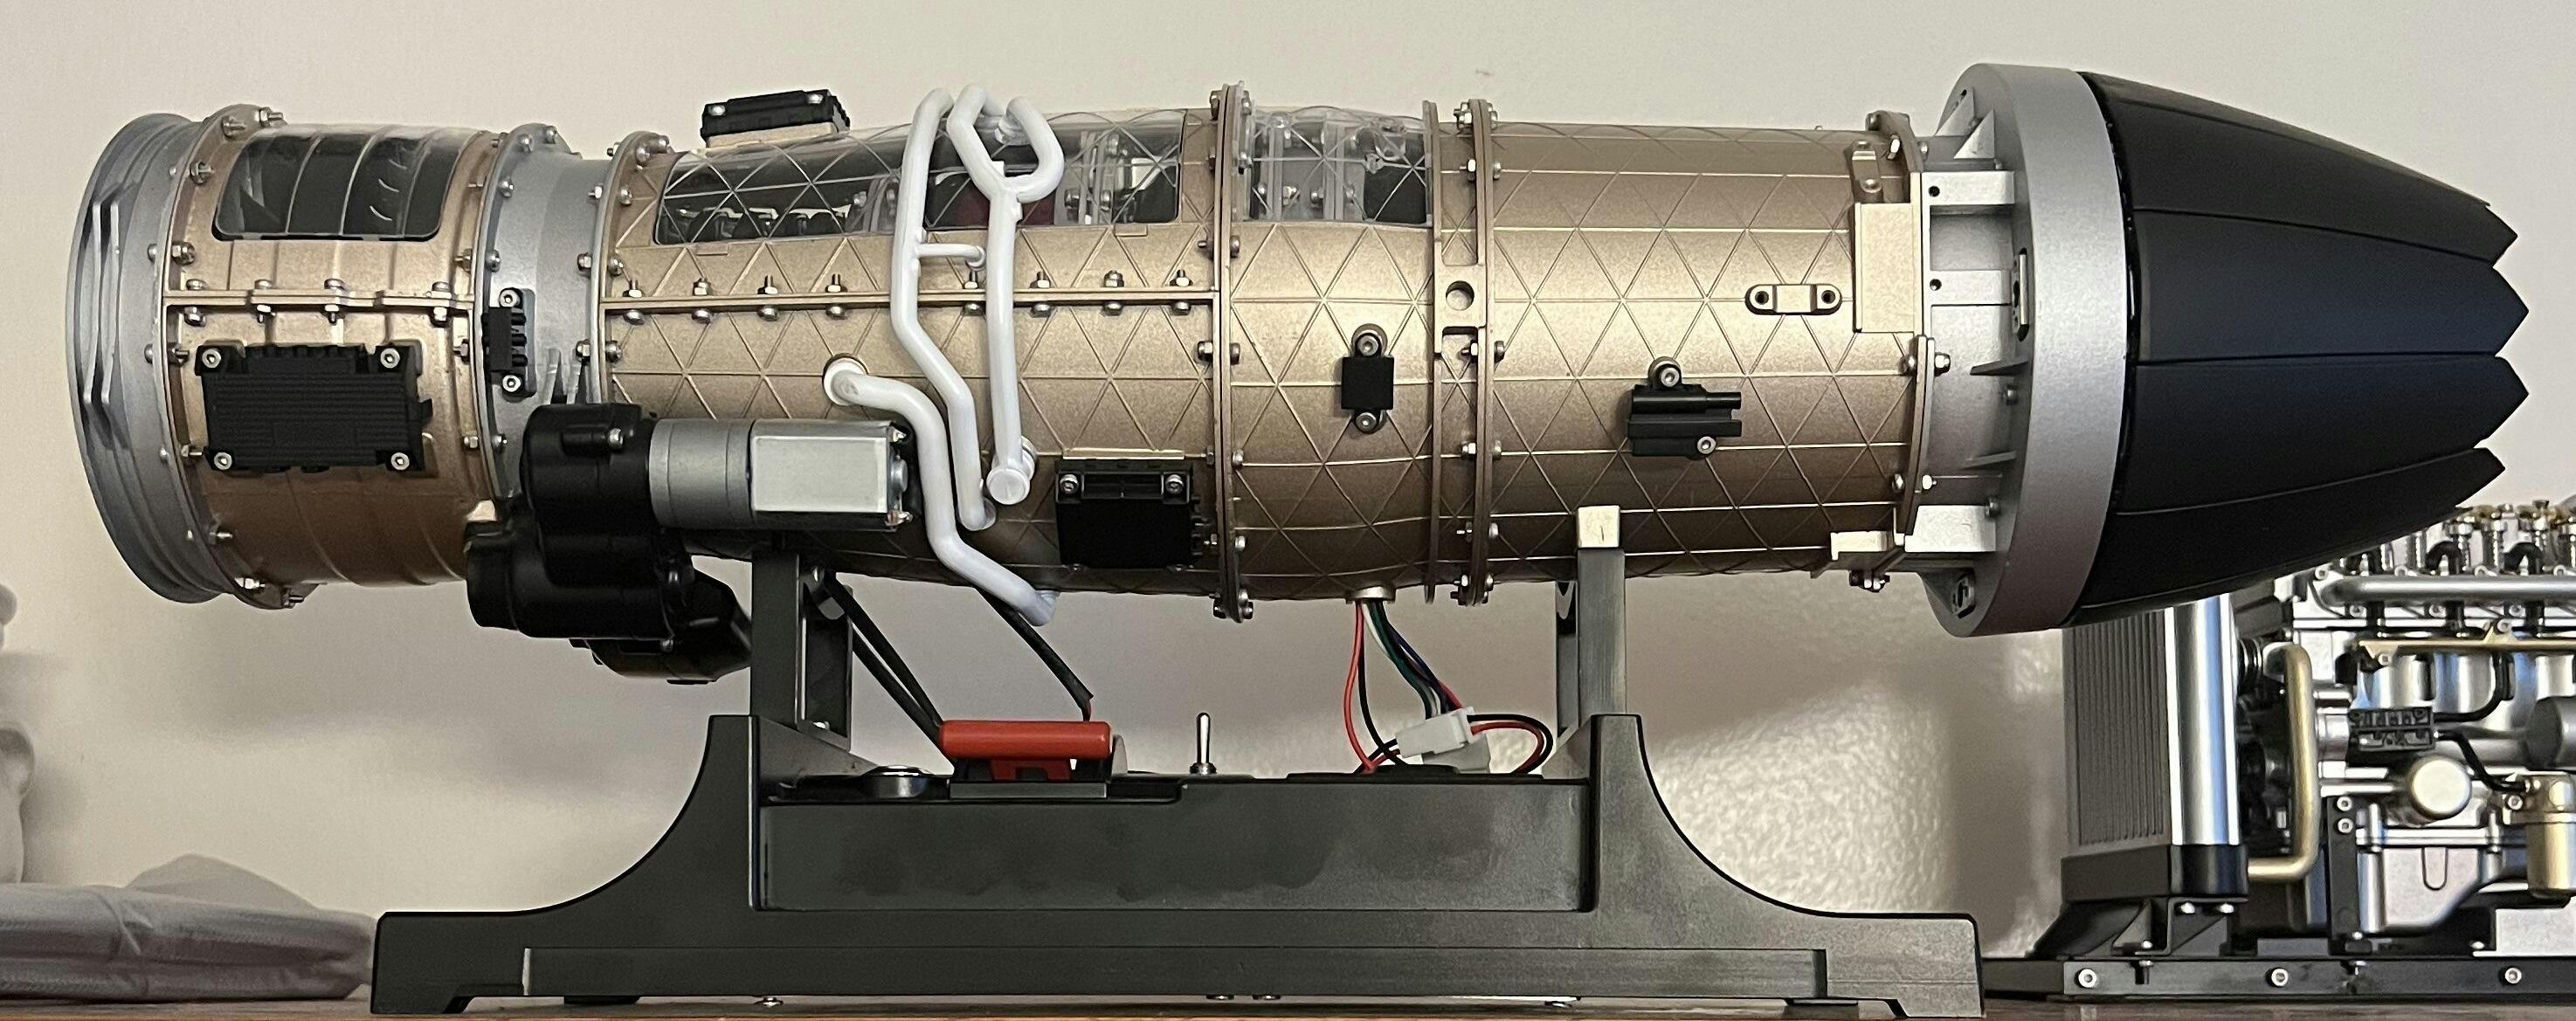
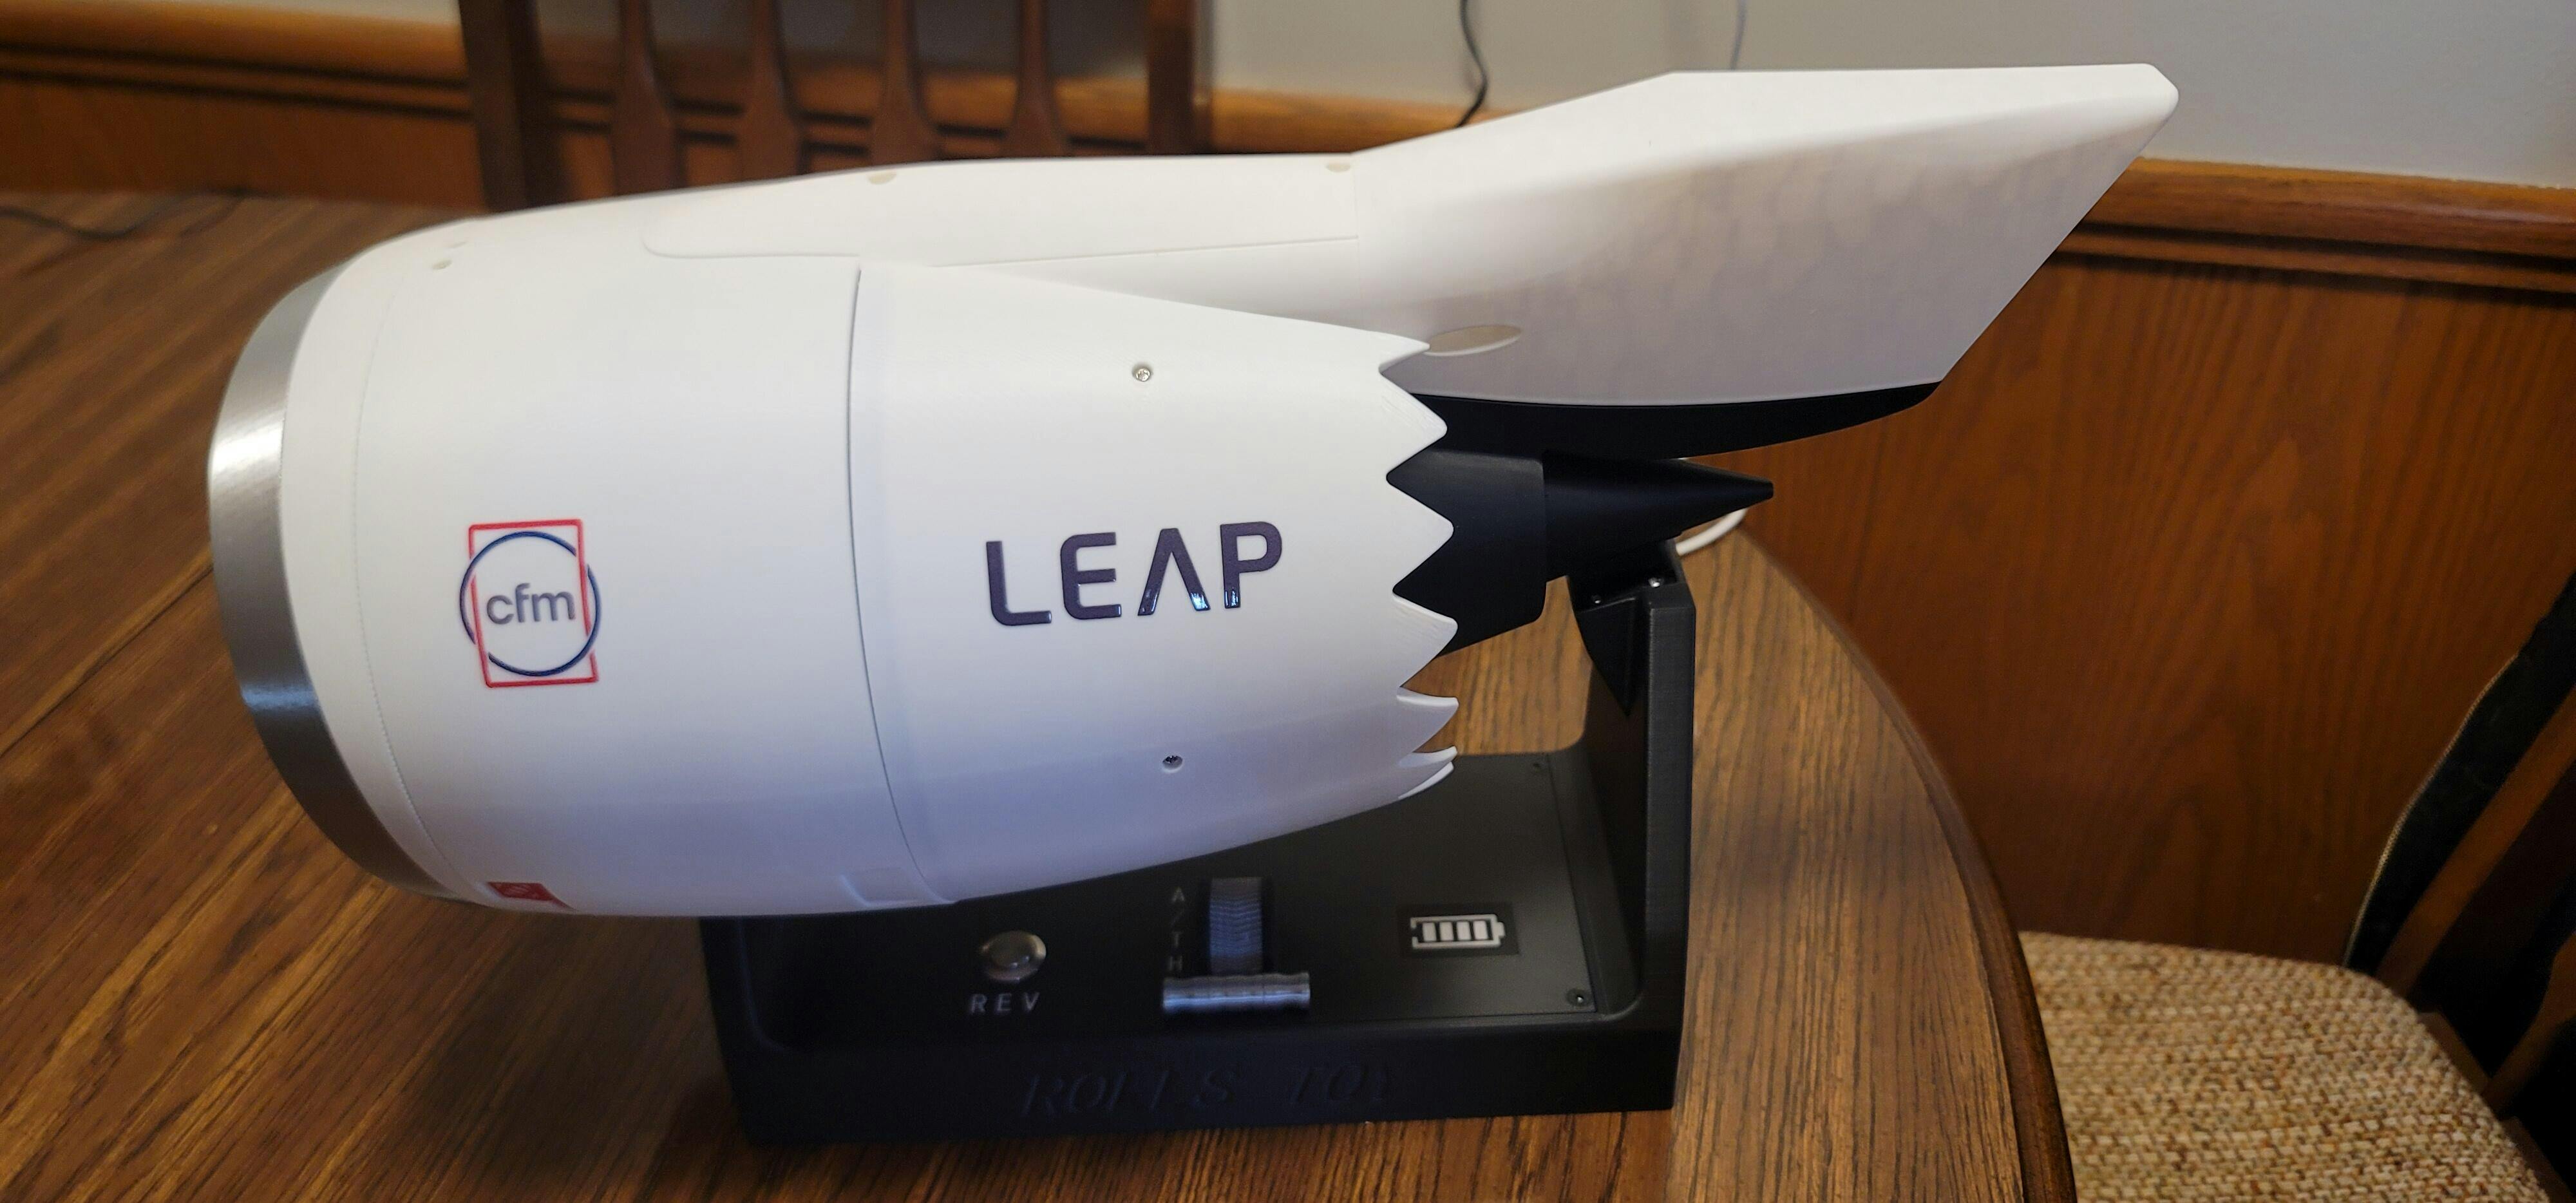
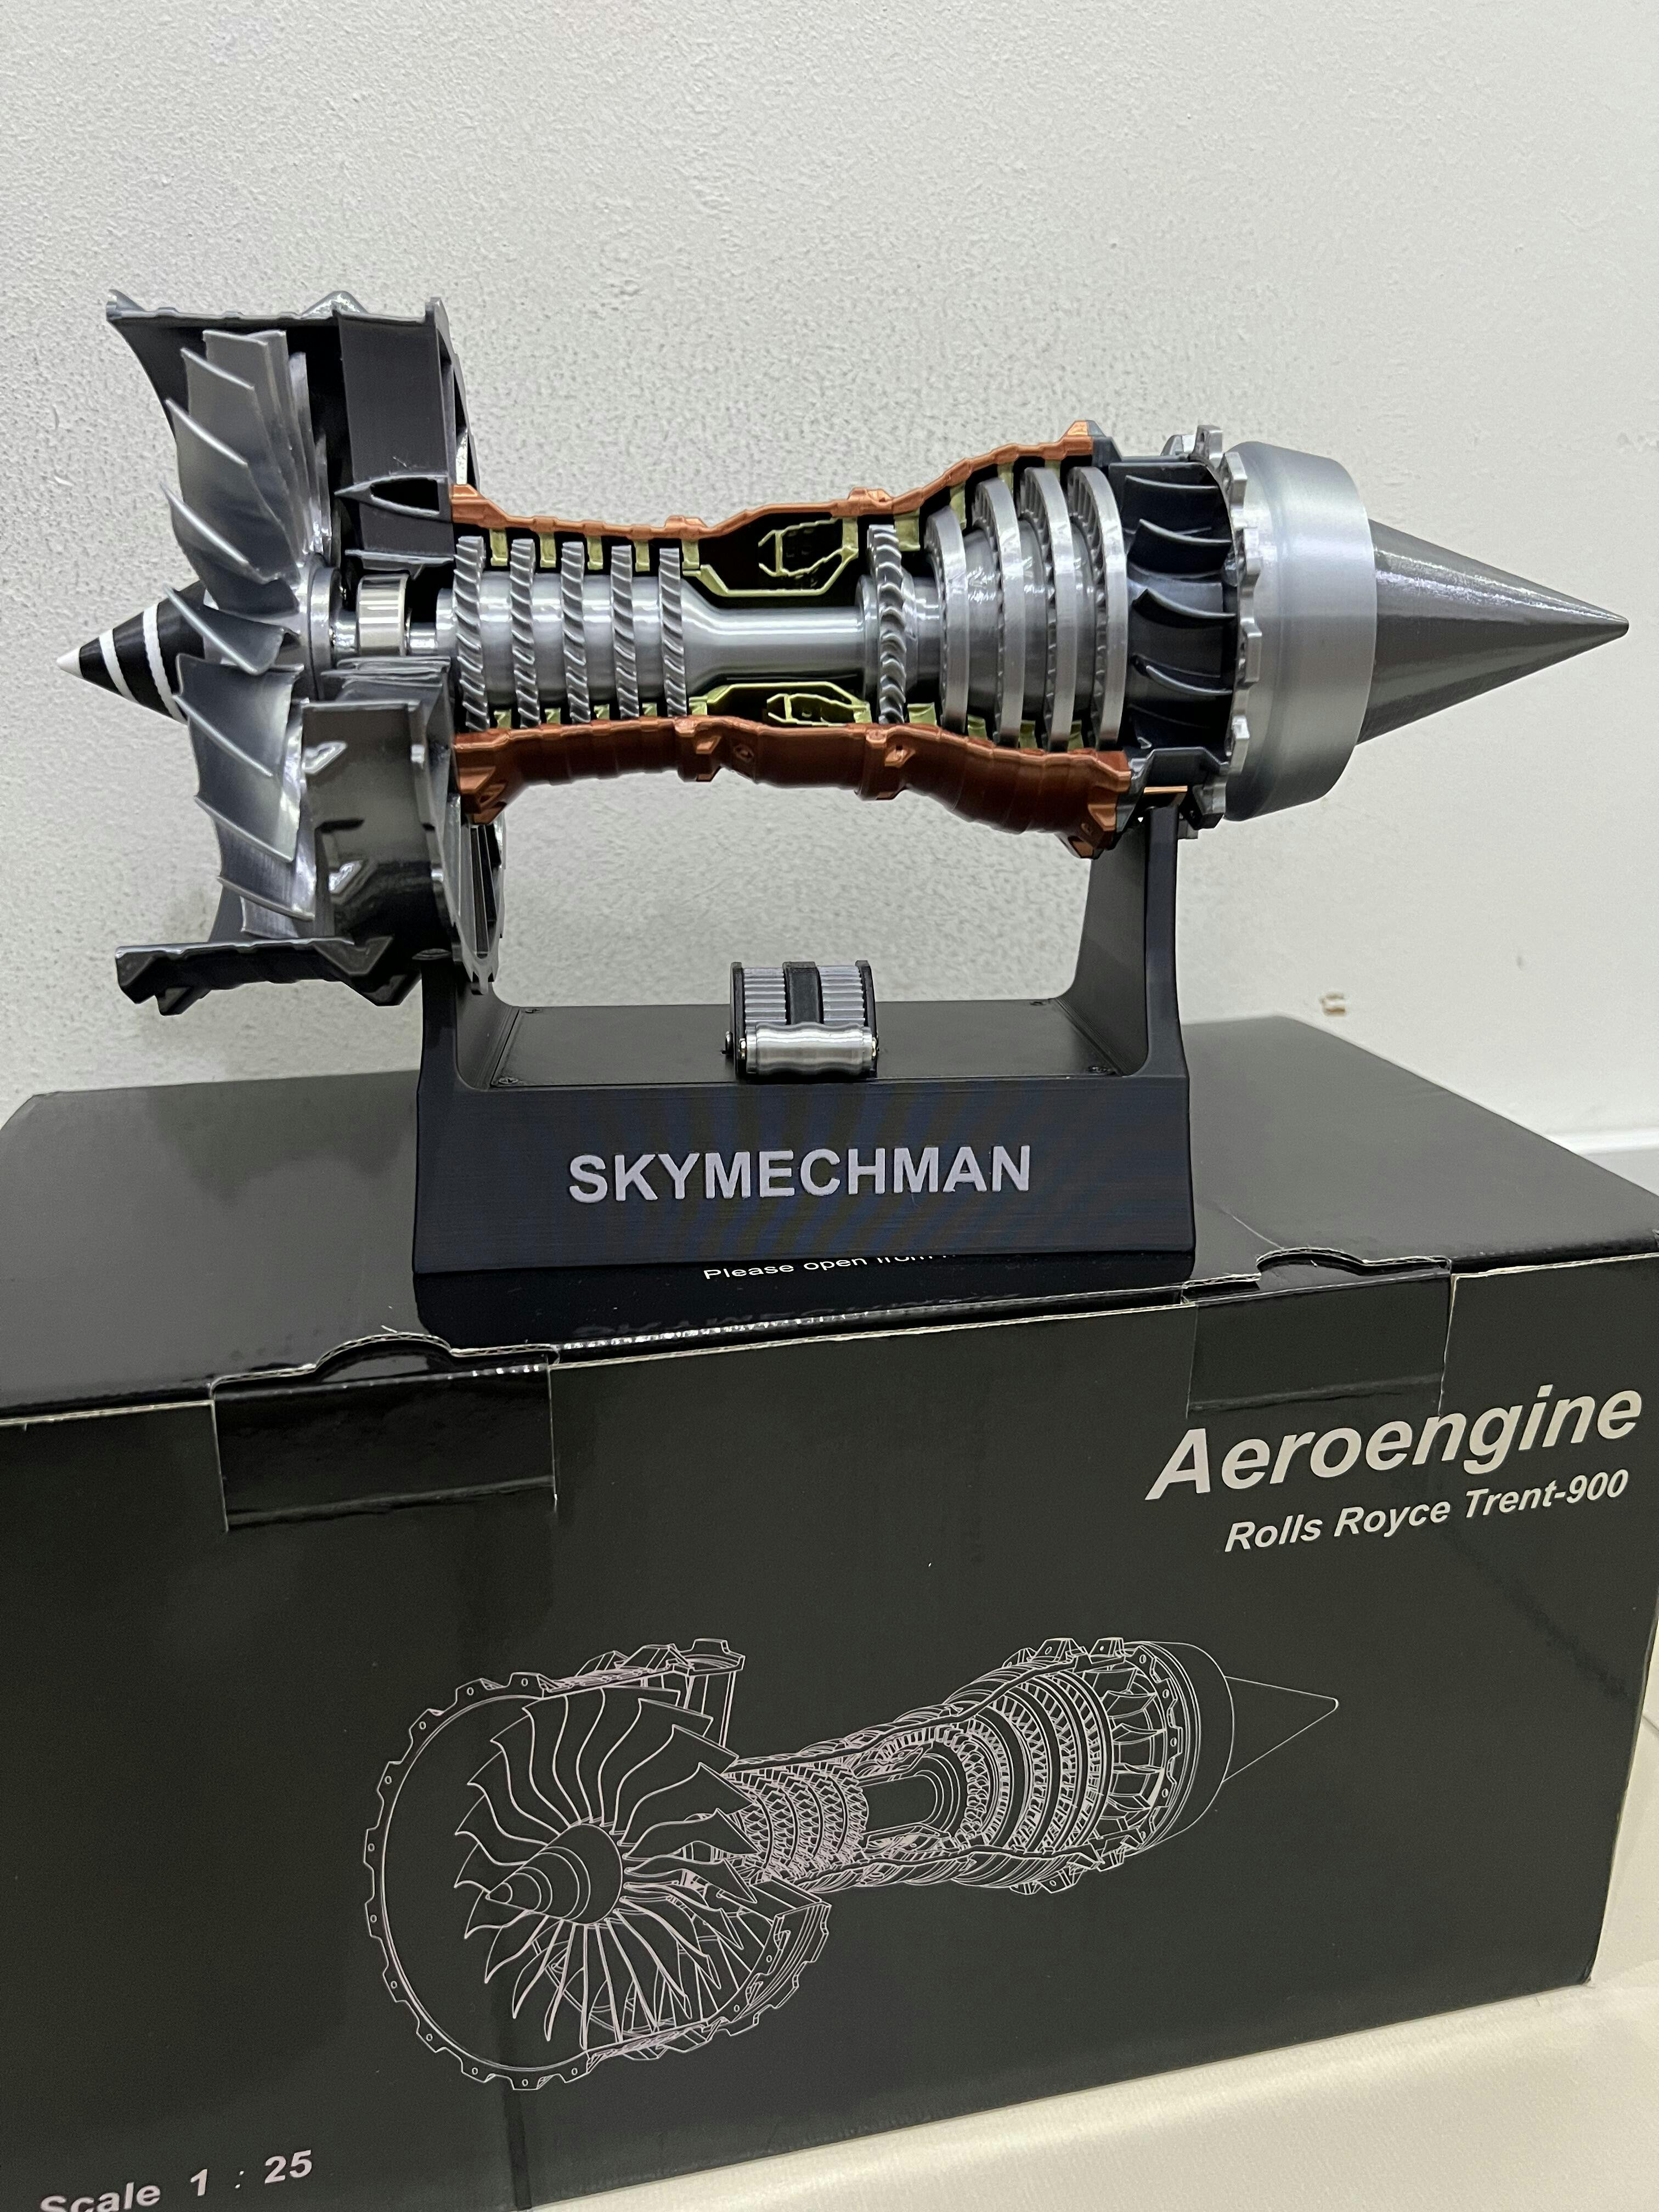
Received the engine today...came quickly and was well wrapped/protected. The model came in 2 pieces...1 the actual fully assembled engine, and the other piece was the assembled base/stand. Once the 2 pieces were connected (via quick disconnect point on the engine pylon and on the stand) the model looked fantastic! When it was plugged in via included USB-C cord, and turned on, the lights were all functional (blue for the cold air bypass, red for the exhaust, and white coming through the stage 1 fan blades) and the throttle and Thrust Reverser selections were smooth and responsive.
All in all, I am very pleased with the engine model and its functions. Will definitely be looking at buying other jet engine models from EngineDIY again.

The engine I received had rubber bushings to hold the rockers on and they kept flying off during running and caused some overheating and led to damage but the ltd I ordered is an absolute champion has been going for 12 days continuesly with only stopping once a day for a minute or less been posting on TikTok https://www.tiktok.com/@playboiser?_t=ZT-8vjk93PkDb4&_r=1

Finally got the package. The product is of excellent quality. My son and I will have a good time assembling the engine for our car model. Thank you to the store!

BONSOIR
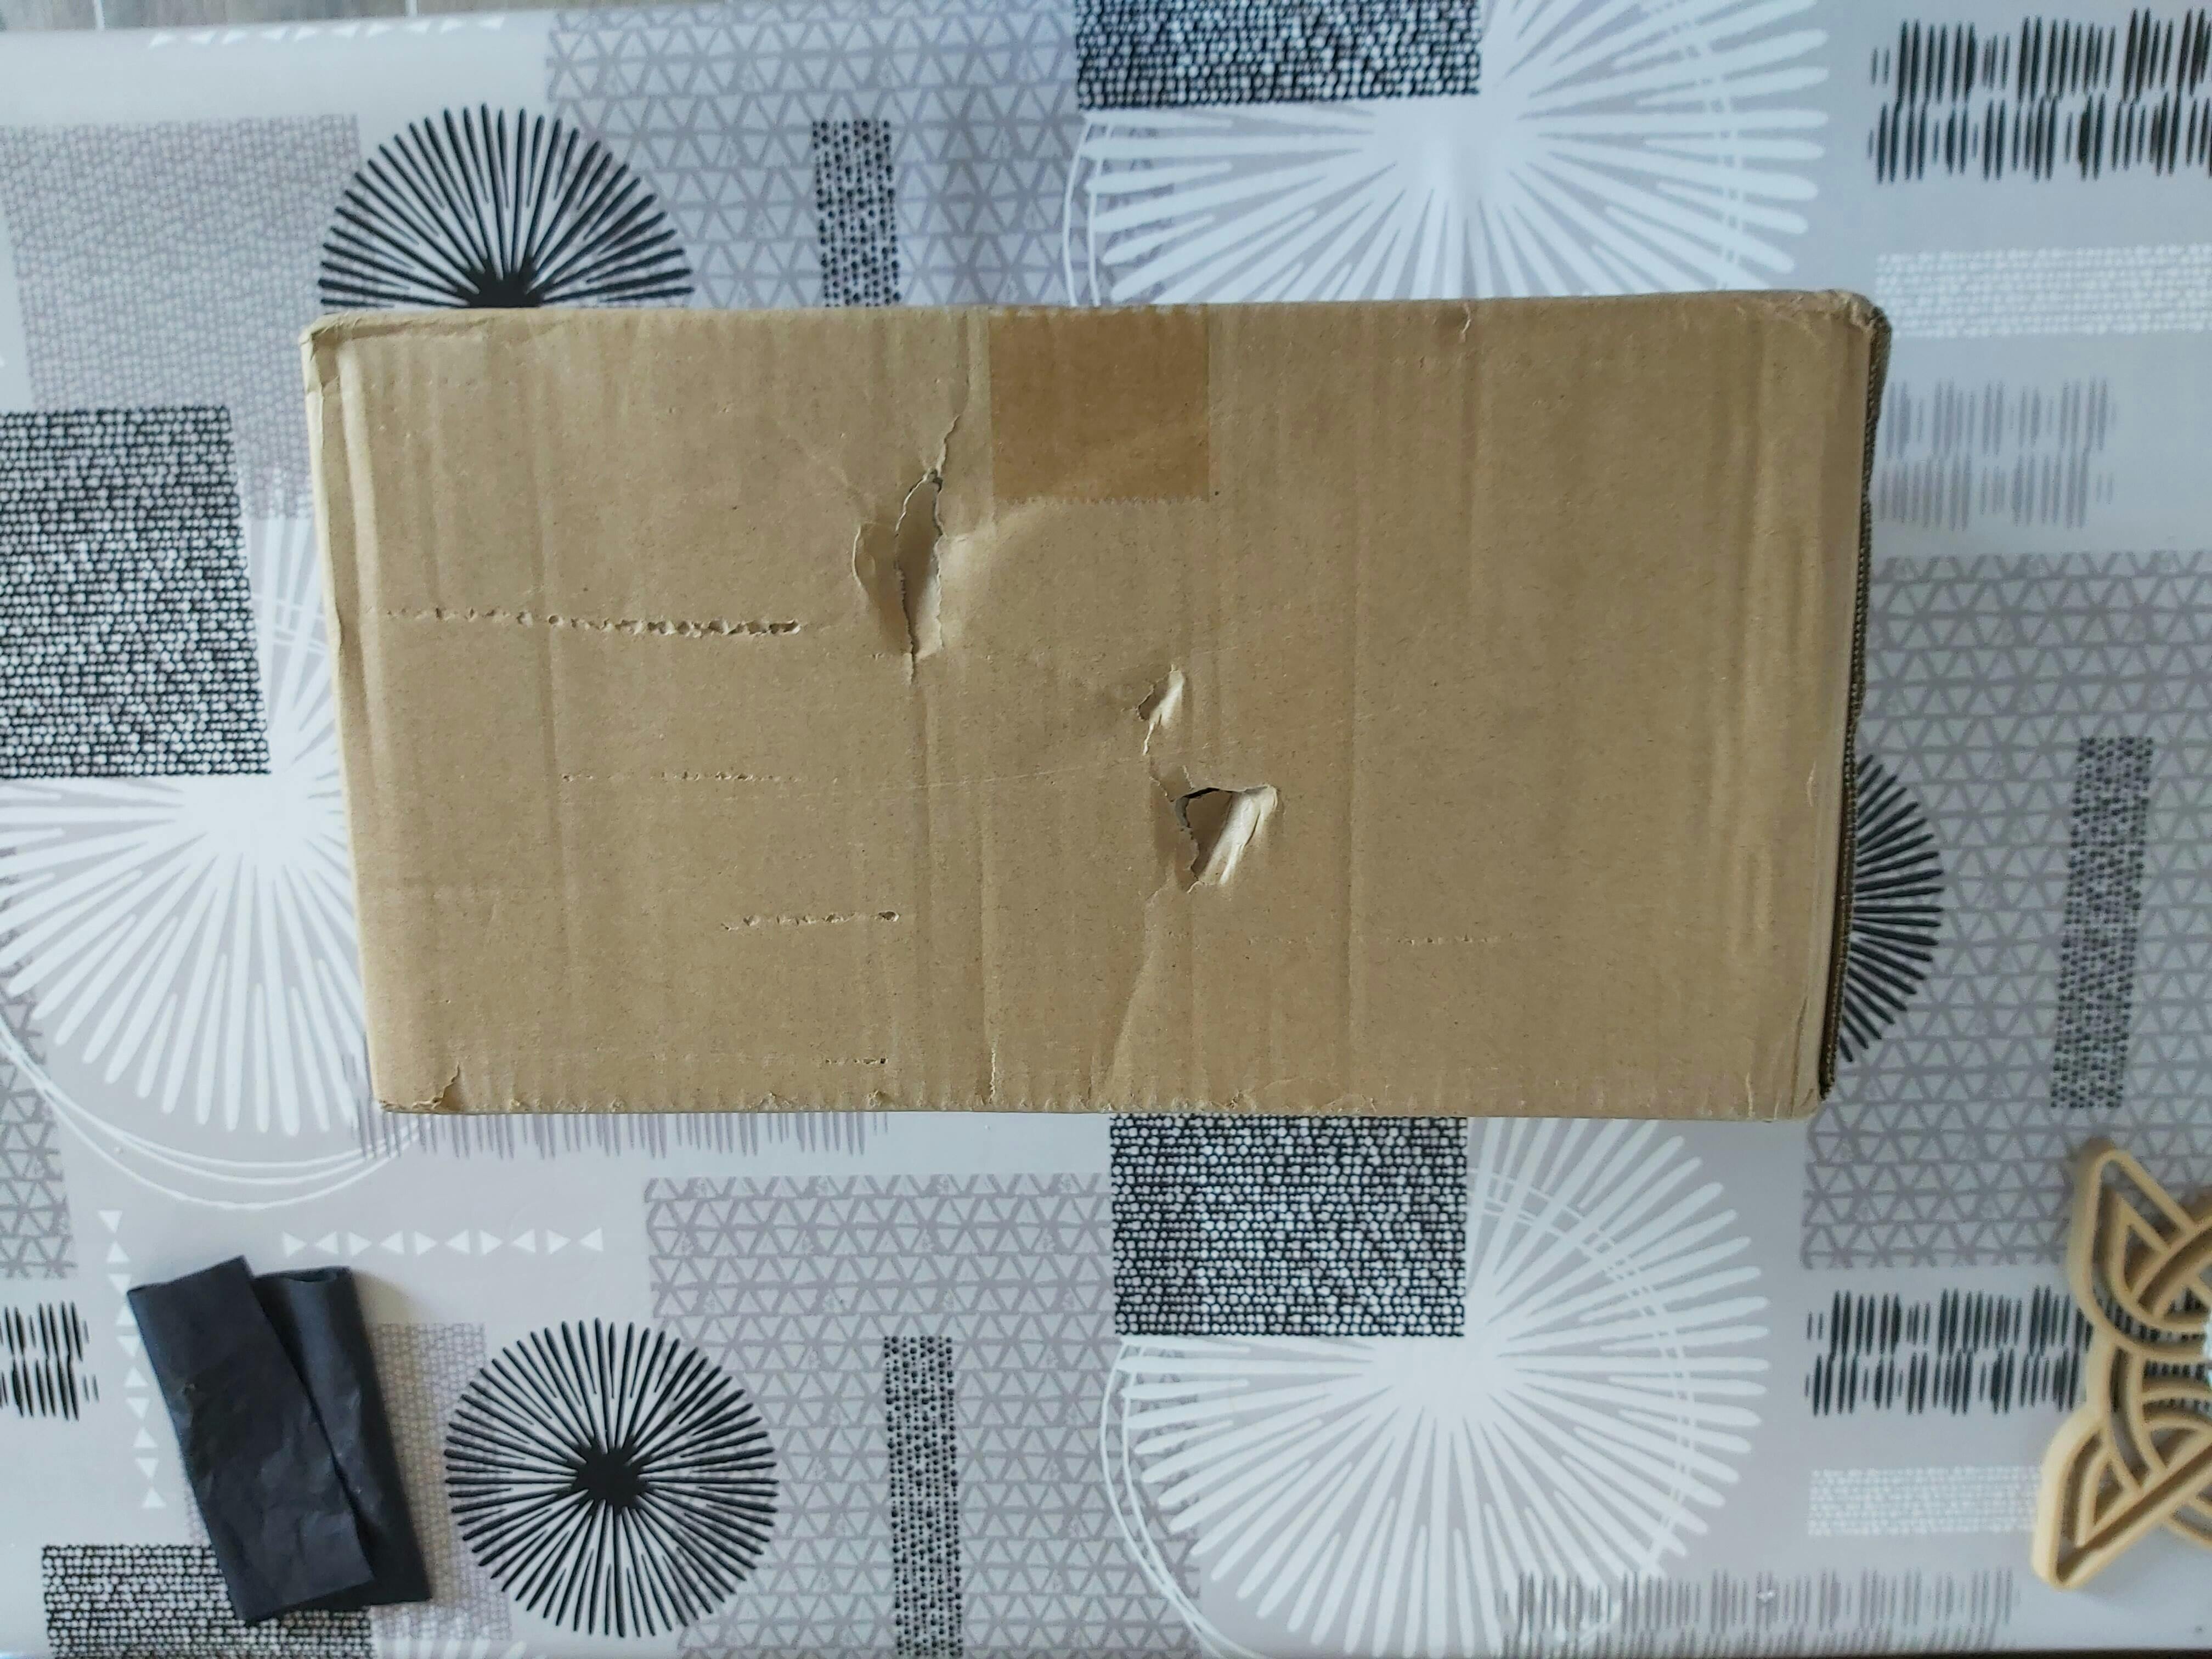
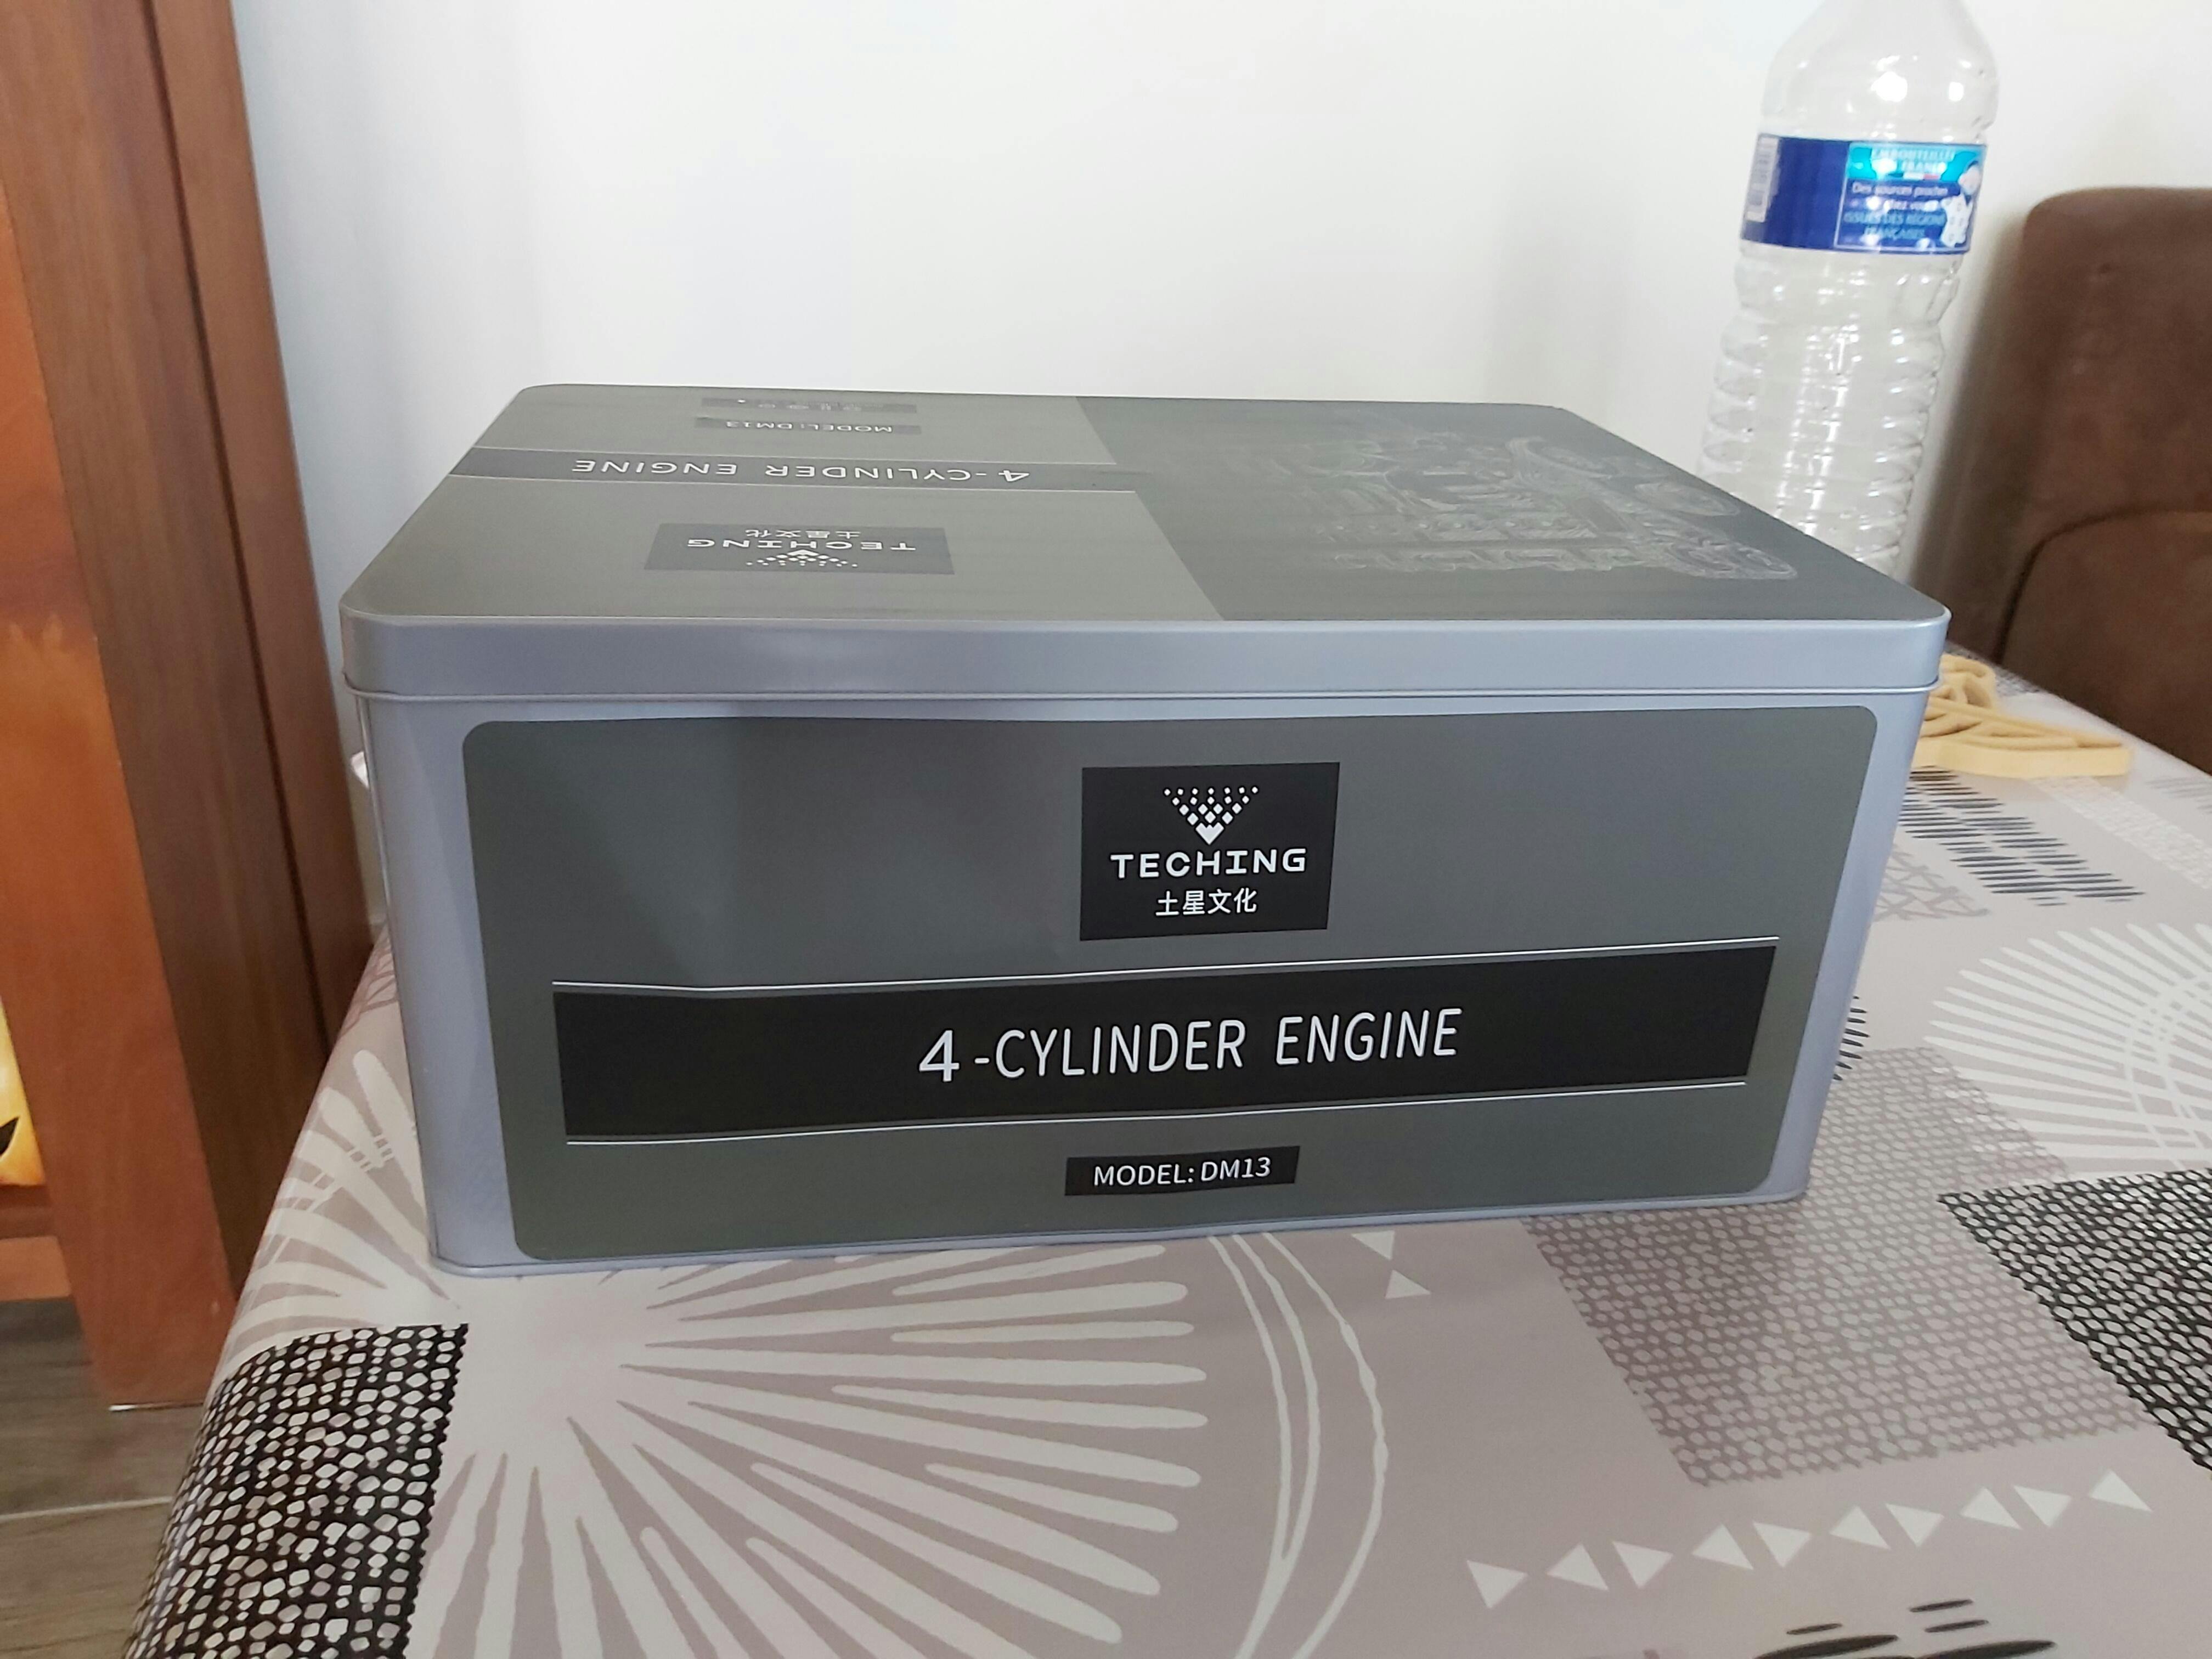
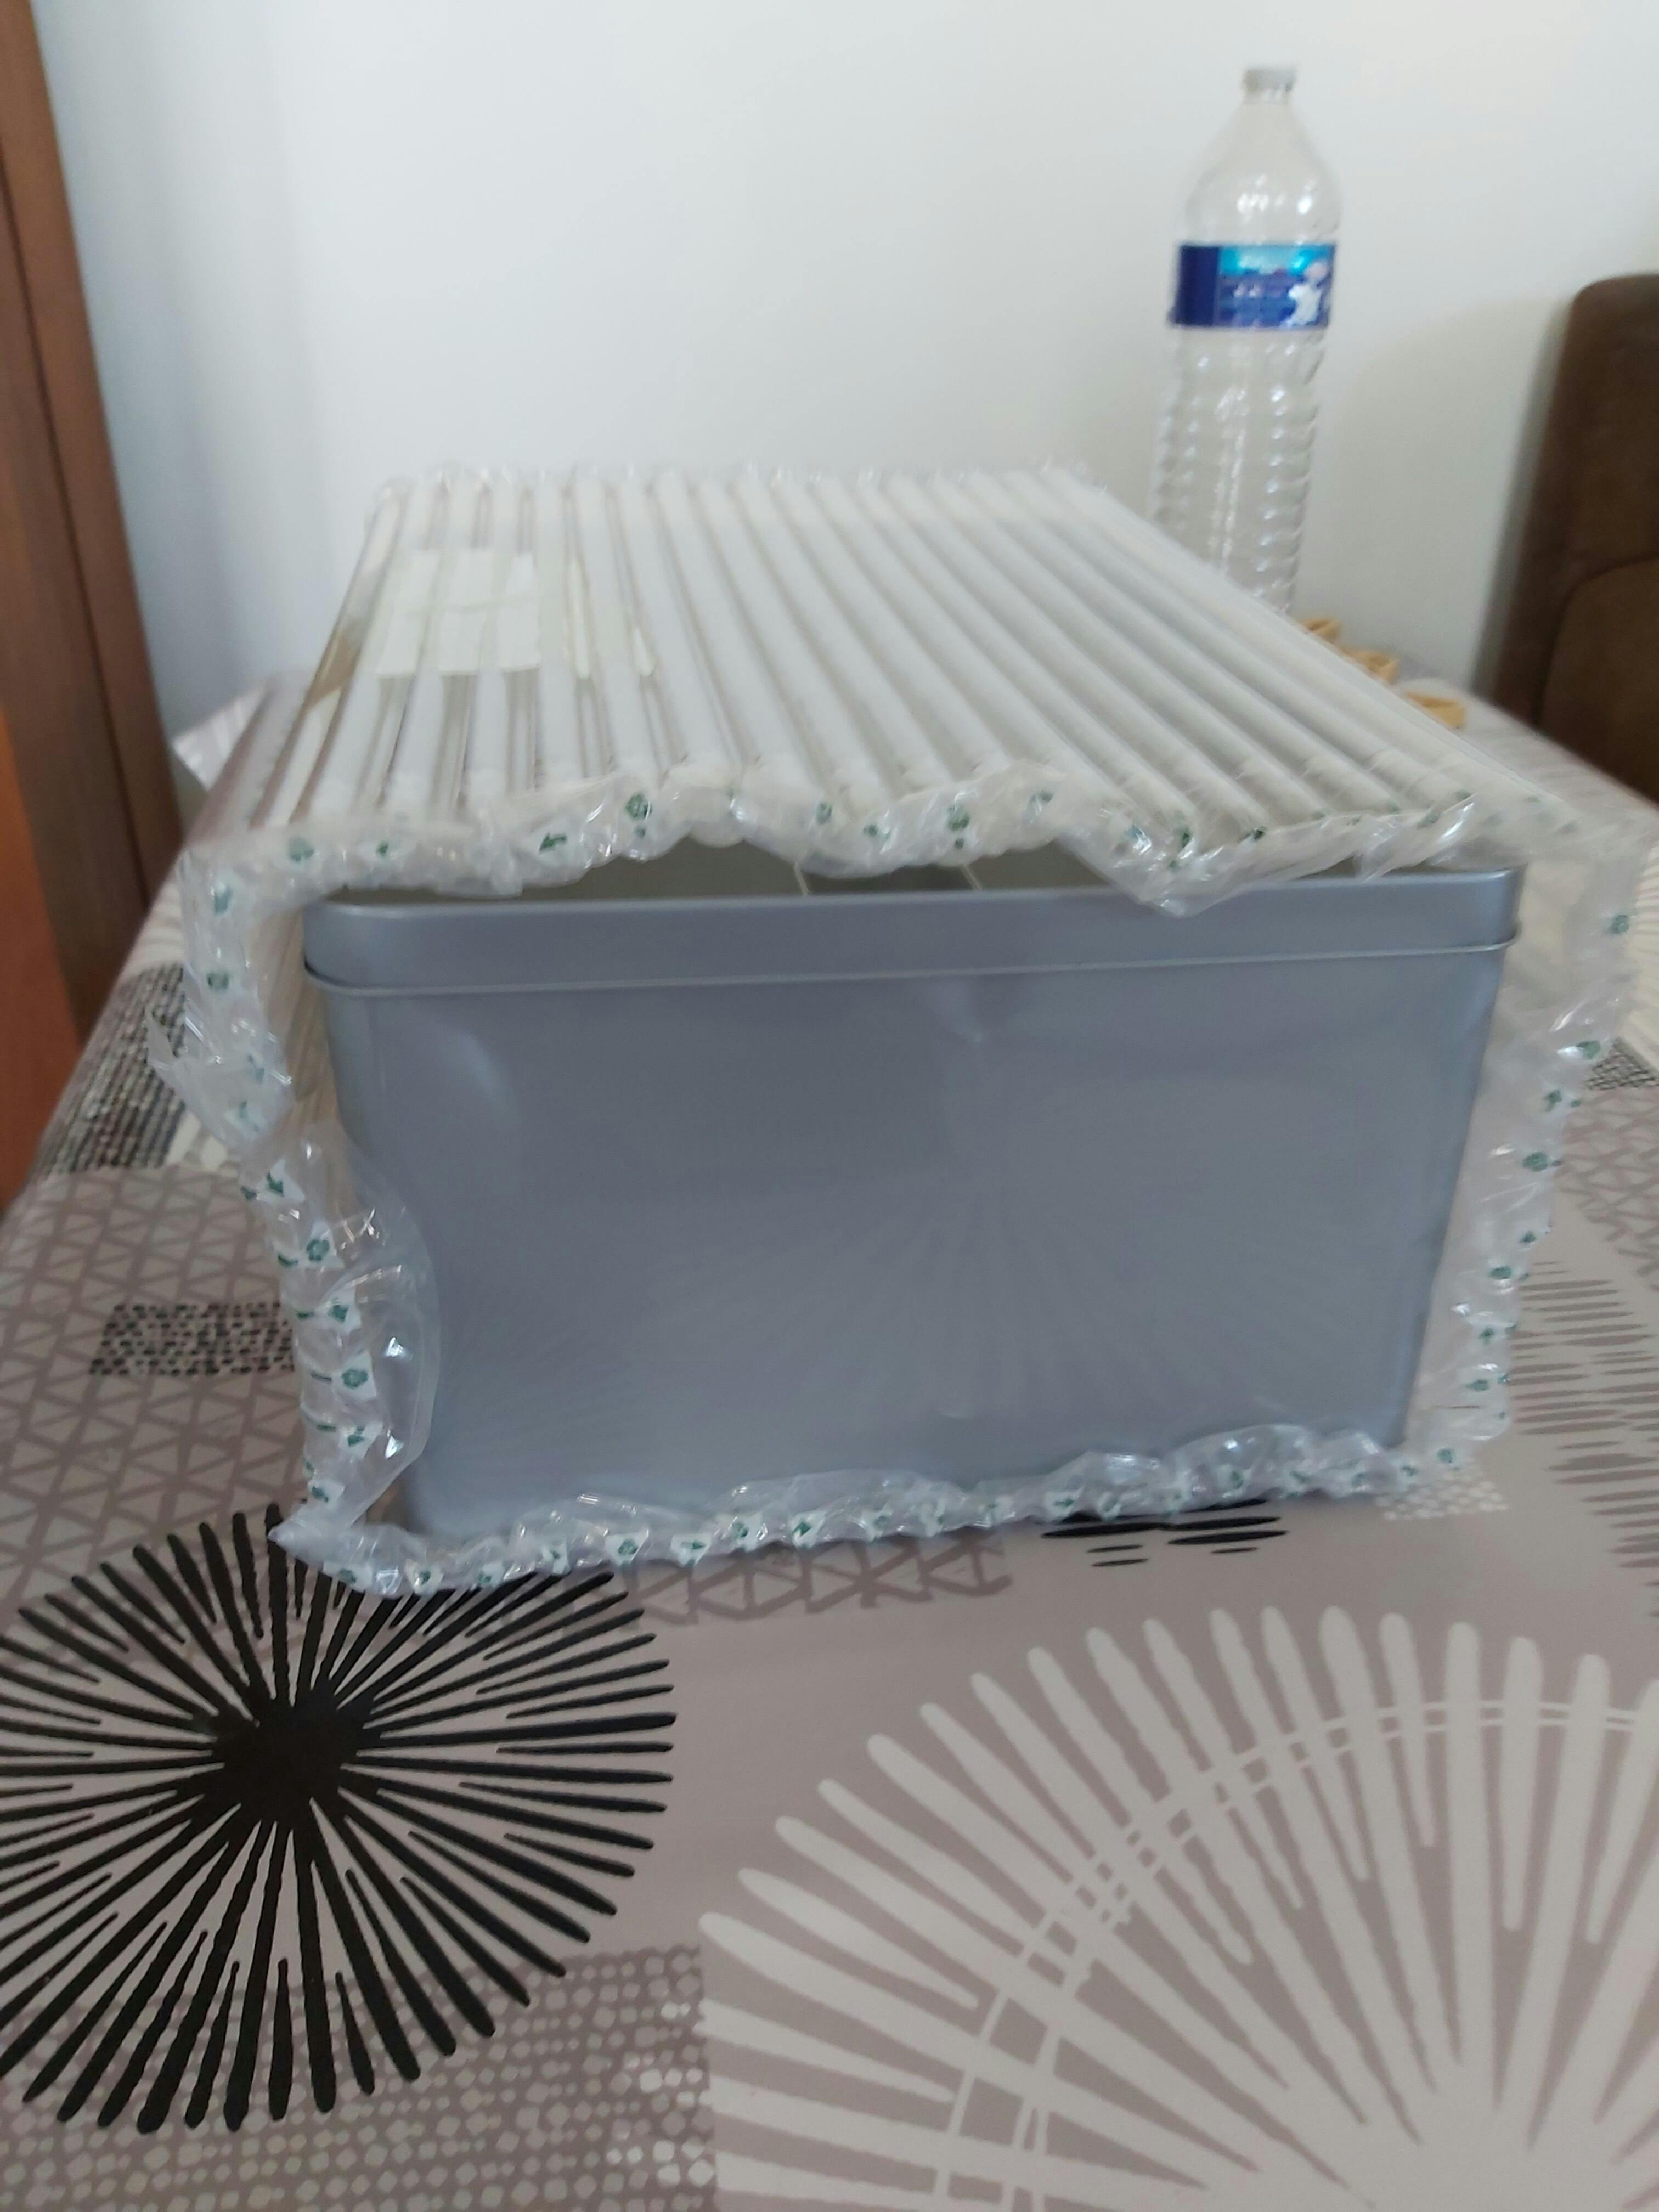
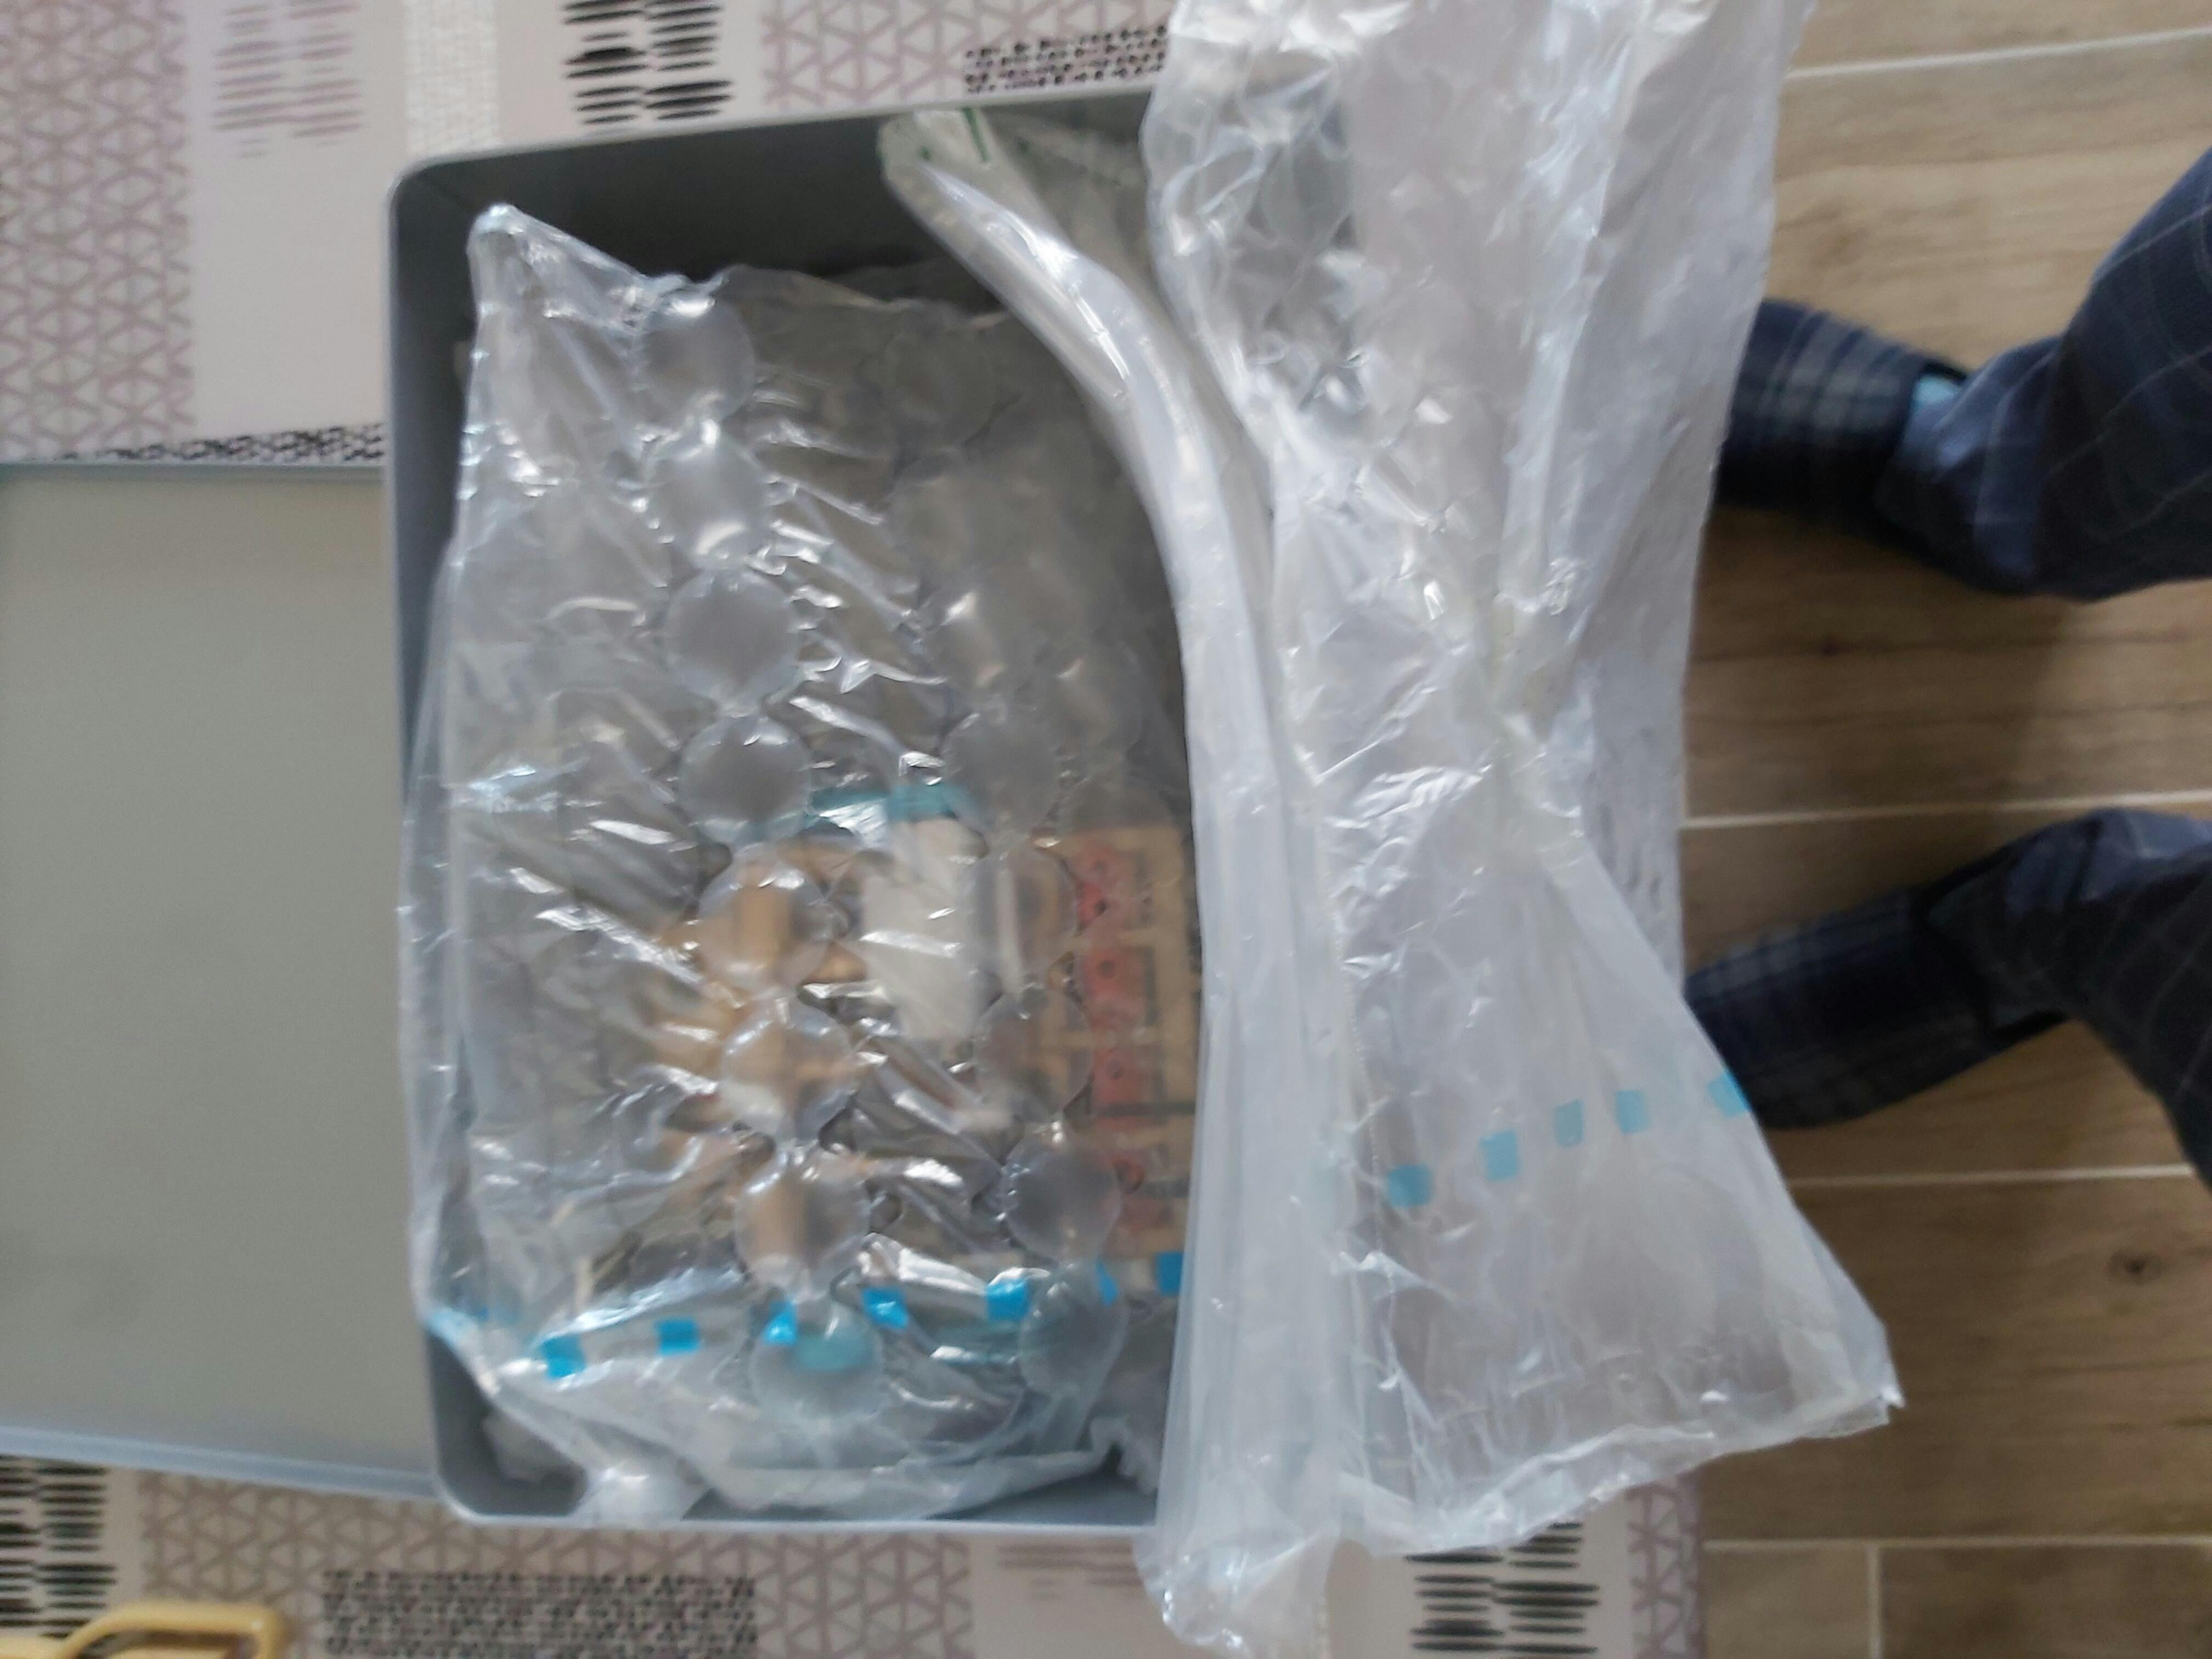
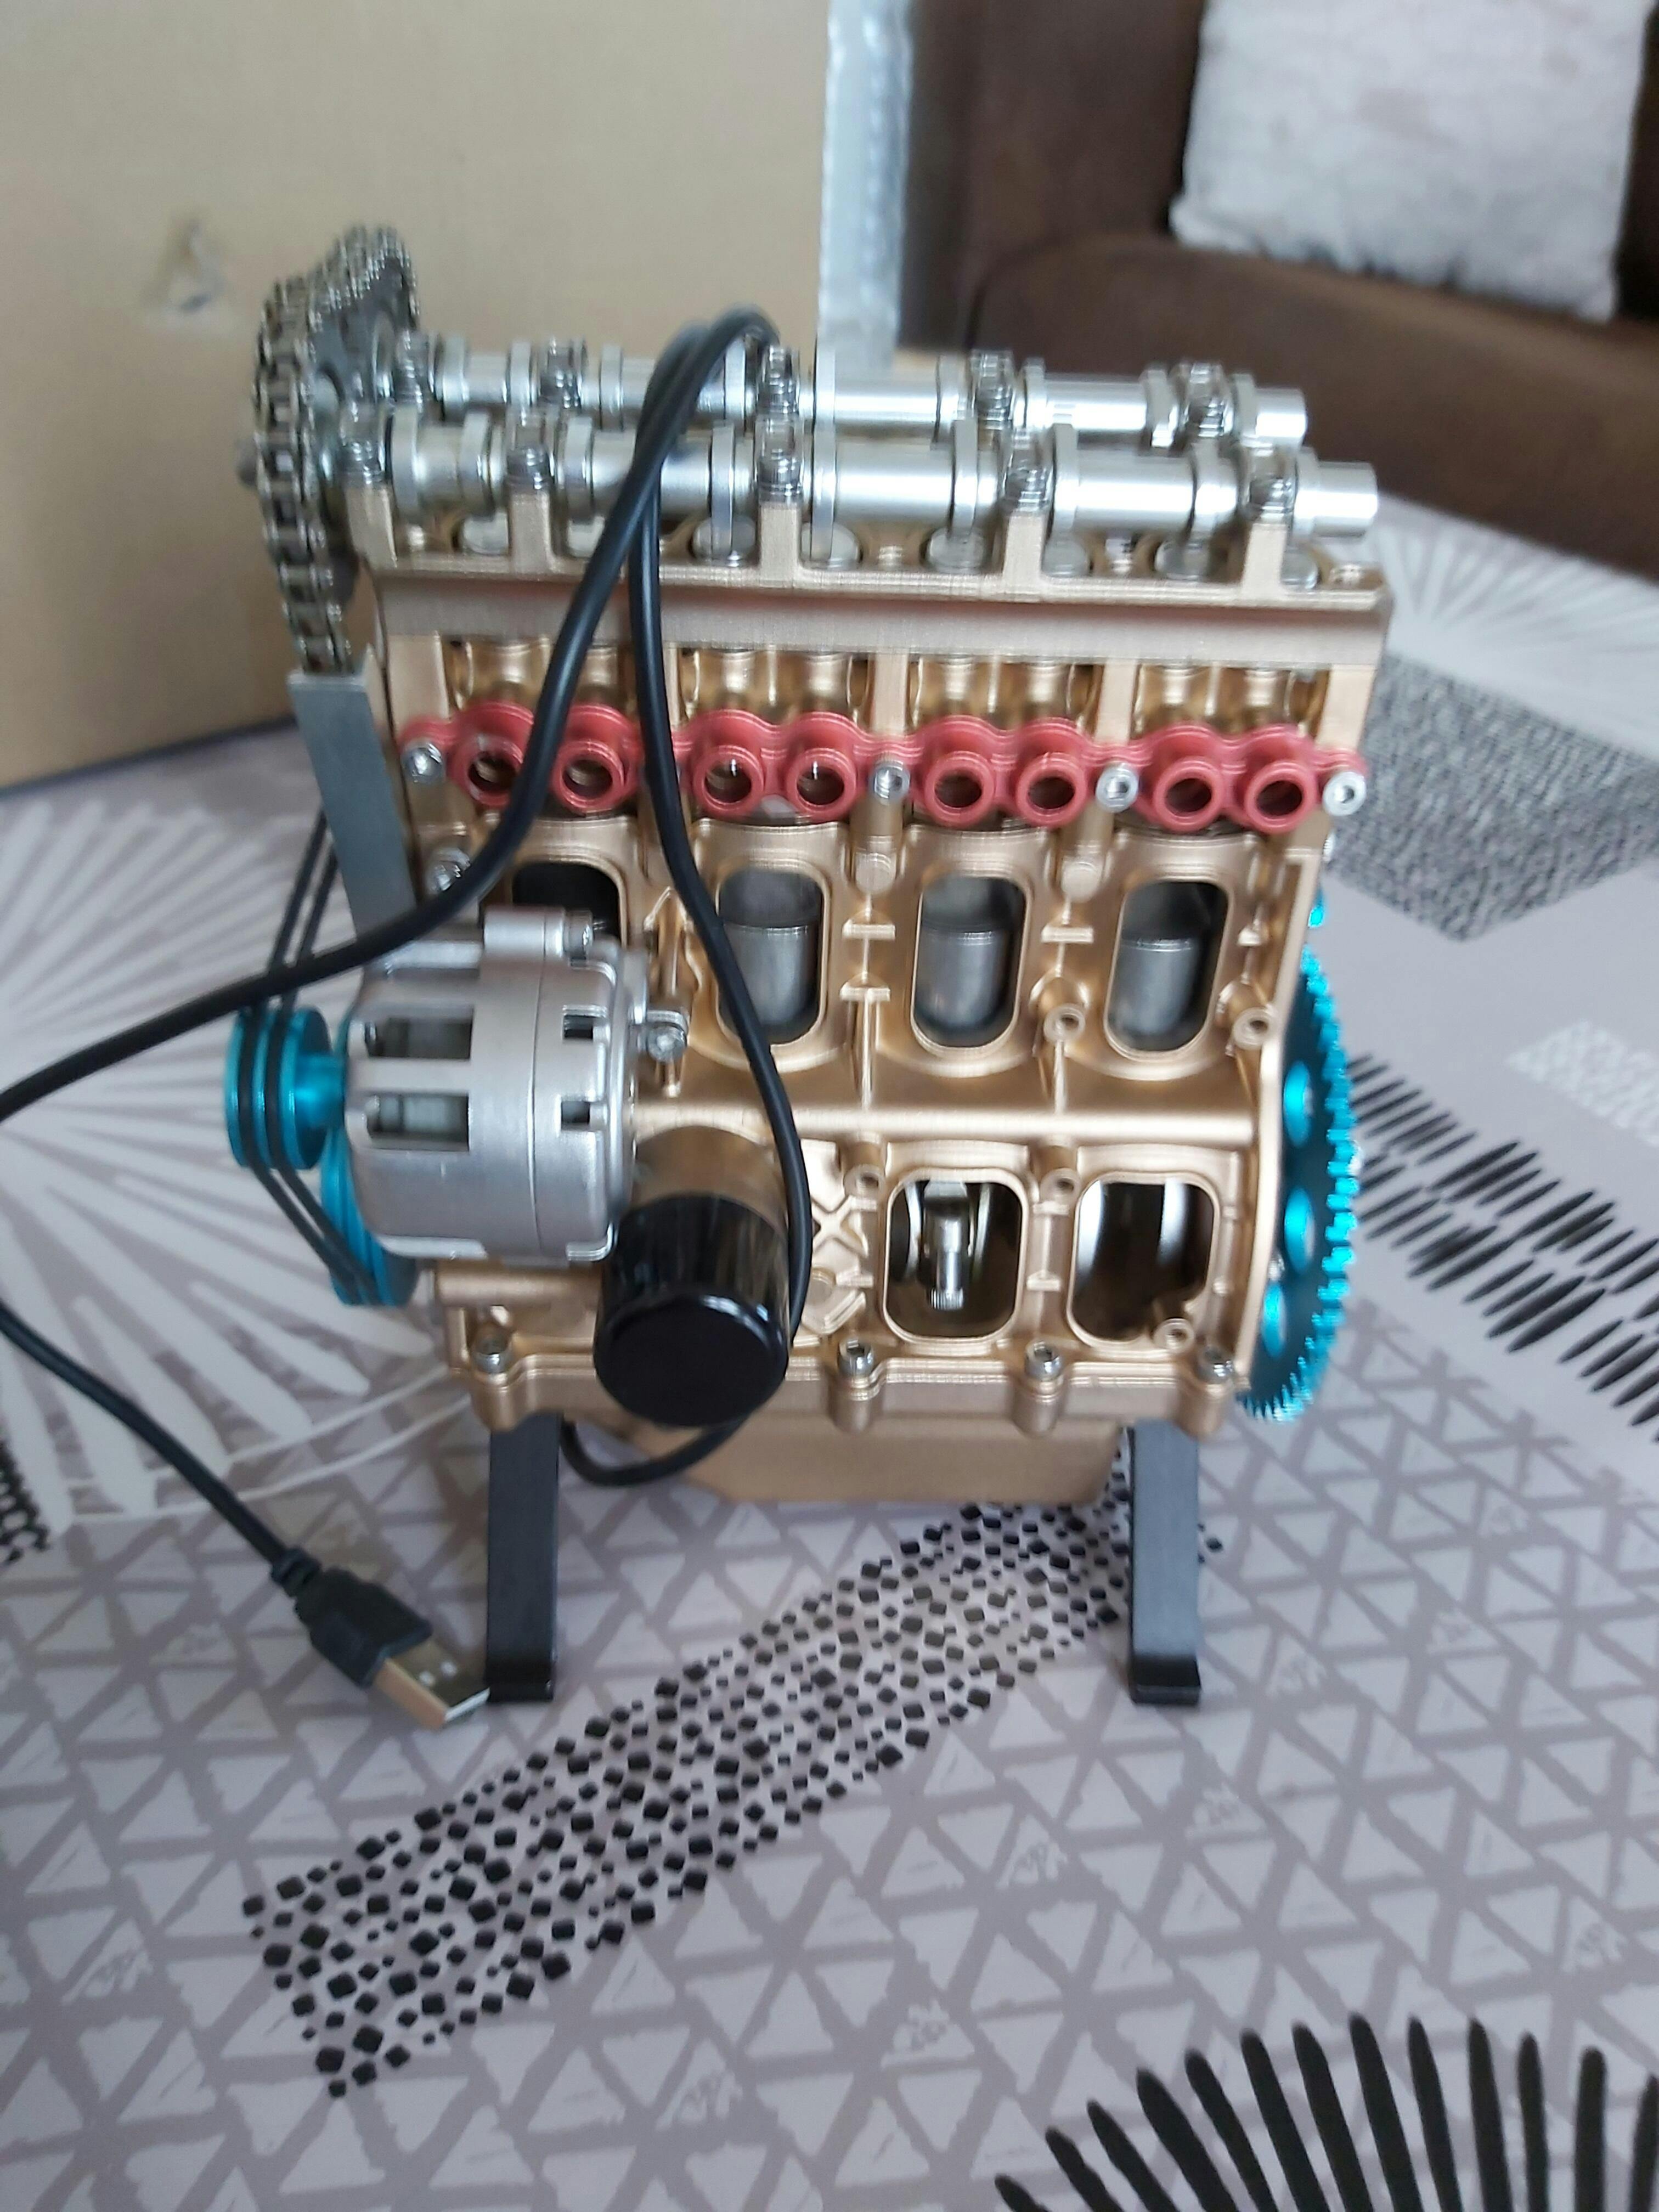
Colis reçu après 15 jours de transport. Deux accrocs constatés sur une face du carton. Après, déballage du colis la boîte métallique contenant le moteur DM 113, prêt assemblée était bien enfoncée. Heureusement le moteur assez lourd et bien emballé a l'intérieur du colis, a bien résister aux du transport. Après, 4 jours de mise en fonctionnement, il bien avec aucune anomalie mécanique. J'espère que par la suite ENGINEDIY, restera vigilant sur l'emballage de mes prochaines commandes. Sinon rien n'a dire beau moteur de 4 cylindres et 16 soupapes. Jolie à regarder fonctionner.
Cordialement,
Franck Chauvigny.
I love most everything about this engine.
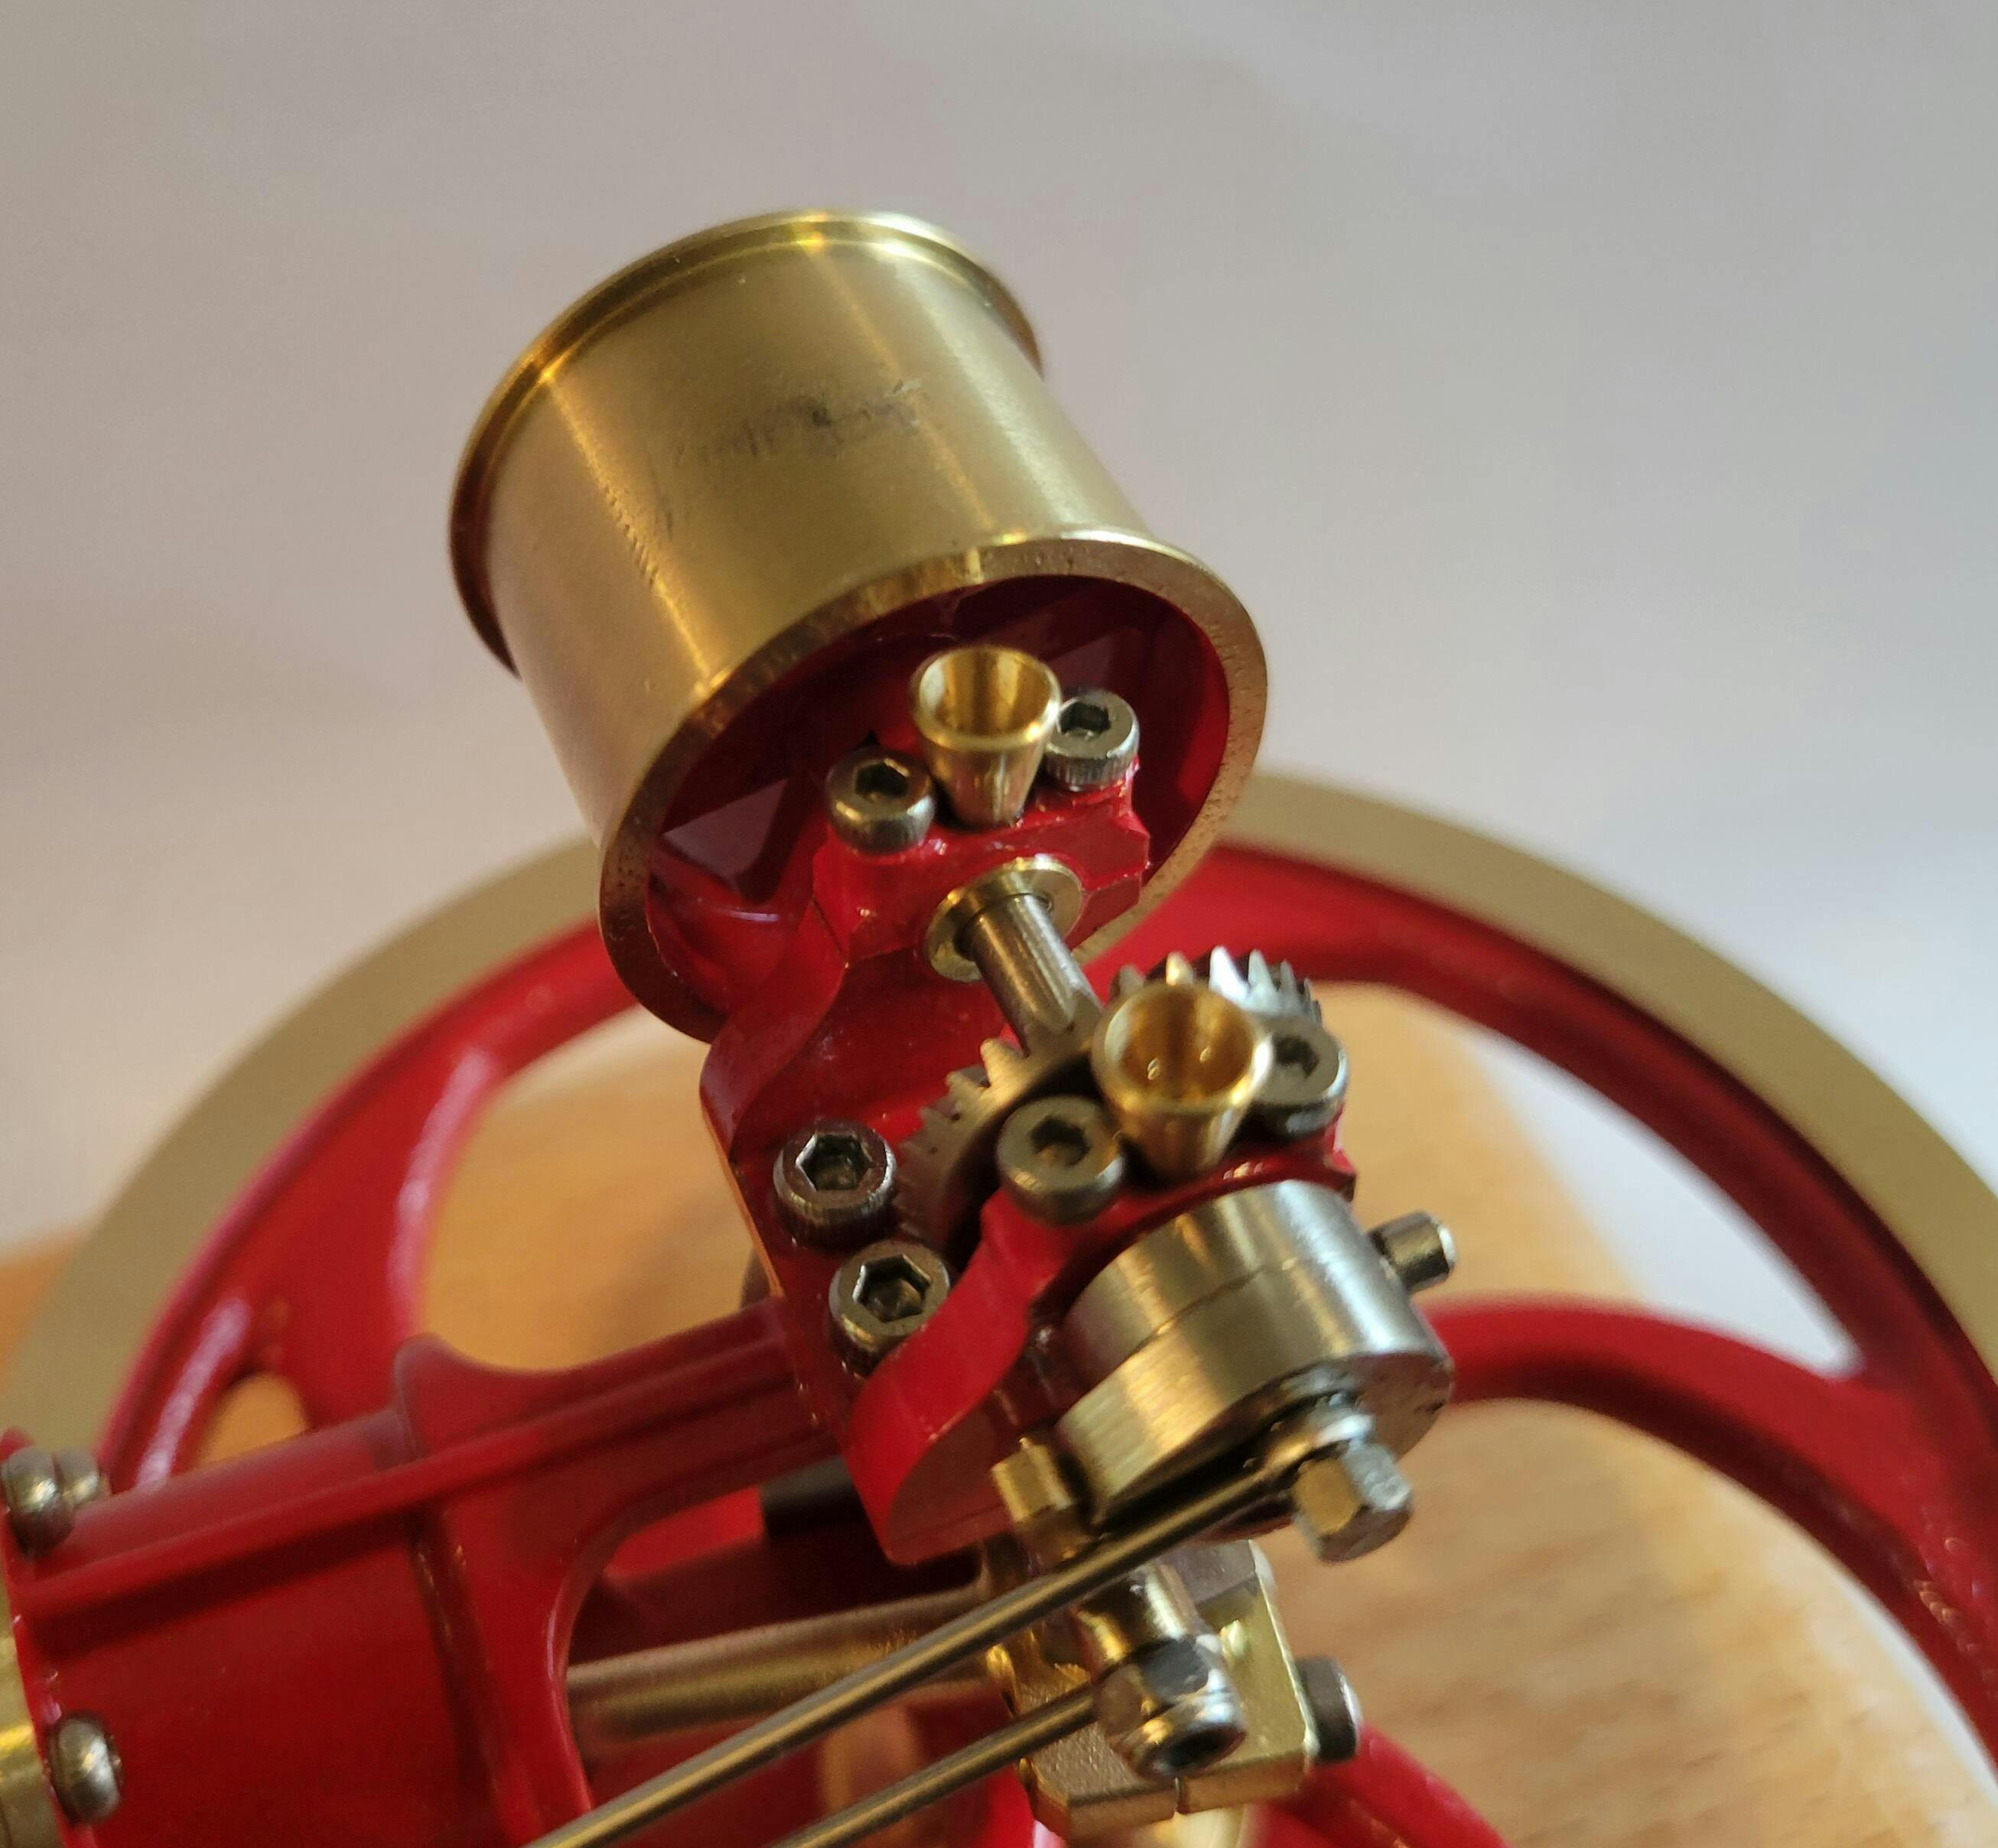
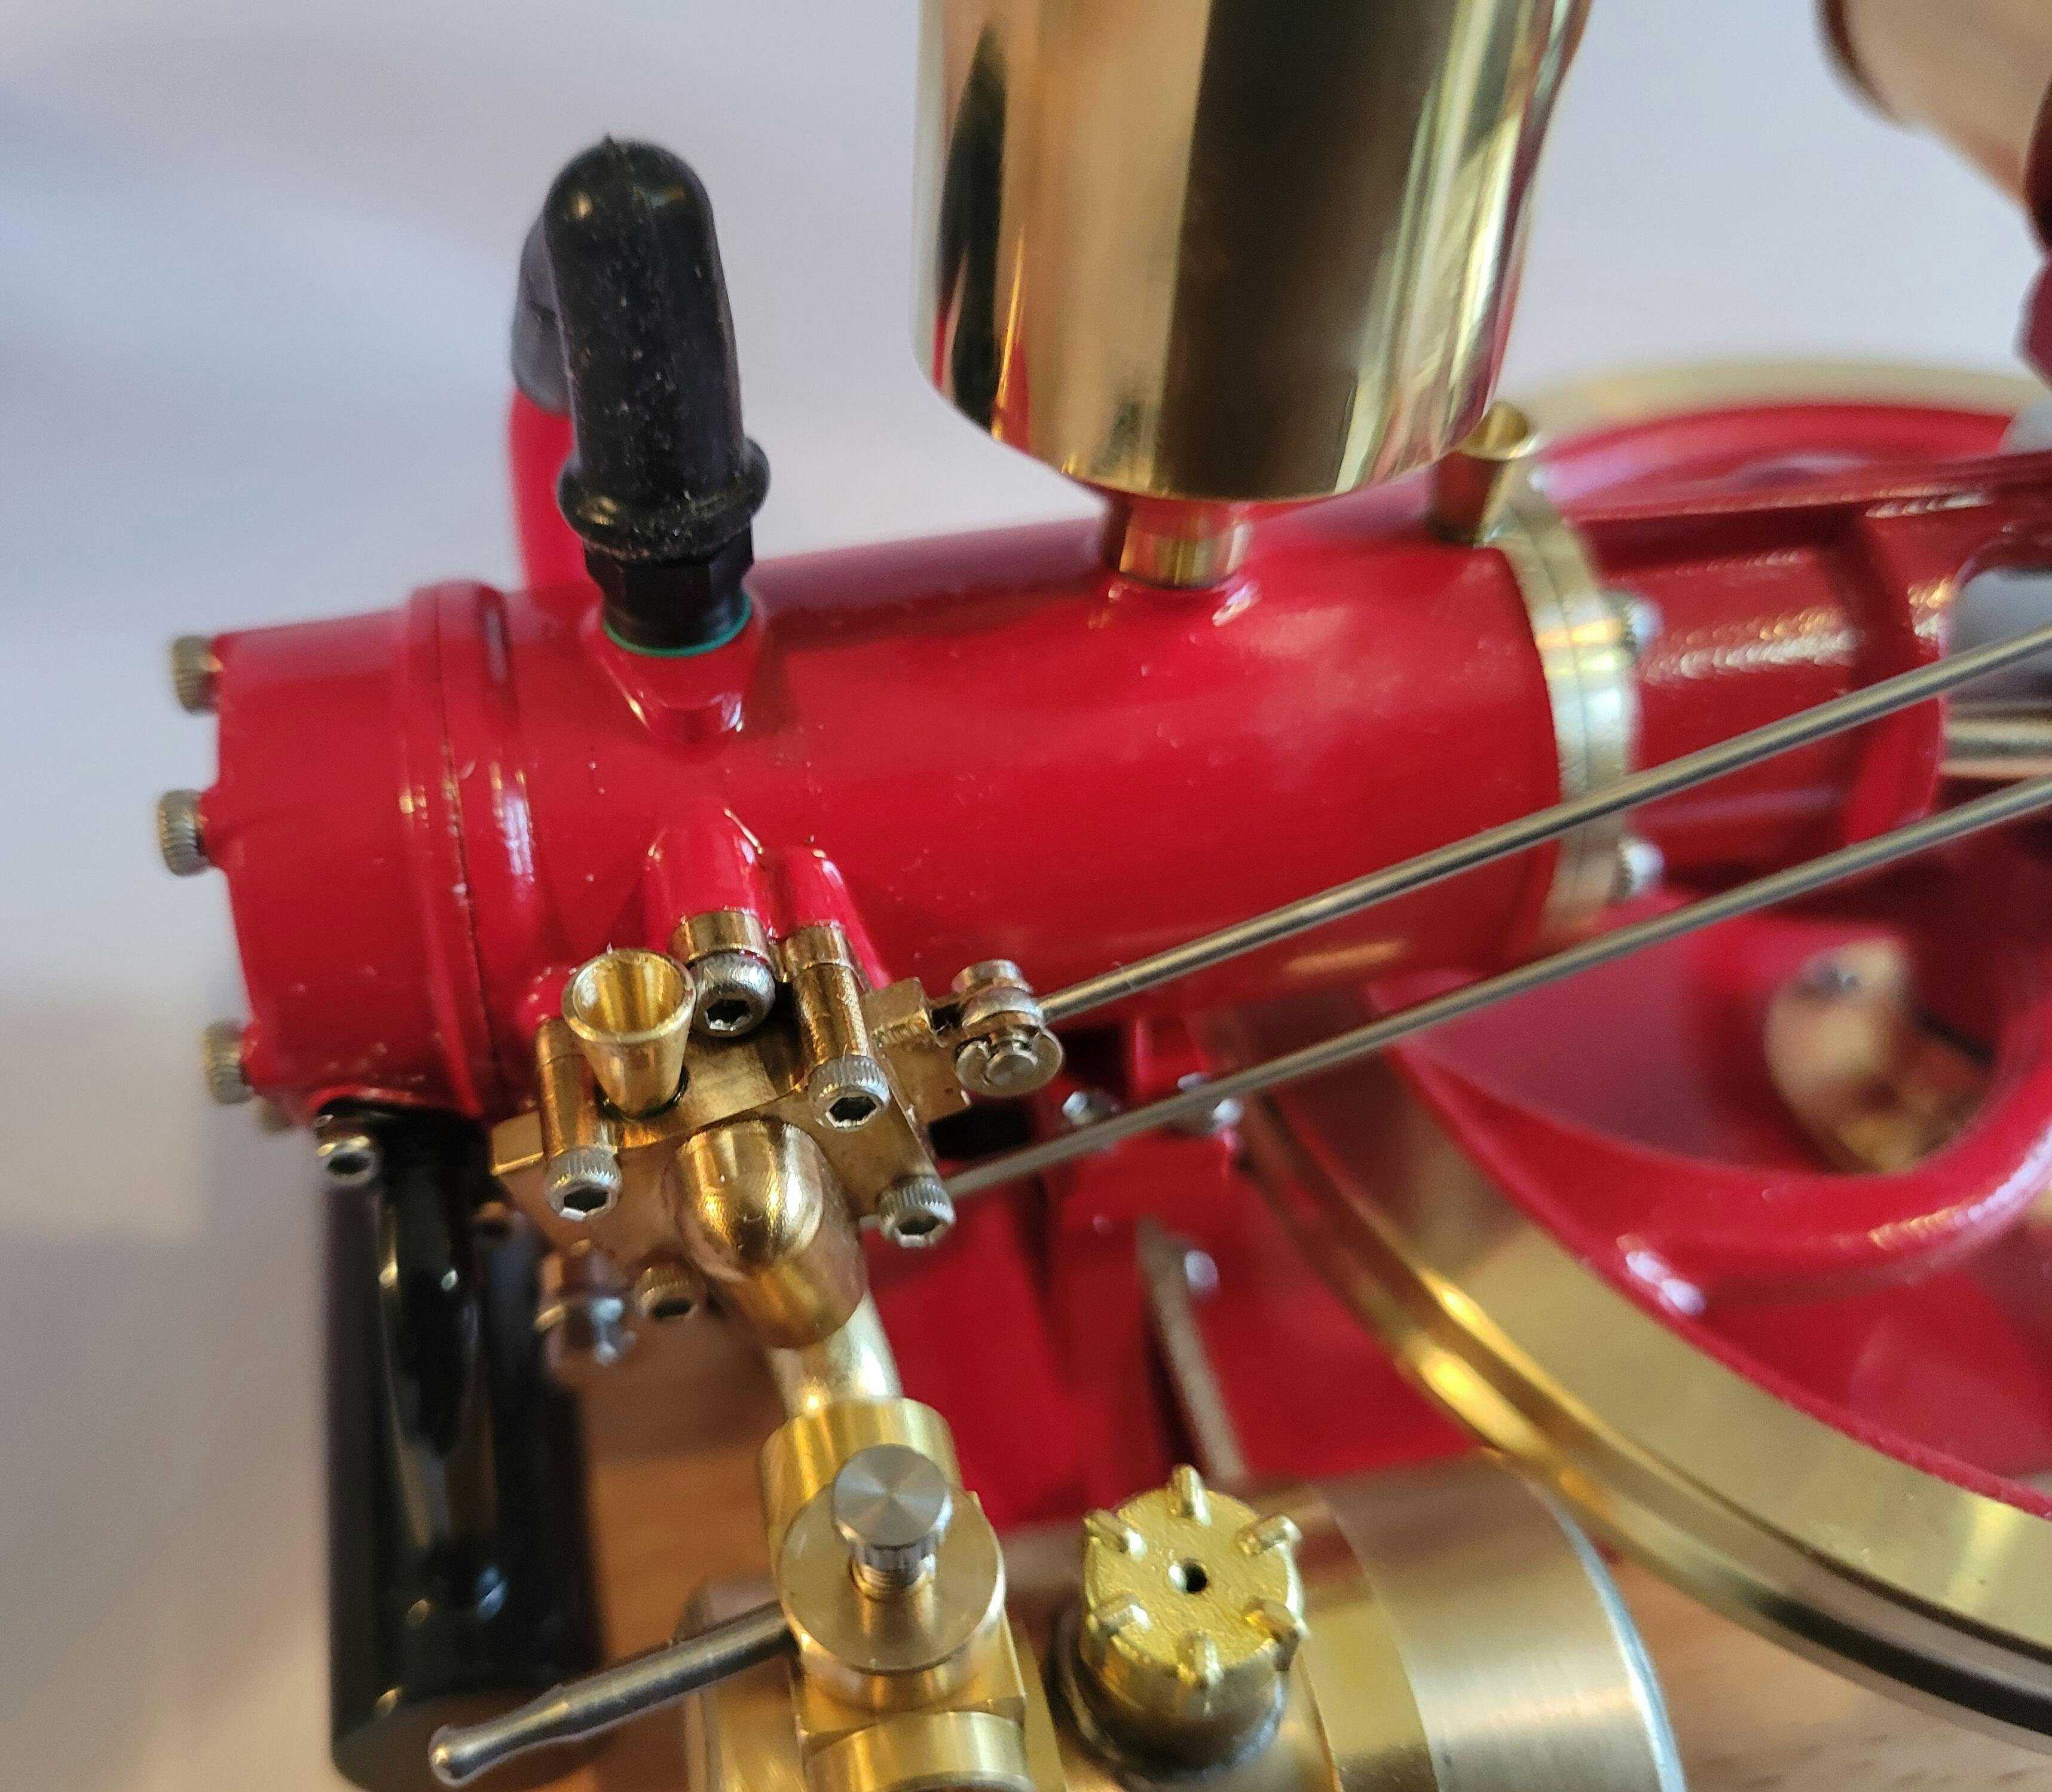
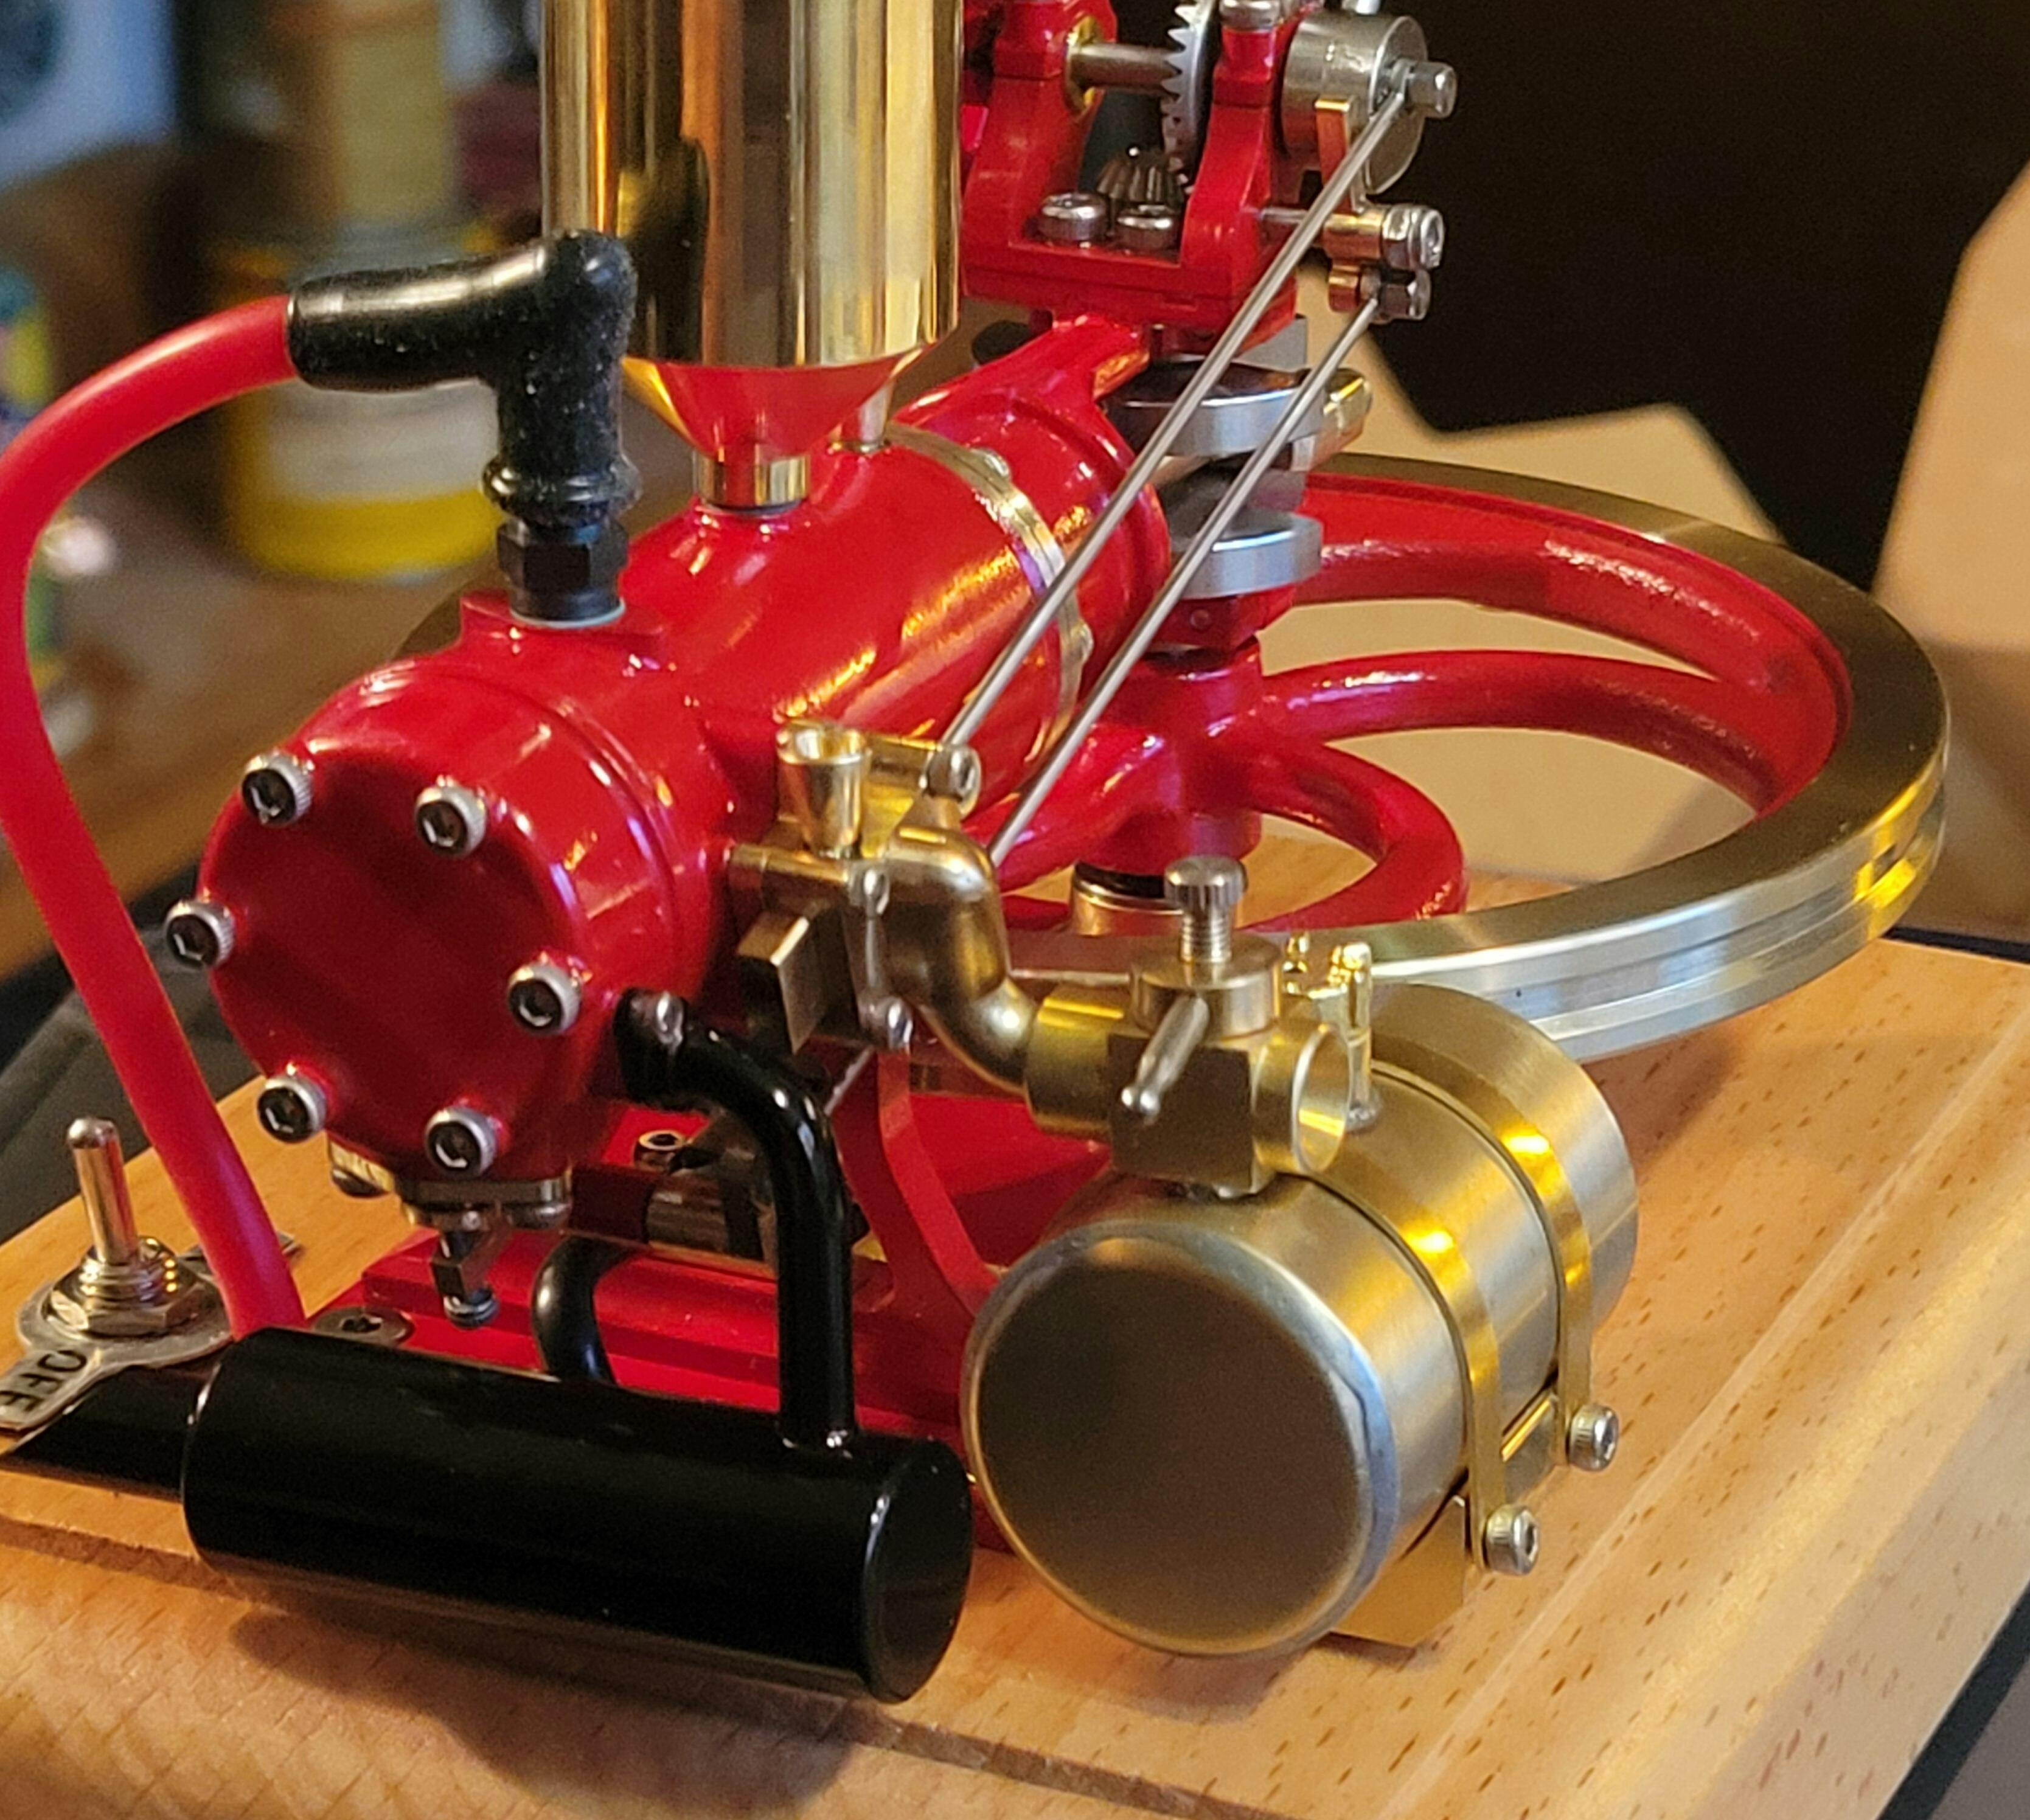
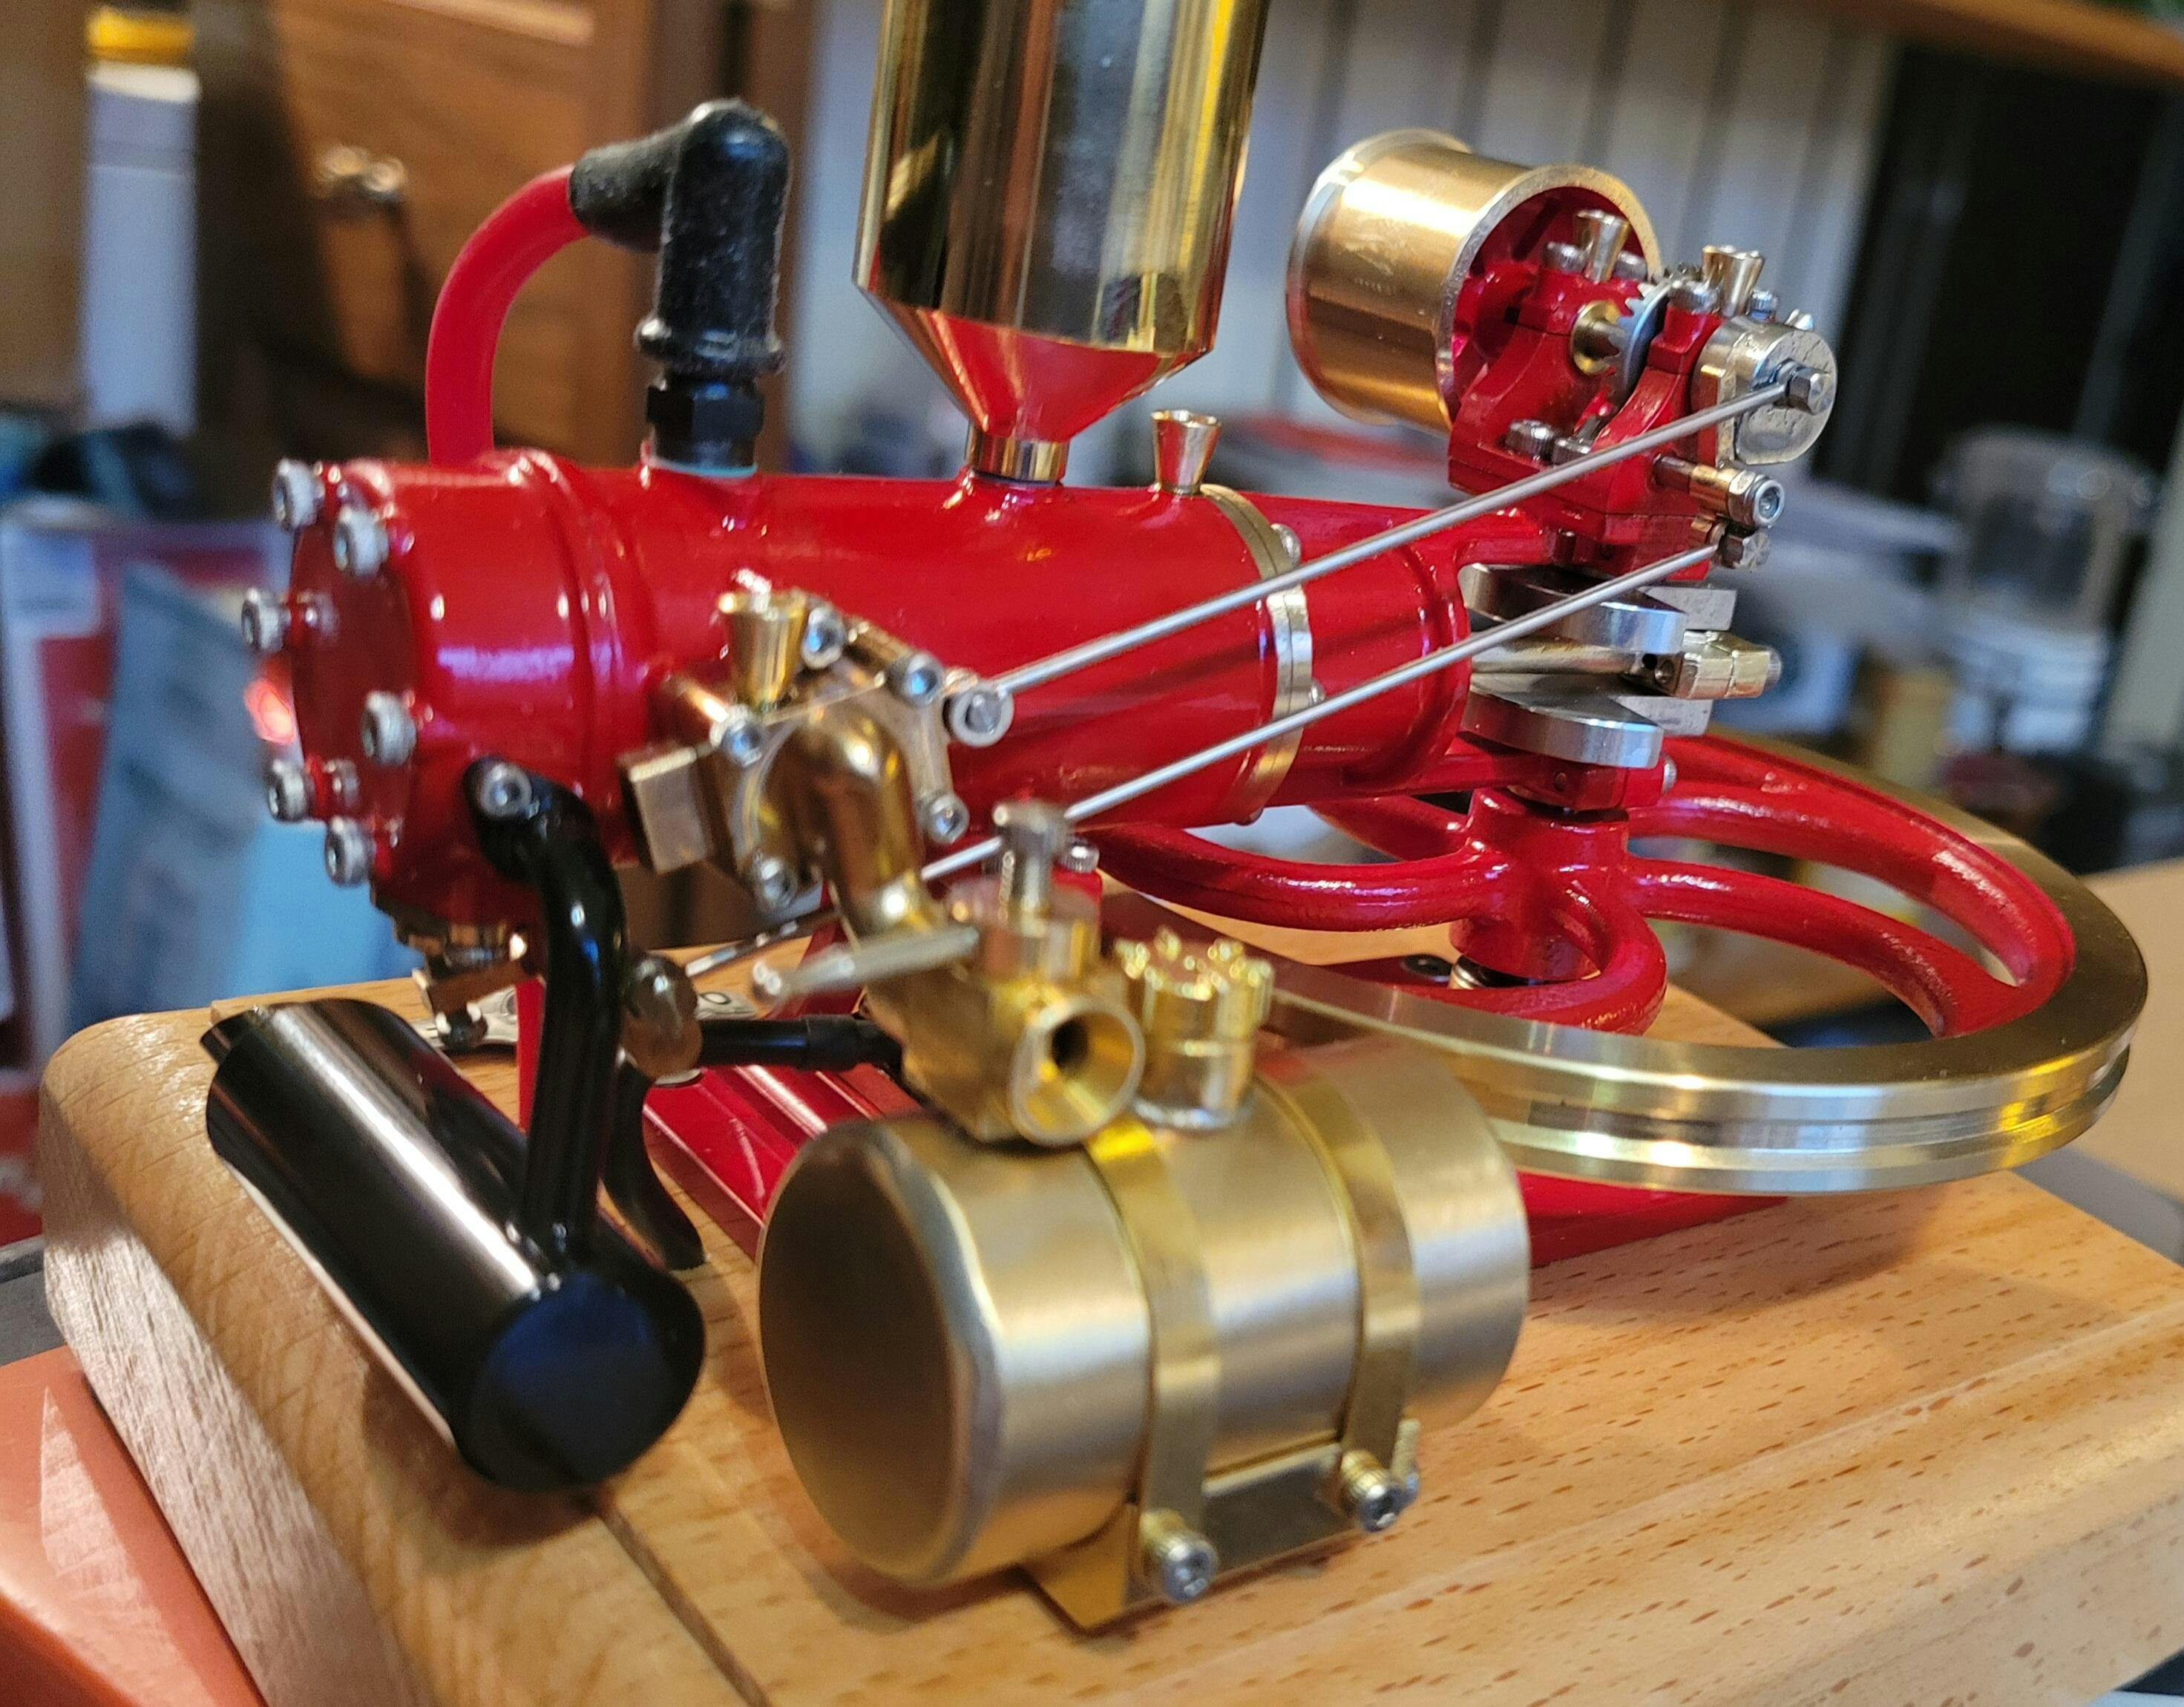
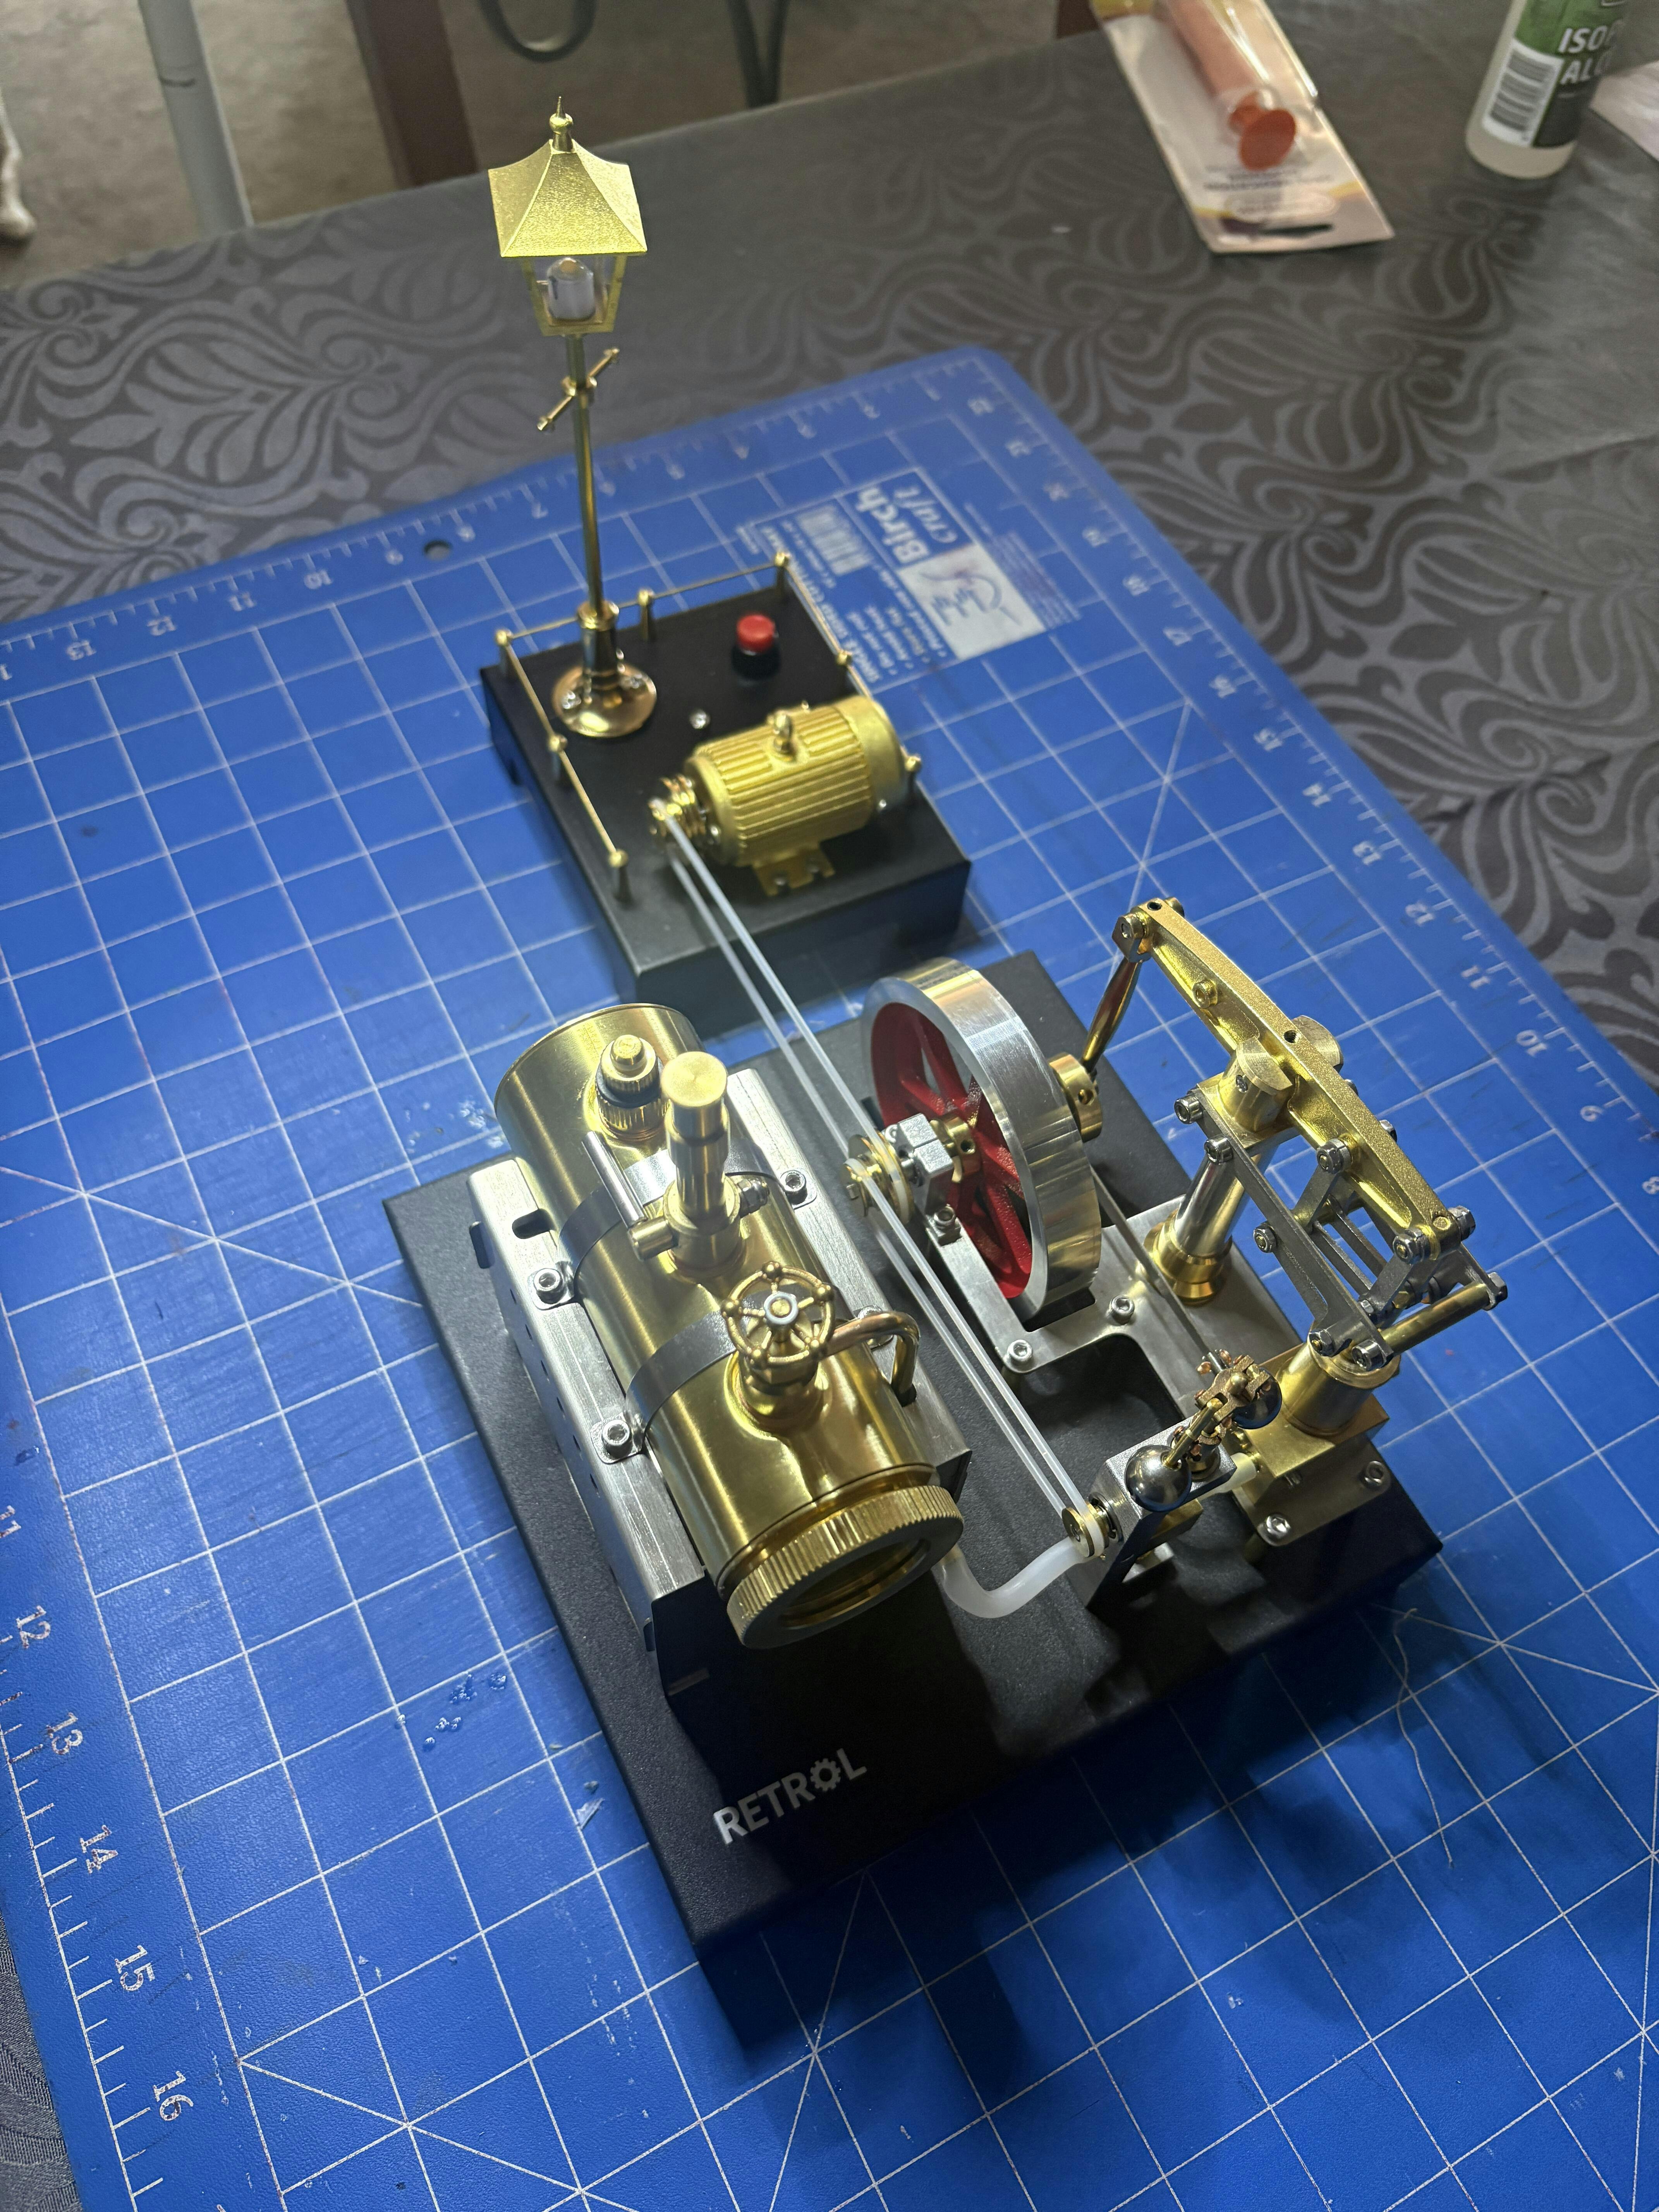
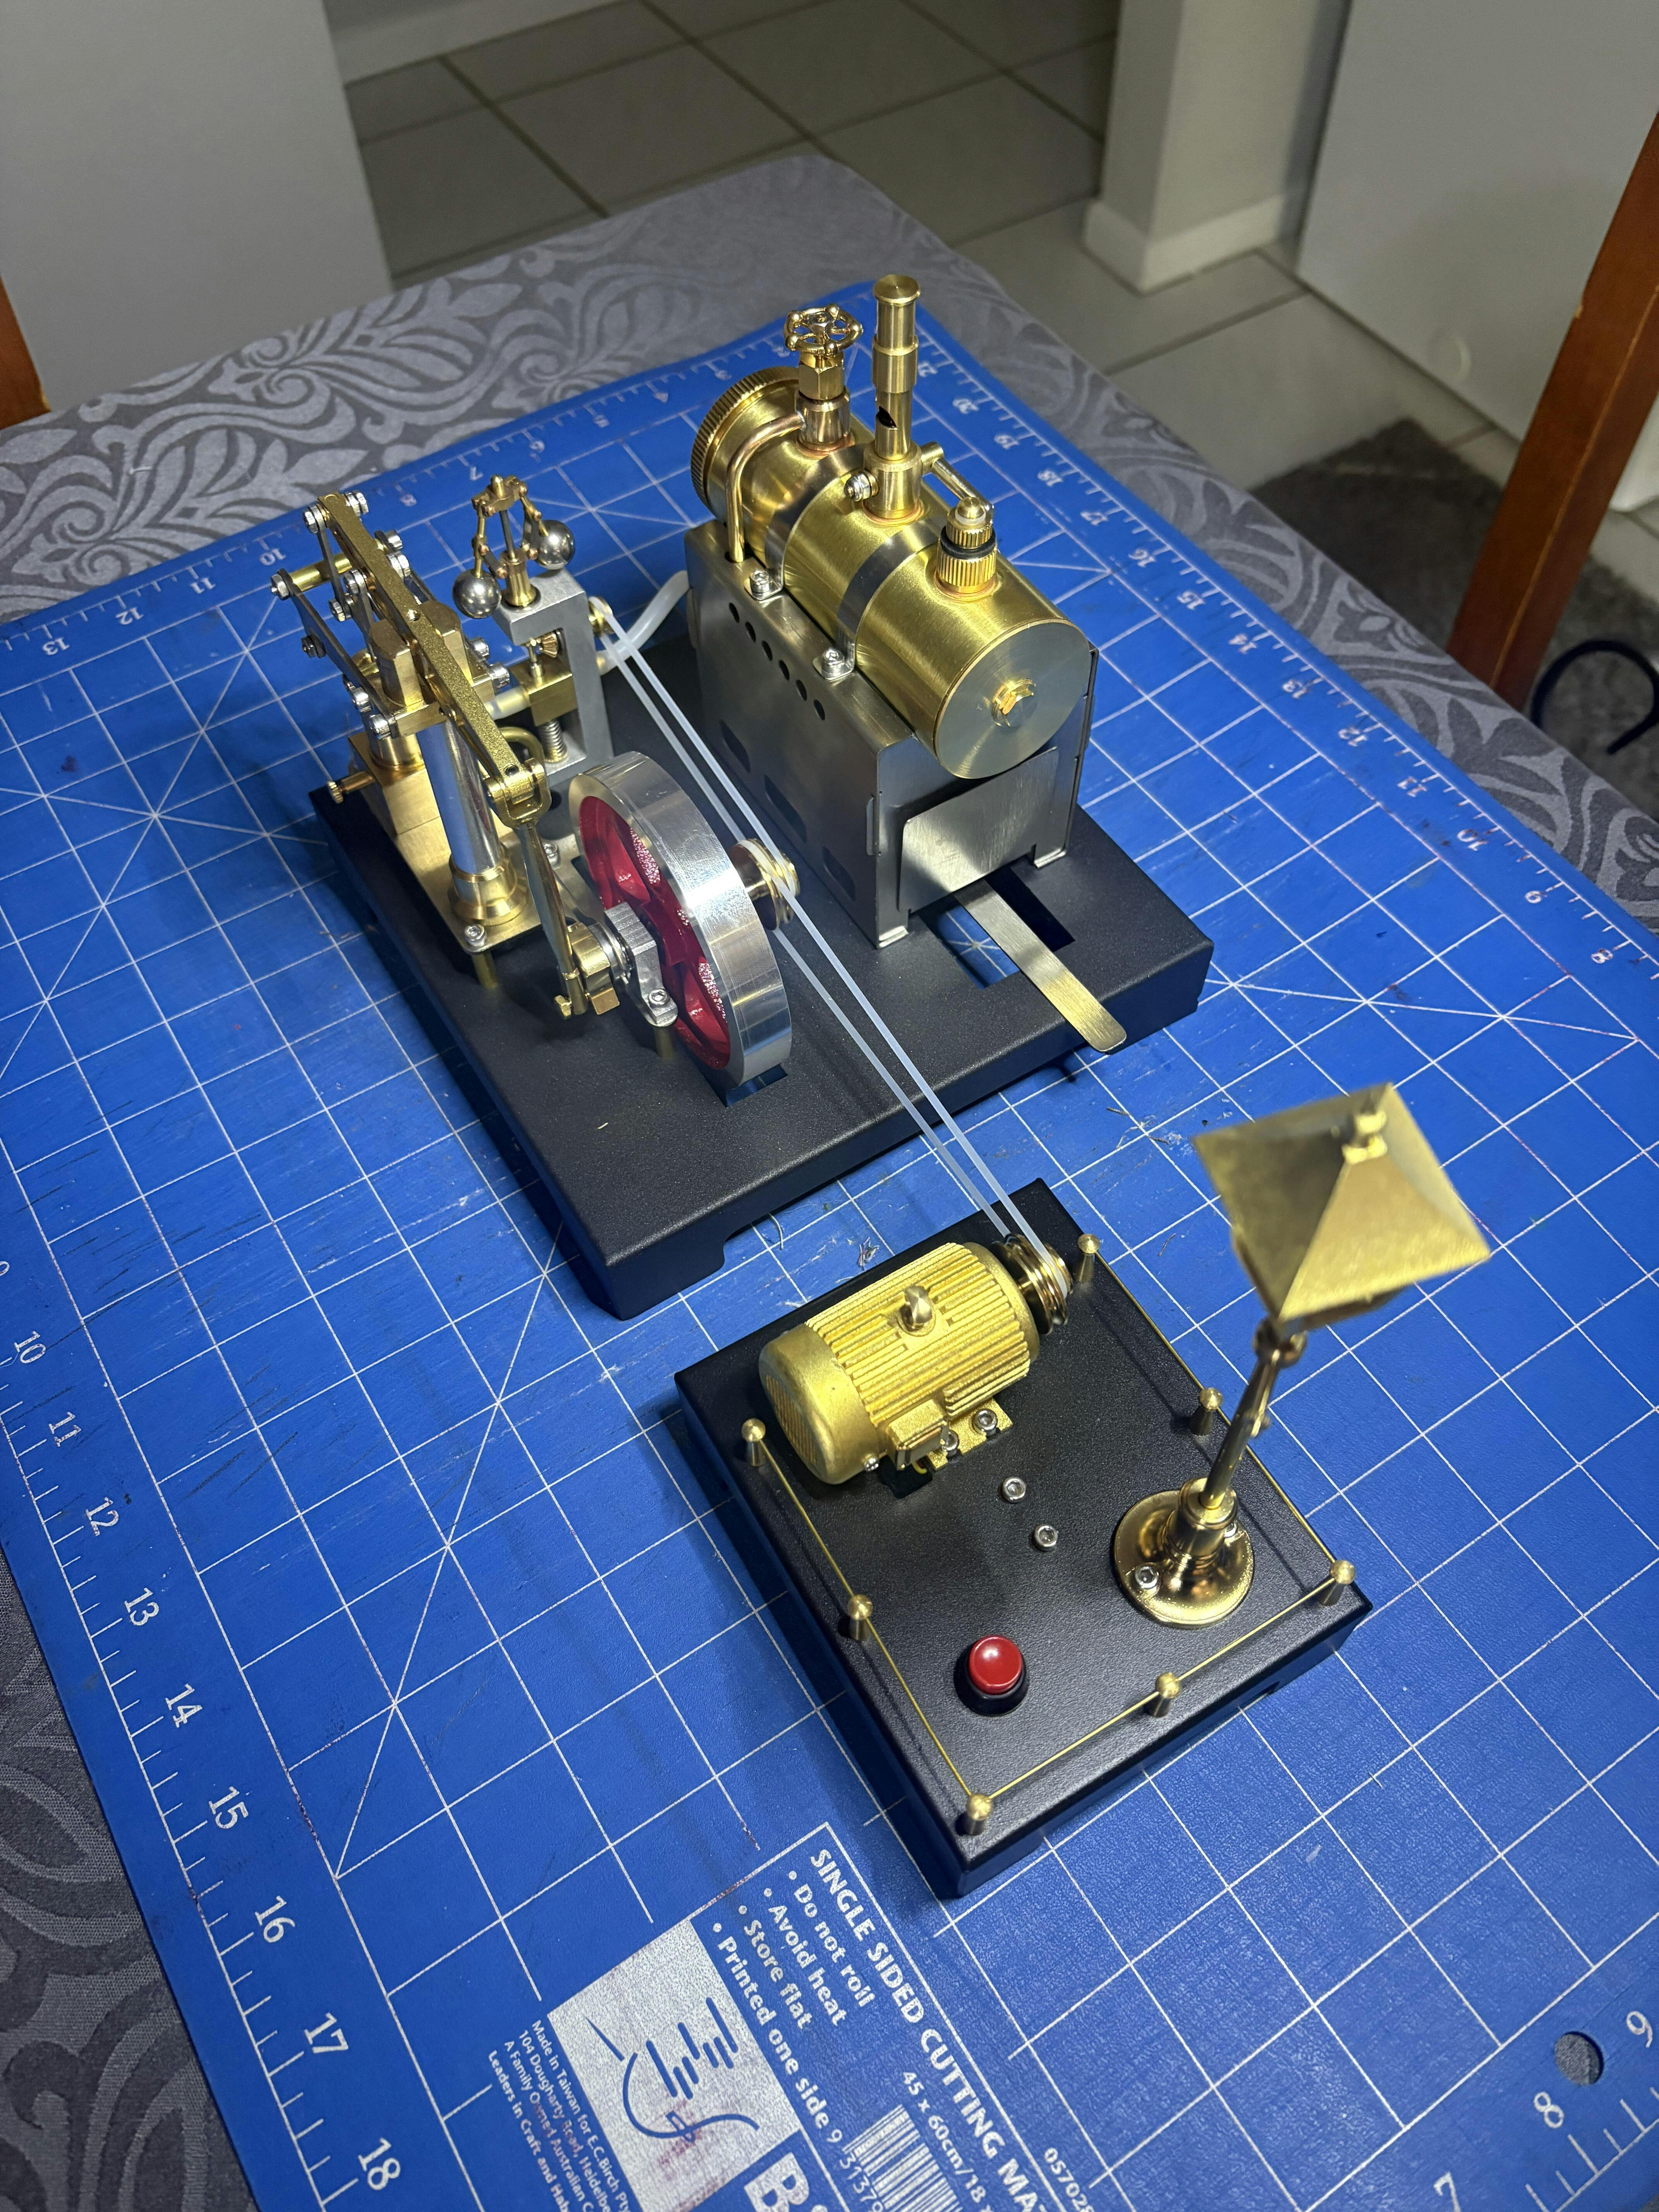
Simplicity and elegance. The sound and the steam puffing out of the chimney. I added a backpacking burner to replace the alcohol burner giving much more control over the flame. Now it is near perfect.
Thanks for a great engine.
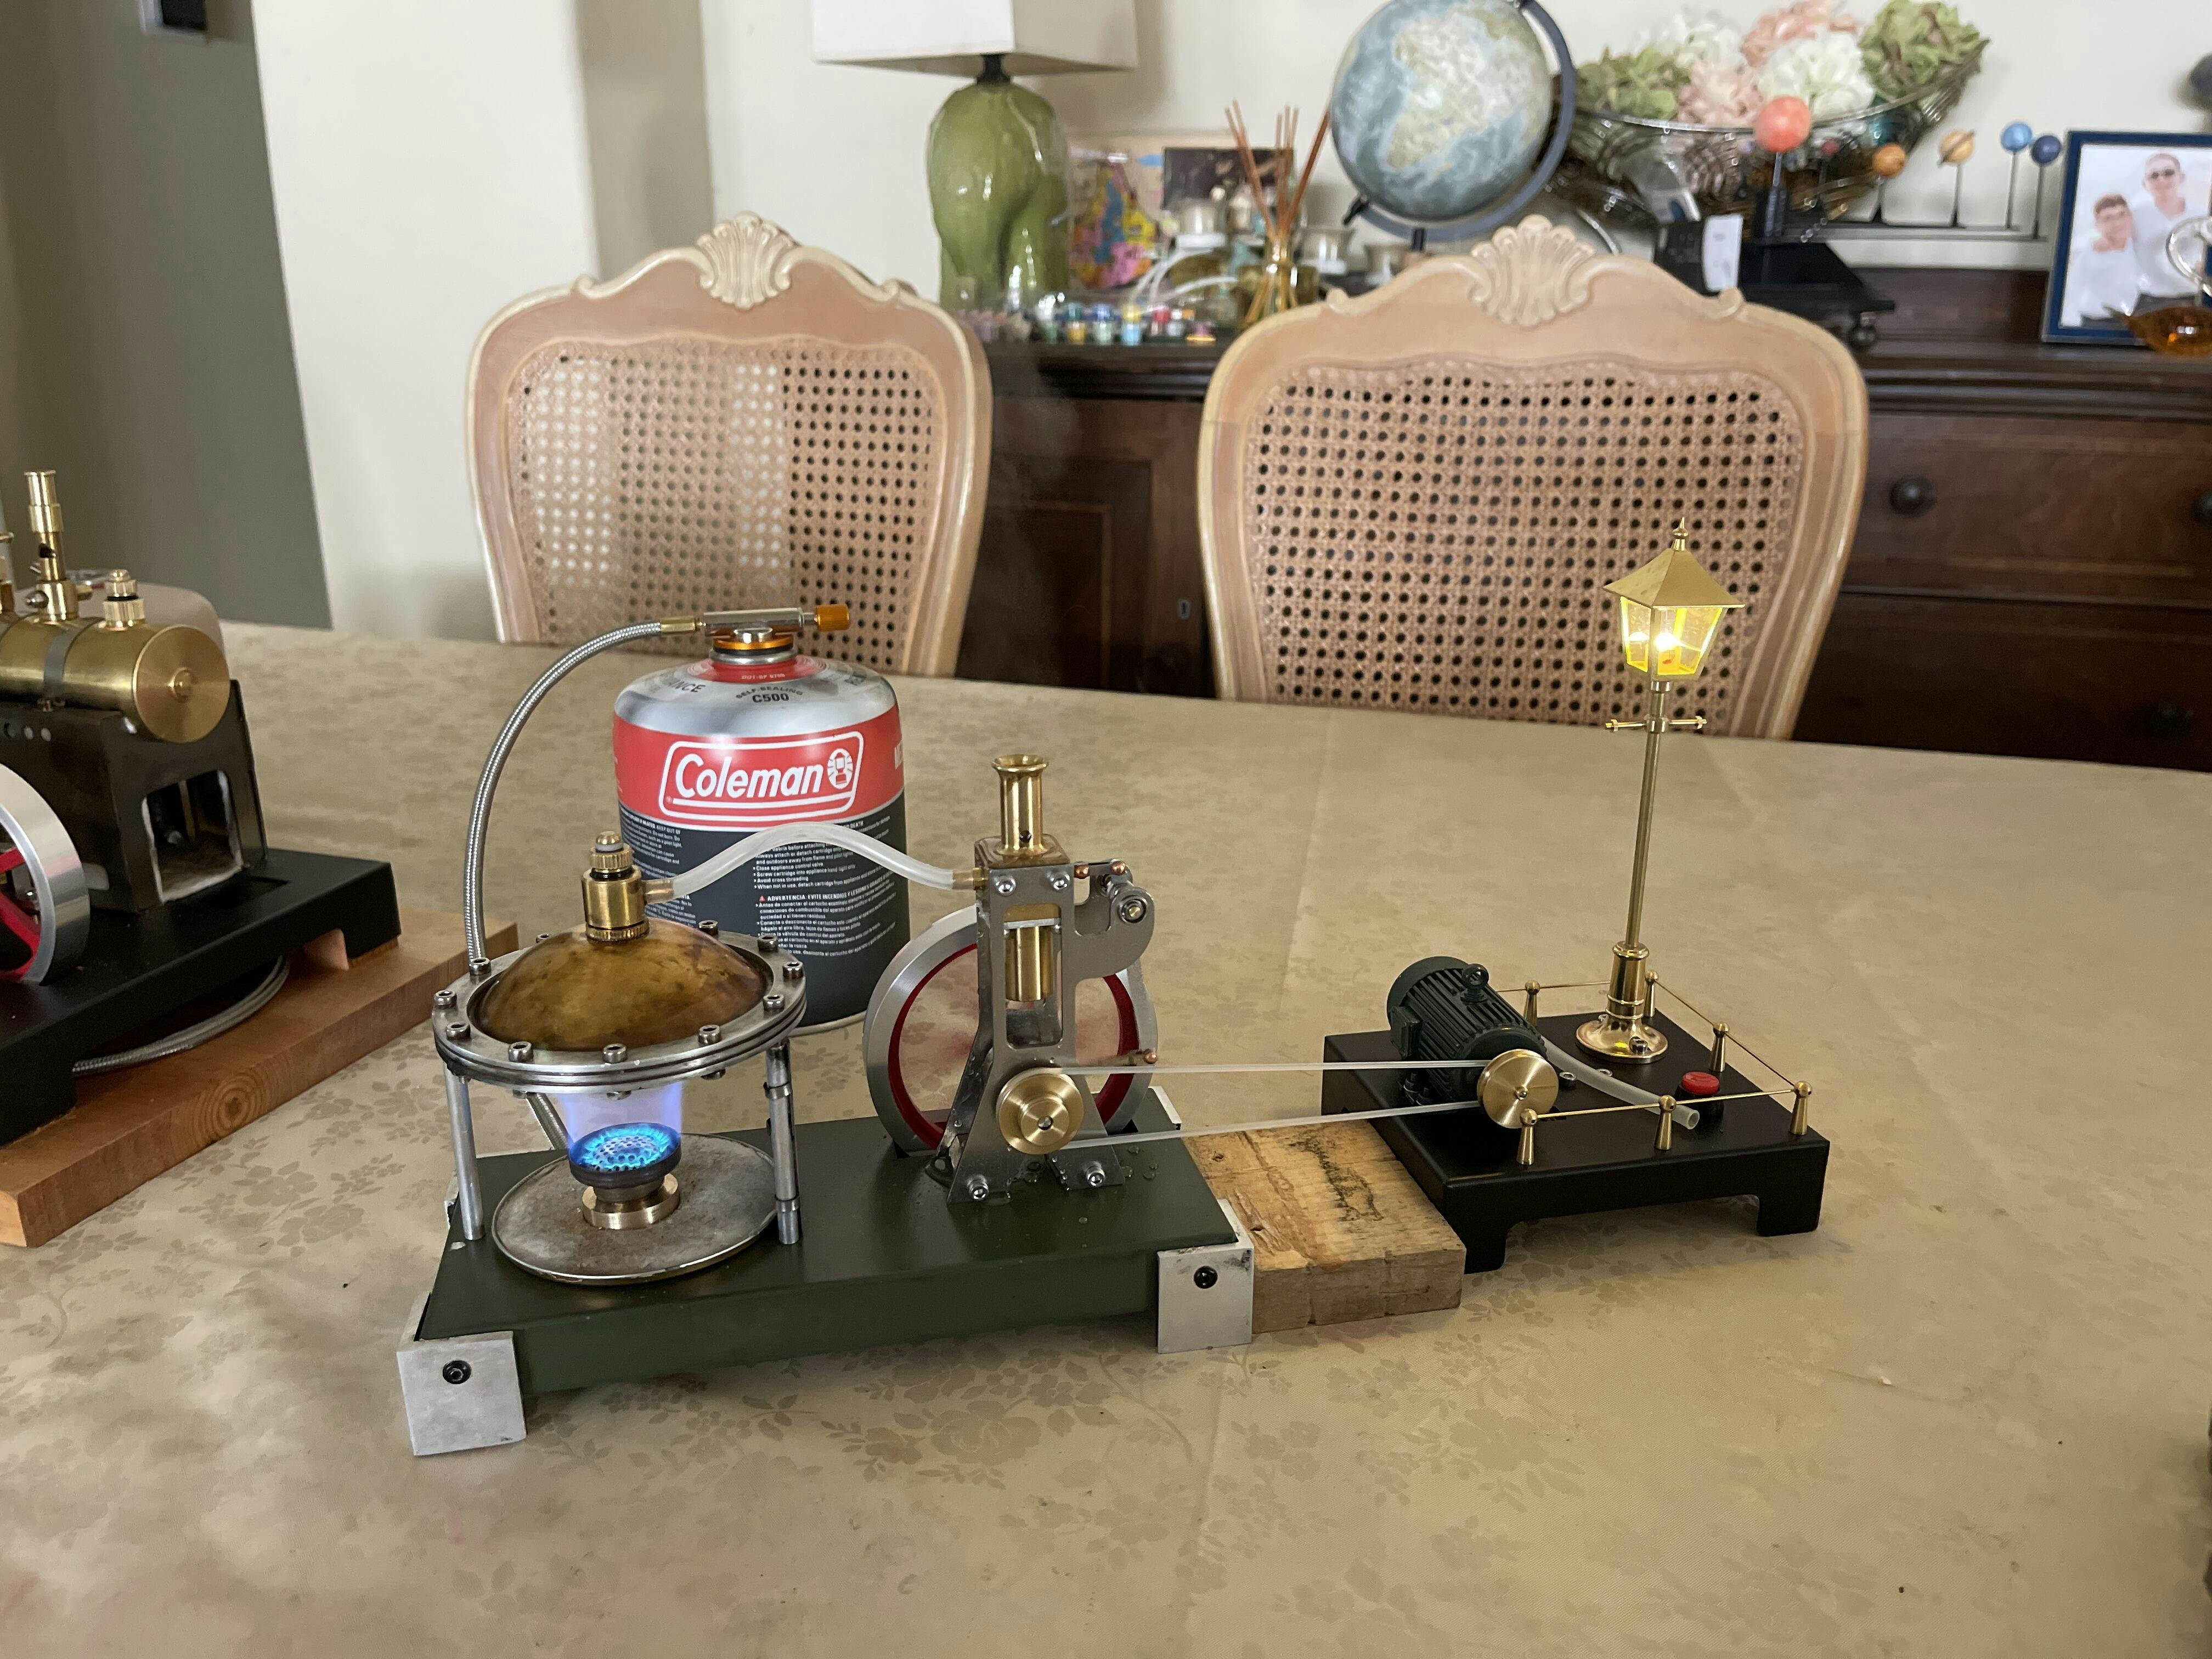

Had a great time assembling the beam steam engine kit and really enjoy having it in operation. I also purchased the generator scene and is a great addition to the engine. Can’t wait to order and get my next kit.

Please check out my review on Model Ship World
https://modelshipworld.com/topic/38253-118-ws-15-turbofan-engine-skymech-via-enginediy-build-review/


I am pleased to see that you have taken the time to look for customer imput. I am taking my time to complete the engine and have enjoyed the experience, so far. My biggest negative, and I know that you have heard this before, are the instructions. I think a lot of people would attempt building the engine with better information available. I know with my engineering experience I will overcome any issues that may arise. My only other negative is a missing threaded rod for the oil filter. The rating I would give it is a 4 1/2 but it was not available.

Overall this is a nice kit. Very high tech looking parts that for the most part fit together well. But there are 2 black plastic pieces that you need to install that is nessisary for everything to turn & rotate, they are not to be found in the instructions. If the instructions were better I would have rated it higher.


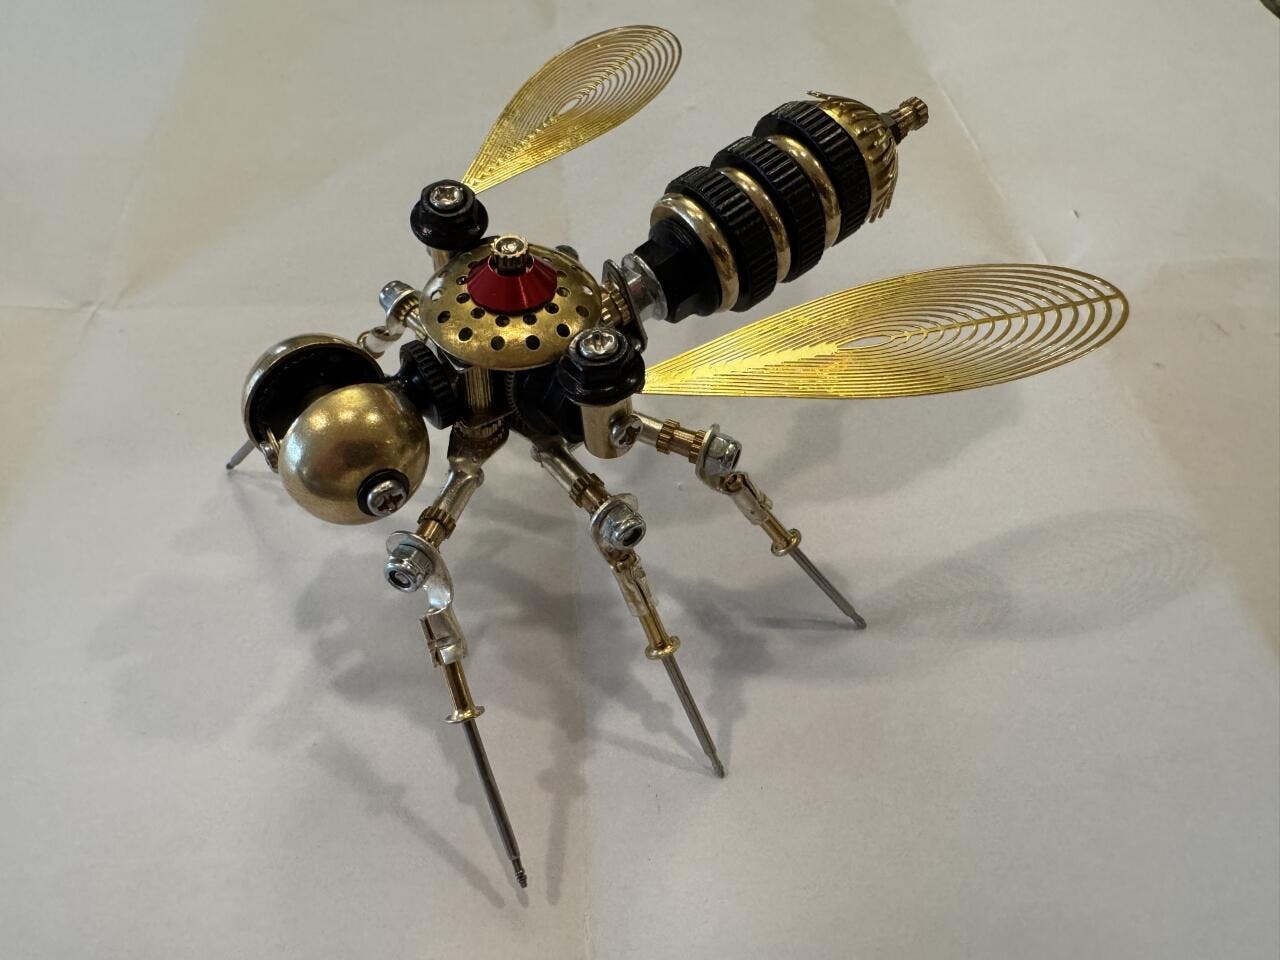
The actual kit is slightly different from the picture; the legs are different and mine came with a red-colored cap for the bee's back instead of gold. Compare my picture to the one in the listing. My kit was also missing the two screws that connect the "abdomen" to the "thorax". I was able to bend some nails to do the job, but those were pretty important pieces. Otherwise it was a fun kit, took about two hours to assemble for my first time doing a mechanical kit like this.
The kit comes with two very low-quality tools: a screwdriver and pliers. The pliers shattered in my hands as I was clamping one of the legs; the resulting blood blister is still healing as I write this. The screwdriver was ok but I wish they would not include wasteful throwaway tools. Use your own tools for this.

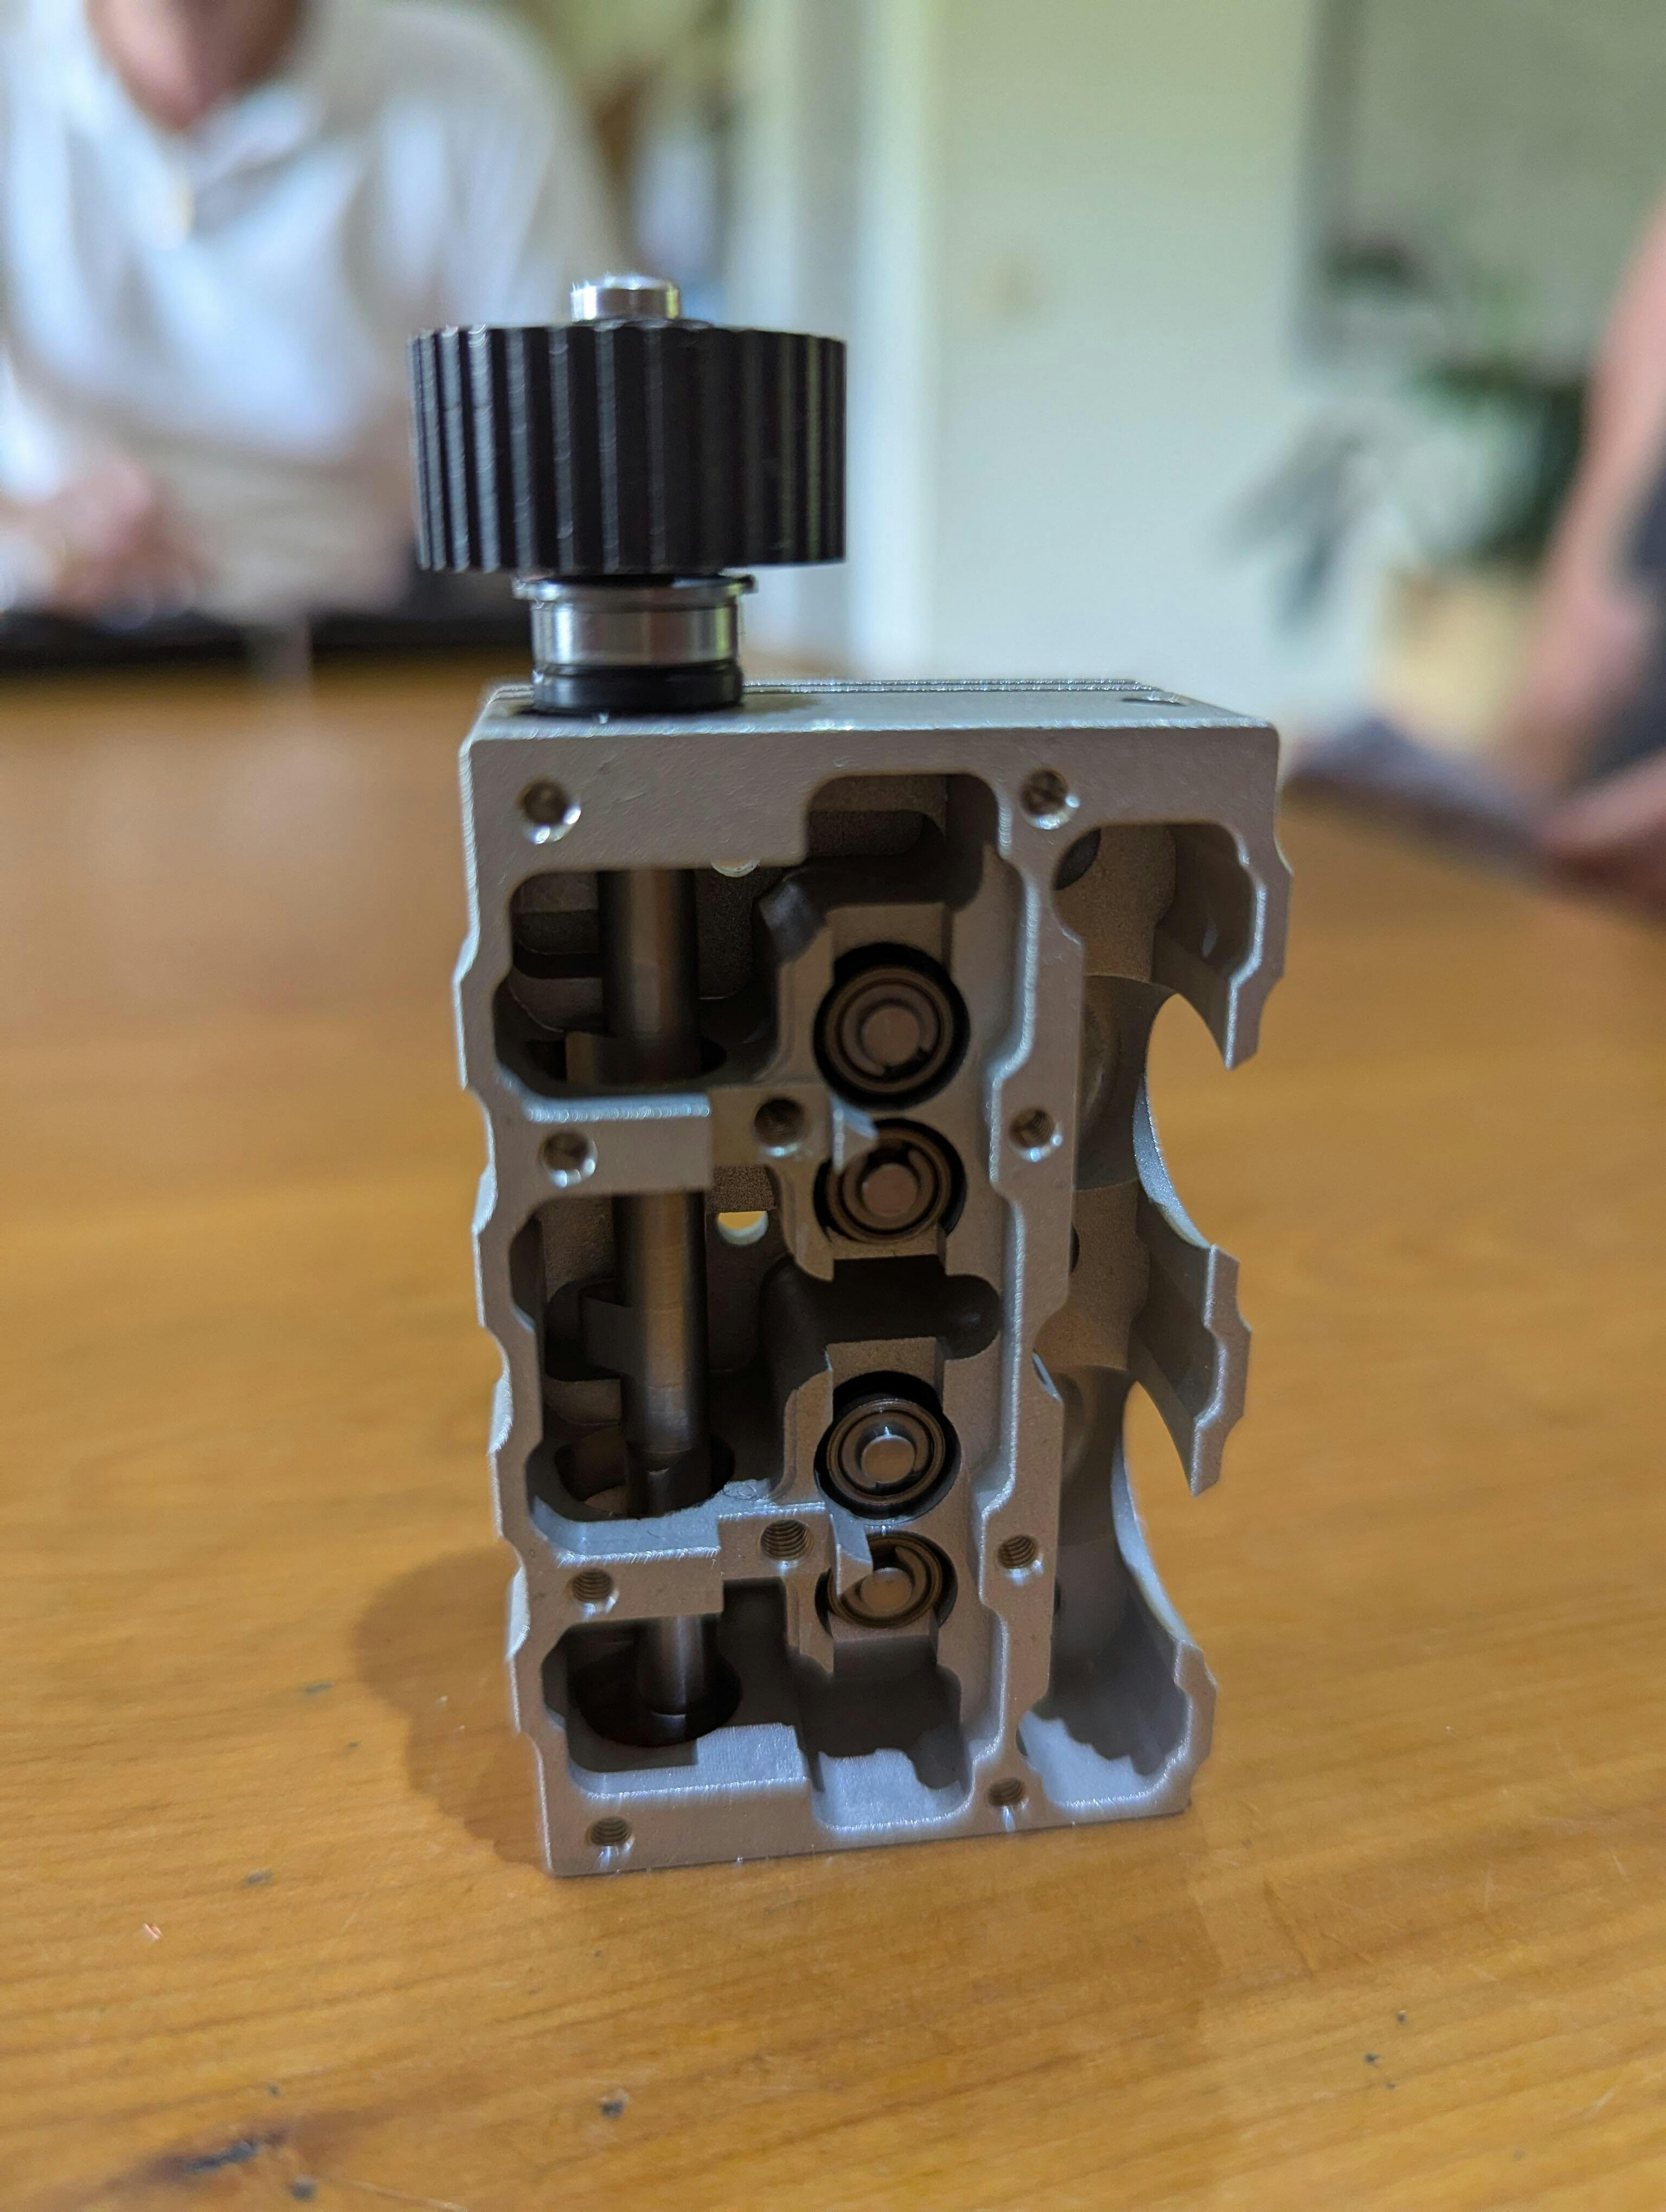
I bought one of these when they first came out a few years ago. I assembled it and ran it for a few minutes before it overheated. The cylinder head gasket and water pump functioned very poorly so I put the engine aside for over a year. Then I realized it was actually easy to make a head gasket. Starting with the head gasket I carried out a series of upgrades which are described below.
Cylinder head gasket:
I made the new gasket from 0.2 mm copper sheet. To do this I used the cylinder head as a drill guide: I started by putting the copper sheet on a wood block, then put the head on top, and drilled two holes through the head bolt holes through the sheet into the wood. I put the head screws in place which kept everything in alignment. I finished drilling all the head screw holes first (and put all the screws in place). Then I drilled through the pushrod holes to establish their locations. After removing the head, I carefully drilled out the pushrod holes to the same size as those in the original gasket. Then I put the partly finished head gasket on the block and traced the cylinder openings on the gasket with a marker pen from the bottom of the block. I drilled medium holes in the cylinder locations to avoid excessive distortion of the gasket. Then I put the gasket in a smooth jaw vice and filed the cylinder holes to size. I made sure a piston would pass through each hole with the gasket installed on the block which required some final adjustments. I drilled the water hole for the head and locating pin holes last. The original gasket had a slot for the water transfer passage, but it is only necessary to drill a hole in the gasket aligned with the hole in the head since there is a slot in the block. The last step was annealing the gasket by heating it red hot with a torch and allowing it to air cool. The gasket worked perfectly...
I also made an aluminum gasket. I did not use it yet, but it should work without annealing. I might try it later as an experiment.
Water pump:
As I explained earlier, the water pump on the L210 6 engine is worthless in my experience. I gutted the pump then I threaded a water fitting in the hole where the shaft was, and plugged the original water inlet with a screw. The pump now serves as the water outlet.
Install a generator:
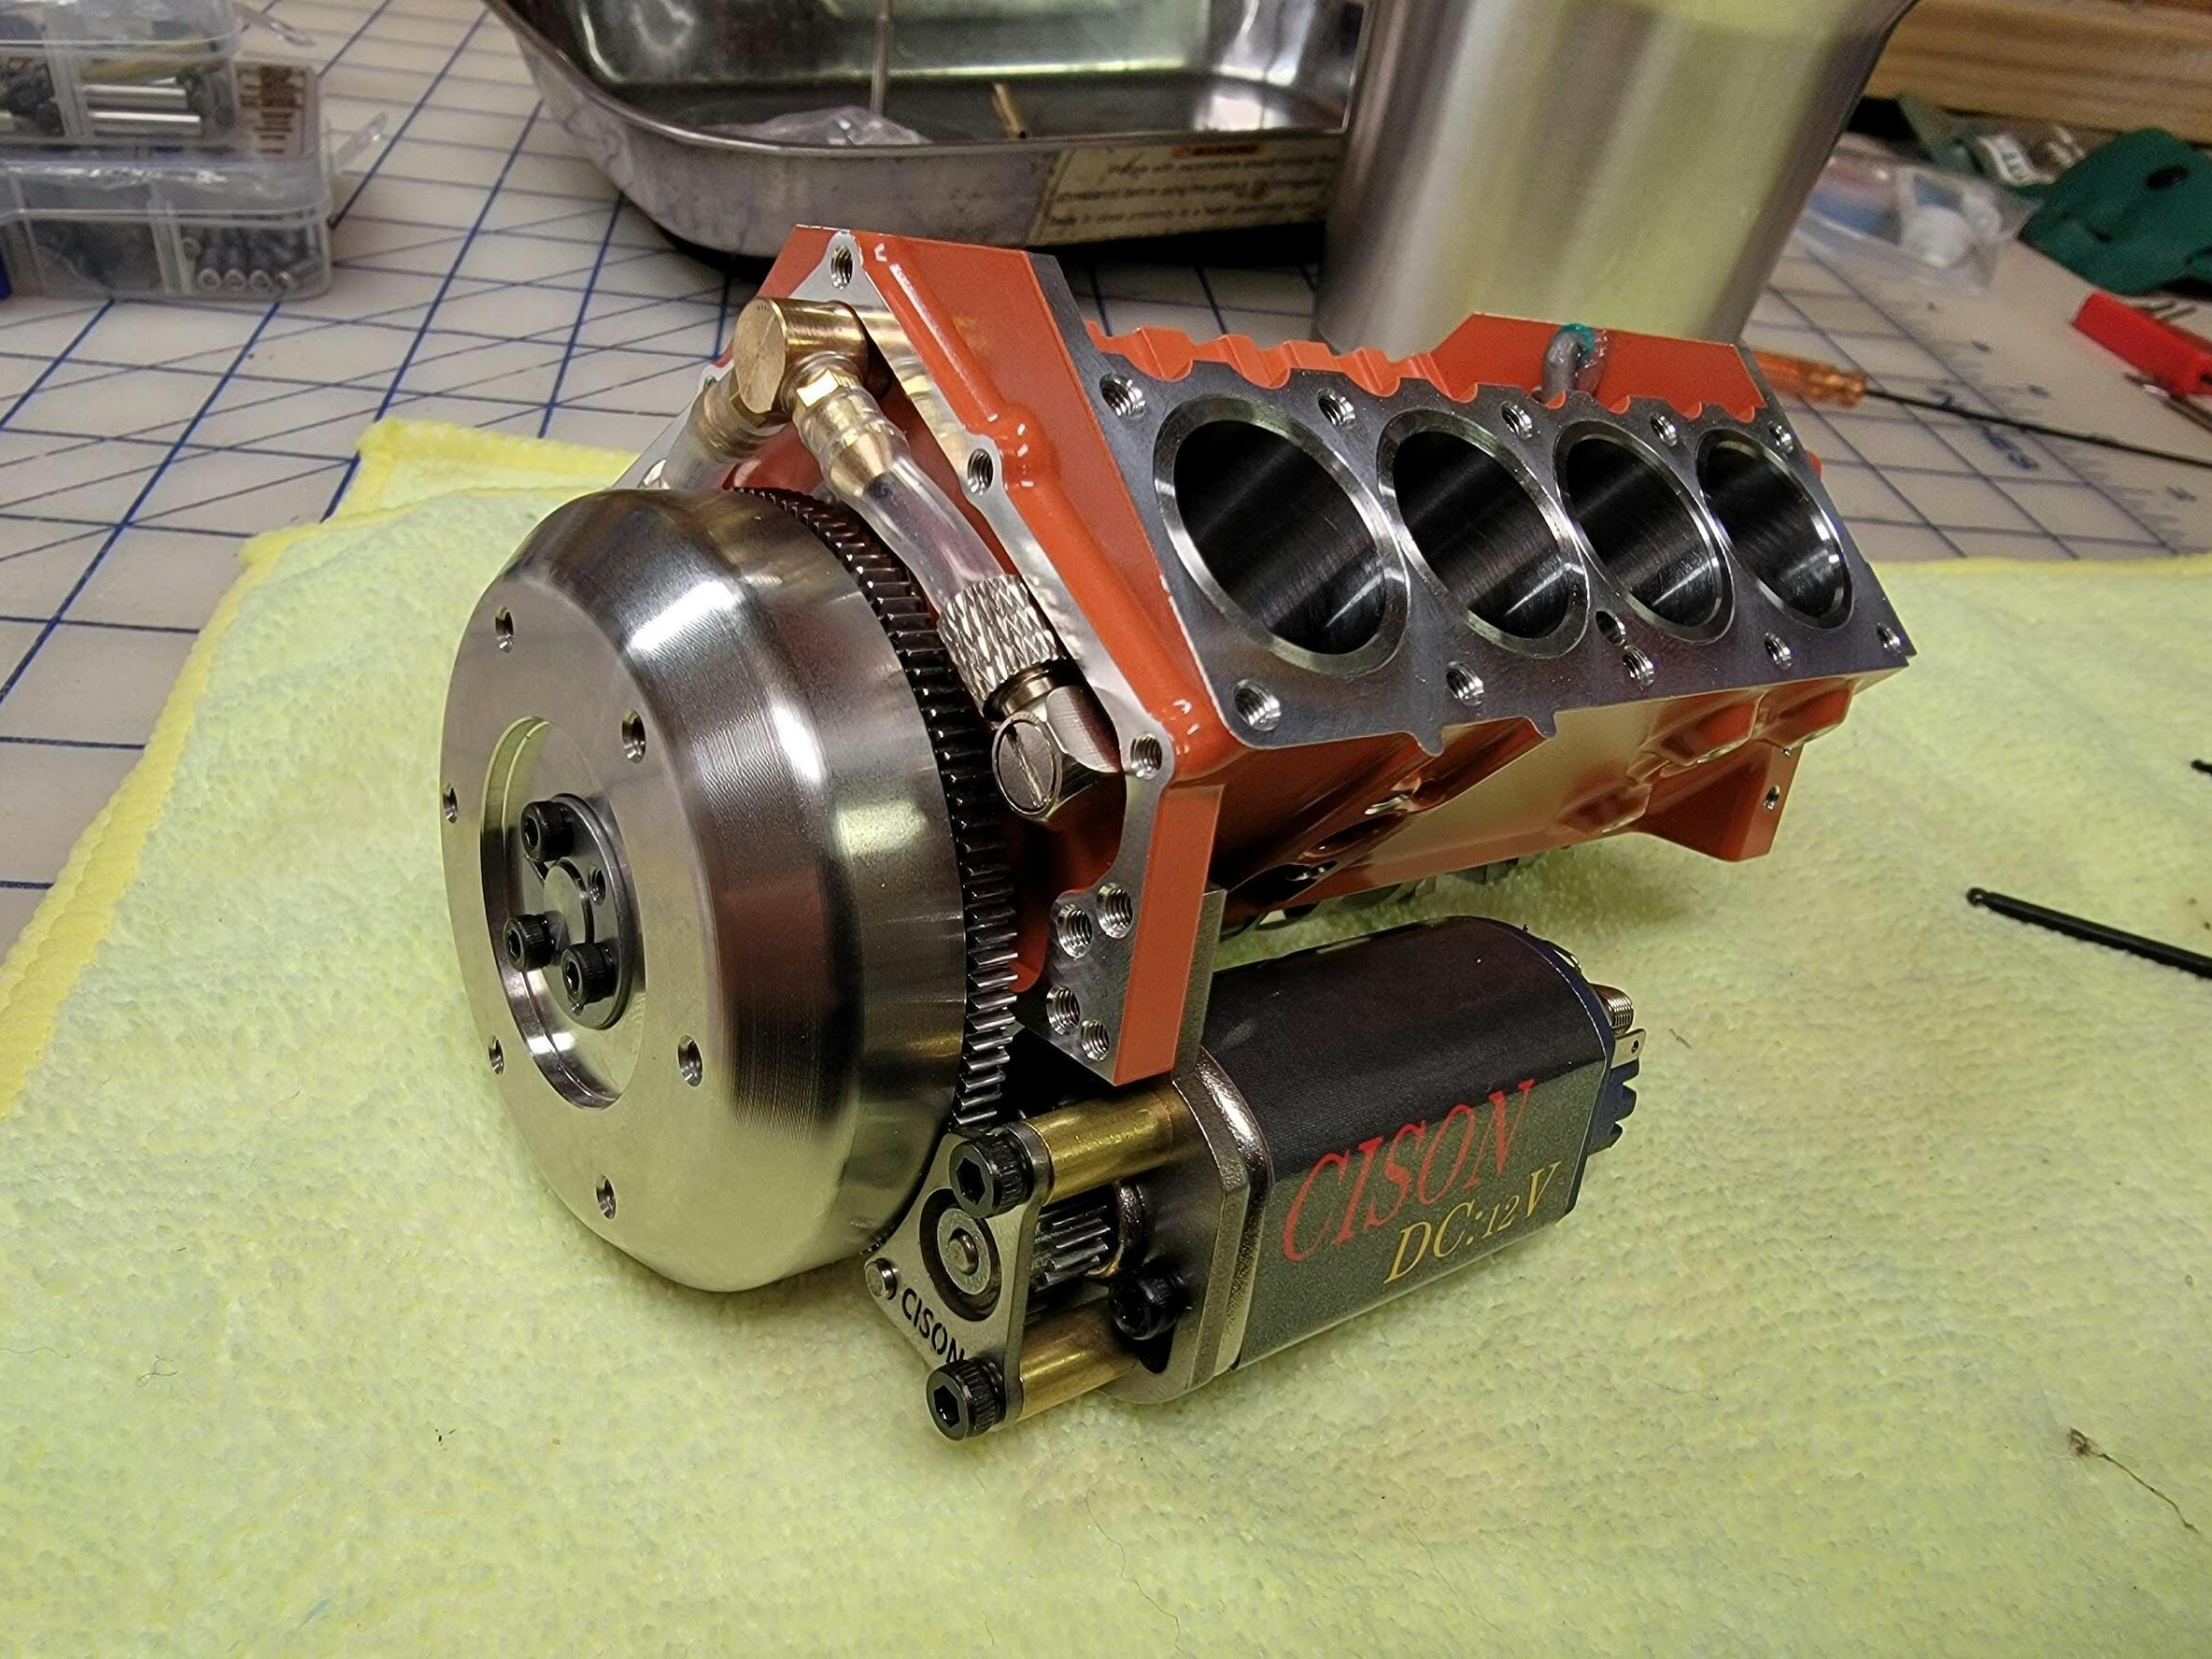
I installed a Cison V8 generator as shown in the picture (it is attached to the oil pump support brackets). I prefer the V8 generator to the 4-cylinder generator because the small diameter pulley on the V8 generator shaft makes the generator spin faster which increases its output. I also liked the option of the internal diode board.
The generator is run using a 158 mm long toothed belt (found in a bag of various belts on Amazon). I also bought a 12-volt water pump and fan from Amazon and installed them using an adjustable voltage regulator set to 12 volts (also from Amazon). I installed another voltage regulator set to about 8.5 volts for the CD ignition that is also run off the generator. To start the engine, 12 volts from the starter relay is sent to the ignition voltage regulator through a diode. The diode prevents back voltage from the generator going to the starter motor once the engine is running (at normal operating speeds the generator supplies all the electrical power needed). The voltage regulators are needed since the generator can produce more than 15 volts.
Ignition wires:
The ignition wires are quite ugly. To fix this, I shortened the wire terminals at the distributor and custom cut each wire to length. At the distributor I carefully removed the two layers of black tubing from each wire down to the metal terminals using a hobby knife. I was careful not to damage the red wire insulation. I then put shrink tubing over each wire including the terminals; bent the wires (and shrink wrap) at 90 degrees, and set the tubing with a heat gun.
Radiator:
With the distributor wires under control, I upsized the radiator from a 40mm x 40mm unit to a 60mm x 60mm unit. Originally, I put the small radiator next to the distributor wires, but I was able to install the bigger radiator in front of the distributor after the distributor modifications.
I made a reservoir tank out of ¾ inch copper pipe and fittings. To close off the reservoir I bought a cap and threaded neck intended to restore antique oil lamps from eBay. The picture shows how this was done. The reservoir extends above the radiator which ensures that the radiator and engine are always completely full of water.
Result:
The engine runs well without the battery once started. There are no oil or water leaks but still a slight tendency towards overheating when run at high speed. A bigger radiator should cure this. Overall, the result is satisfactory so it is too bad these are being discontinued, maybe they will be replaced with a better version. In any case, I bought another which I will build and modify like this one.


Easy to install. After installing, it looks like the oil is moving faster through the oil line. In addition, I noticed the bubbles in the oil line have disappeared, I am not sure if it was the gears or just better sealing during the gear change. Overall, I think these are well worth the cost and I do recommend them.


The service from this company was outstanding. I placed my order and emailed regarding an update I wanted. I got an immediate respond and they completely satisfied by request. The product is as advertised and of very high quality. They also used the discounts that are available from their Facebook and website. Highly recommended


This was my first engine model and it was a real pleasure to put together. Some of the screws were a bit tricky but nothing some masking tape and tweezers couldn't handle. Really happy with the results. It sits proudly on my book shelf behind me, displayed on all my work calls. It took an evening but I imagine some more experienced folks would make better time. I had no real complaints. Some of the pieces will have small areas where the paint is missing due to the printed strata. The instructions were only slightly confusing in a few places. Overall, a real winner. I look forward to putting some of the other engines together!


Nice looking product , easy assembly

The engine arrived and I was SO EXCITED to give it to my grandson today for his birthday.
We got it partly assembled but could go no further. Part 34 and Part 27 X 2 will NOT go into Part 55, the cylinder cap. My son-in-law measured the hole and said it is too small by a half ml. It's very close and we know that it's meant to be a tight fit but it's physically impossible to insert it.
I am very disappointed and I hope you can help us by fixing the situation. I have attached pictures for your information.


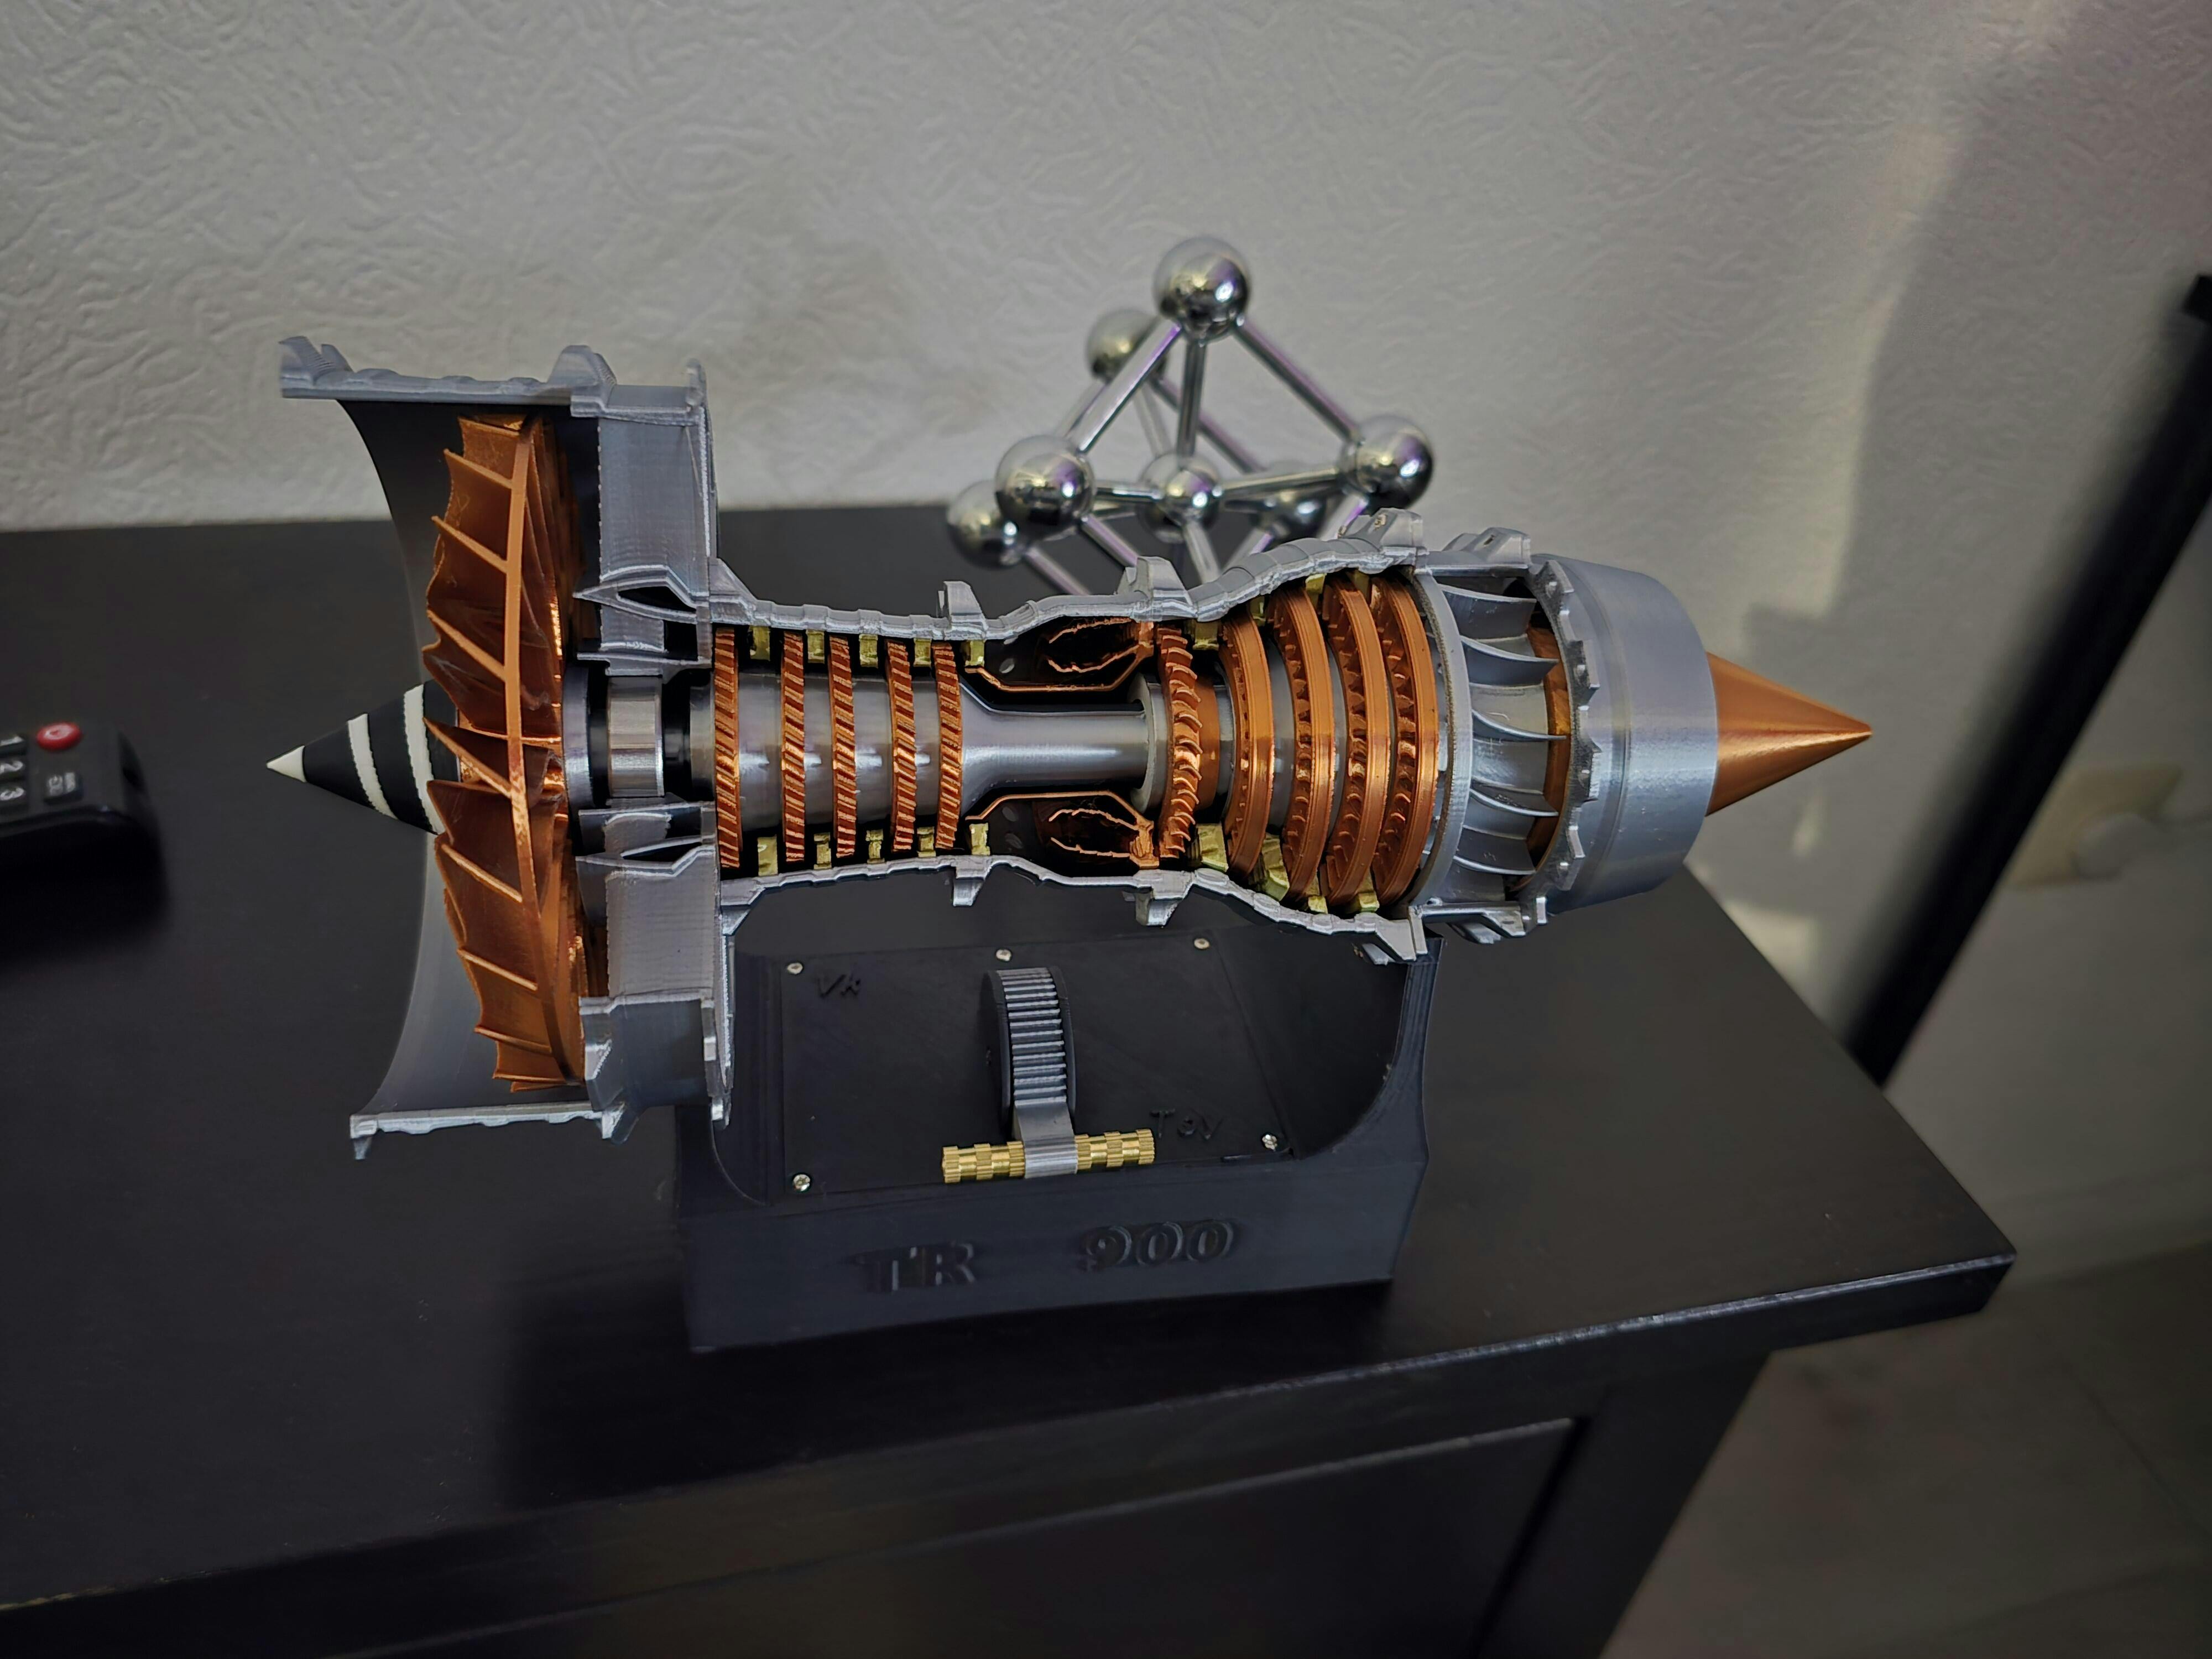
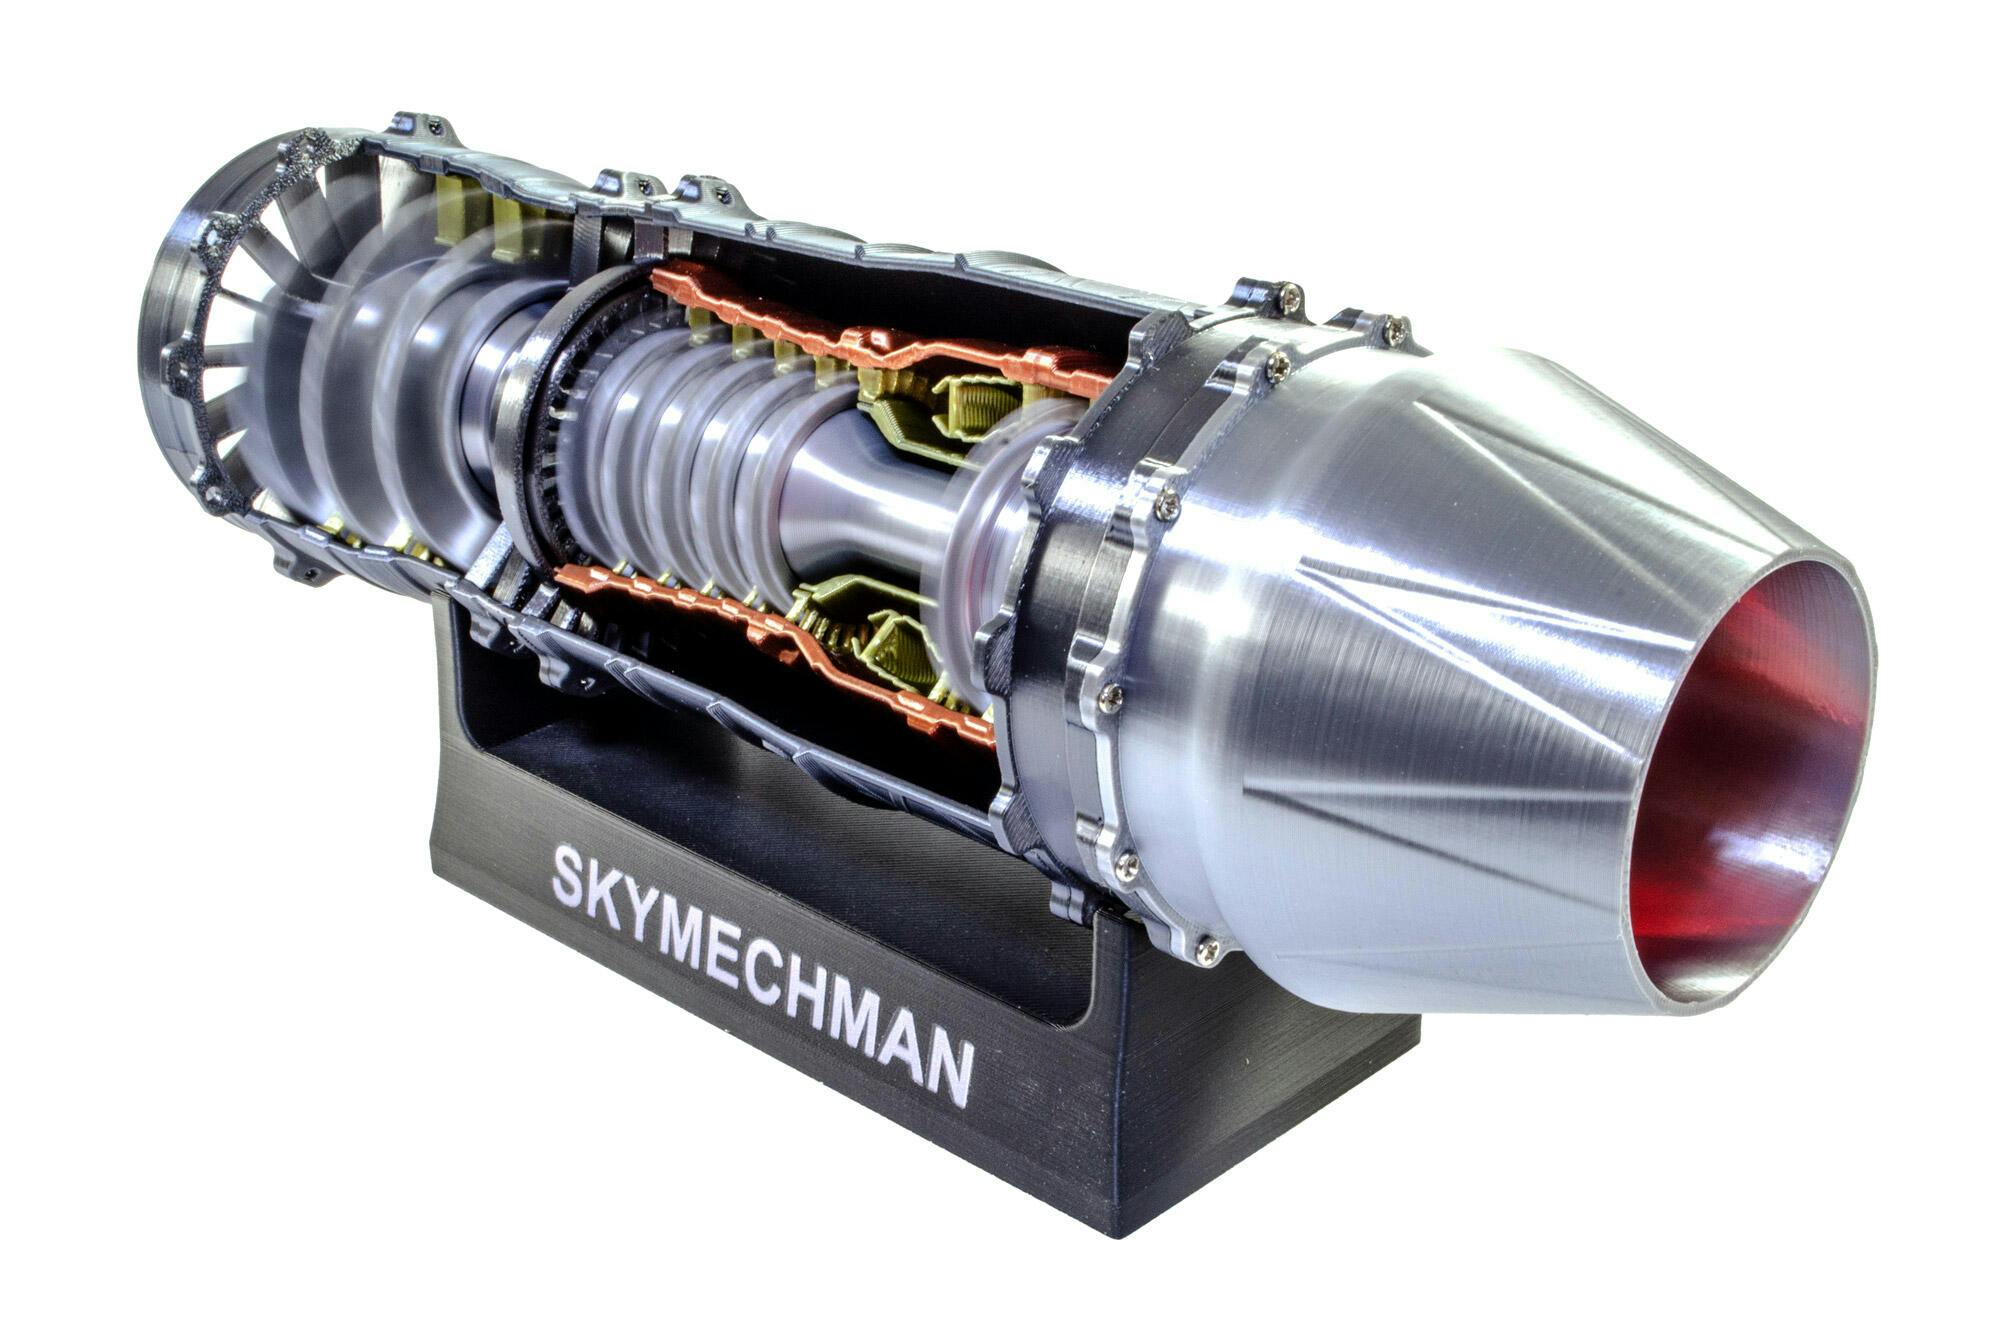
This is a very realistic working turbine model. It can very easily be modified to insert a strip of blue LED "burners," and if you are daring enough to bolt the model down, it will run on butane fuel.

The turbine is very detailed and looks perfect, great price/performance